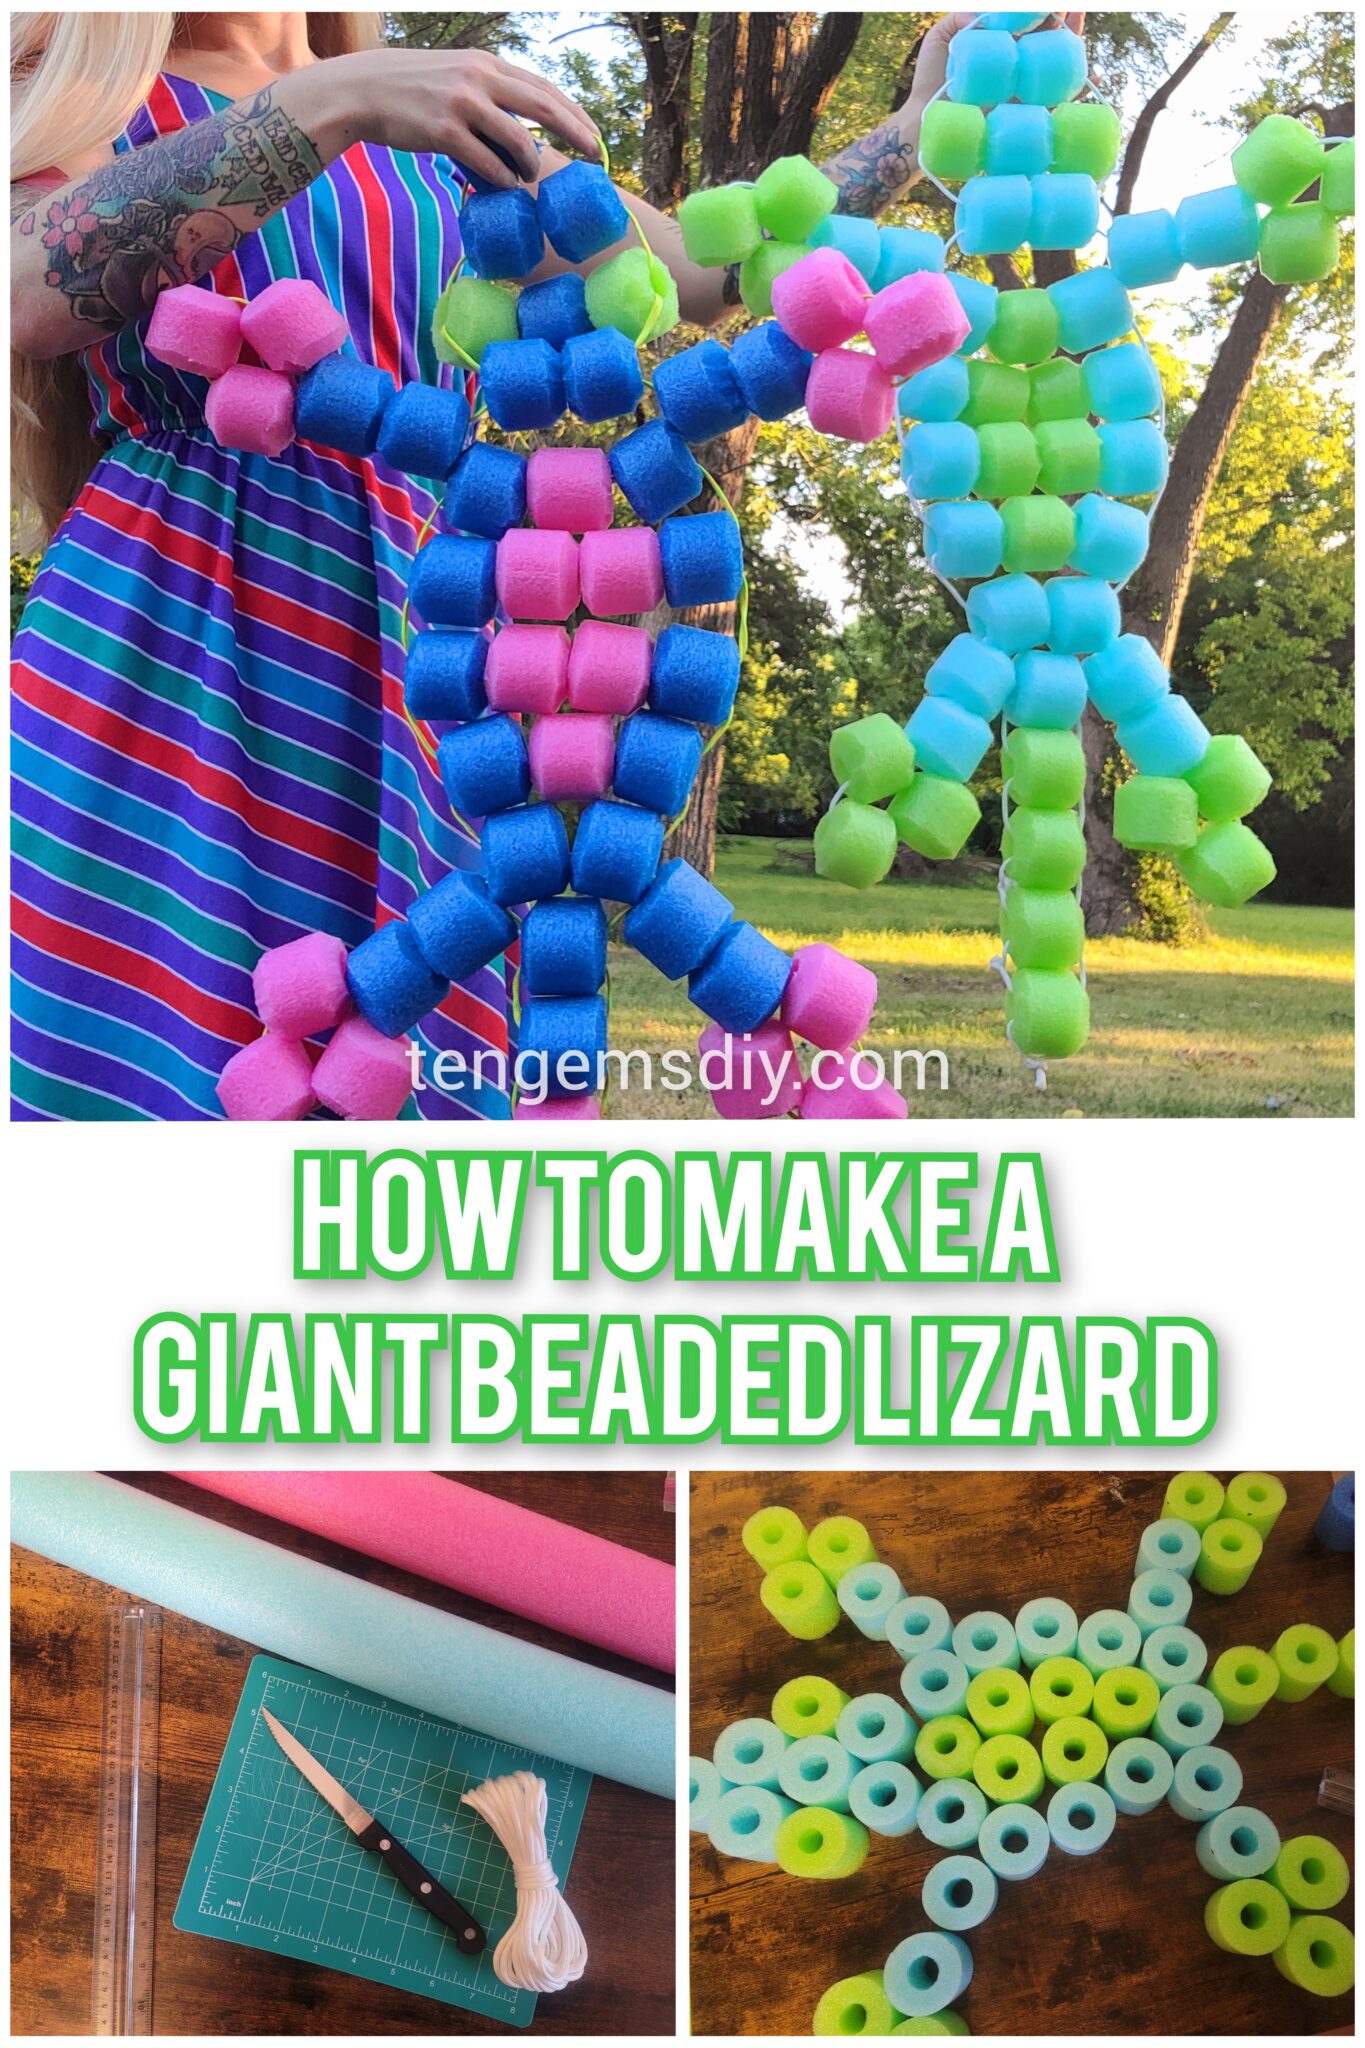
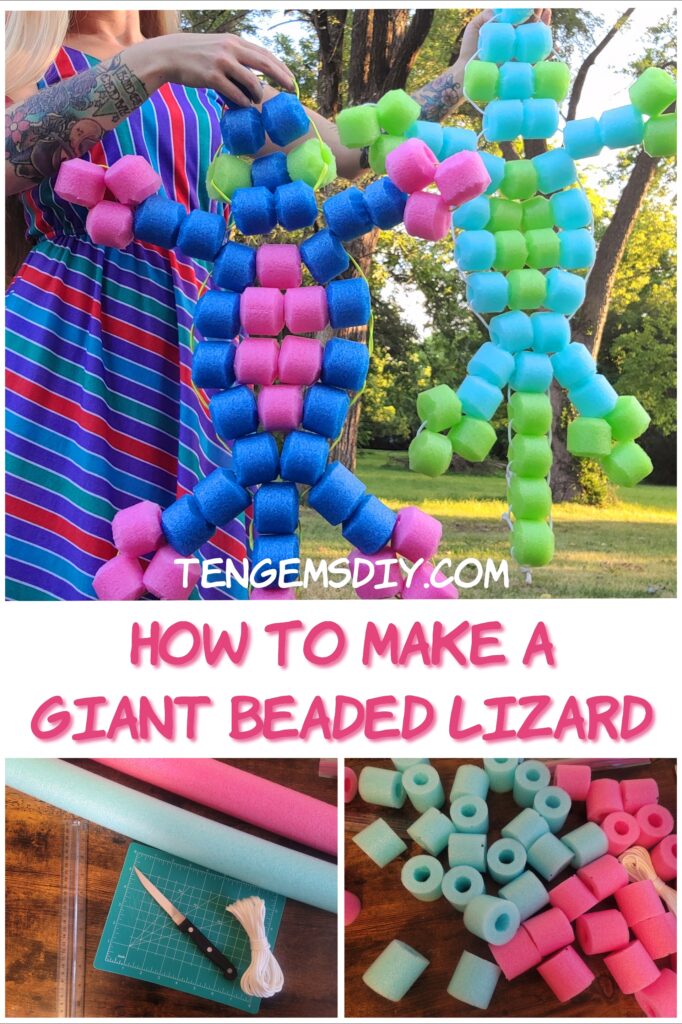
Bring back a classic childhood craft with this nostalgic tutorial for How to Make A Giant Beaded Lizard! These lizards are huge and are one of the easiest pool noodle crafts out there! They can be any colors you choose. Make them as a gift, make them with someone you love, or just make one because you think they’re cute. They’re easy to make, you just need a few things before you get started.
TengemsDIY is a DIY and craft blog. Some of our posts contain affiliate links for products we have tried and recommend. While clicking the links will not cost any money, we may receive a commission for items purchased, which helps keep our website up and running. Here is the privacy policy for more information: https://tengemsdiy.com/?page_id=3
After you’re finished with this tutorial over How to Make A Giant Beaded Lizard, take a peek at some of these other sweet DIY’s:
How to make DIY Glitter and Canvas Wall Art – https://tengemsdiy.com/how-to-make-diy-canvas-and-glitter-wall-art
How To Make Shrinky Dink Handprint Keychains – https://tengemsdiy.com/how-to-make-shrinky-dink-handprint-keychains/
How to Preserve Flowers In Oil – https://tengemsdiy.com/how-to-preserve-flowers-in-oil/
Supplies you’ll need to make your giant beaded lizard, and where to easily find them all:
• 2 or 3 pool noodles – https://amzn.to/3VsY7xA
• Thick cord, 25 feet – https://amzn.to/4b7GSrq
• Cutting mat – https://amzn.to/4baJCEp
• Ruler – https://amzn.to/4cvsxpL
• Serrated knife
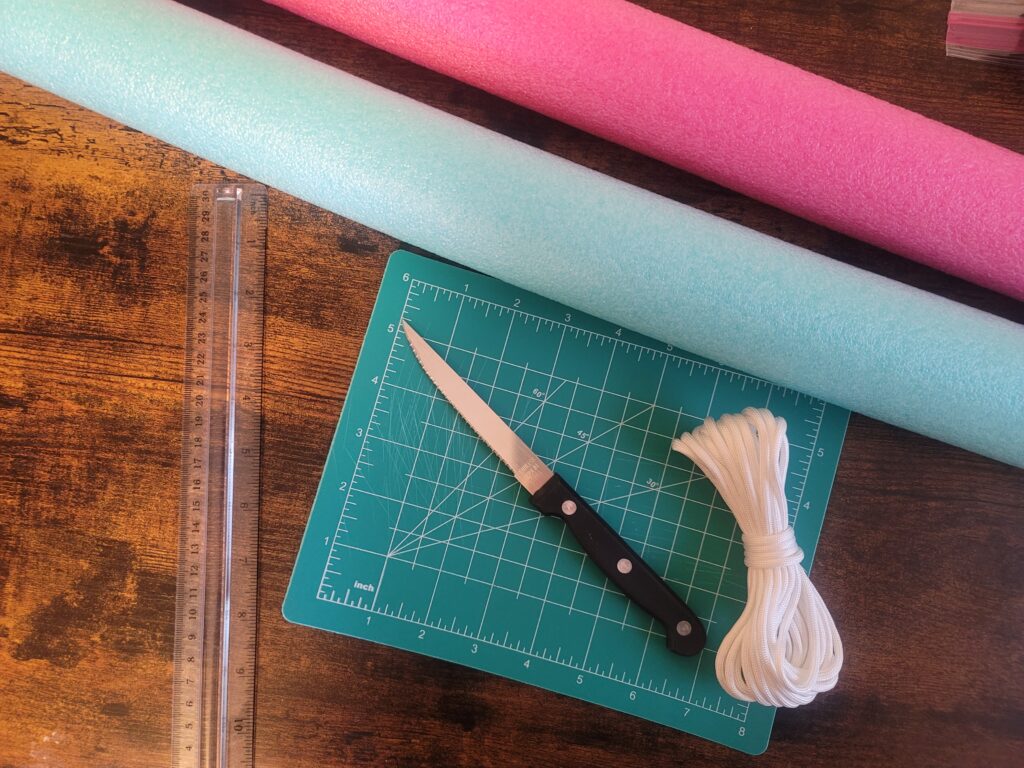
Step one: Gather all the supplies to make your giant beaded lizard
The first step in this tutorial is gathering all of the proper supplies. You can find handy links to all the supplies above in the supply list! First decide what color you’d like your lizard to be. Whichever colors you choose, your lizard is sure to be totally cool! Find the pool noodles in your favorite colors at the store, or at the above link.
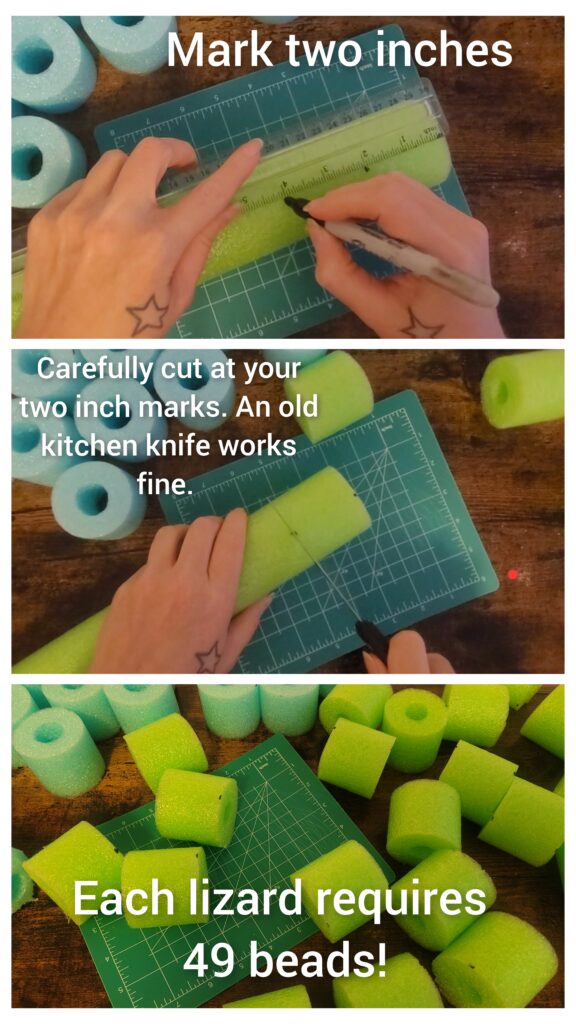
Step two: Preparing the pool noodles
Of all the easy pool noodle crafts, this is our absolute favorite. Use your ruler and a permanent marker to make two inch marks on your pool noodles. This will be your guide when you are cutting later. Each lizard uses 49 beads.
Step three: Cutting the “beads” for your giant beaded lizard
Now that you have marked where you will cut your beads, using a serrated knife, carefully cut the pool noodle at each of your two inch marks. Remember, each lizard will need 49 beads. The belly, toes and eyes use 20 beads, while the body and tail use 29 beads.
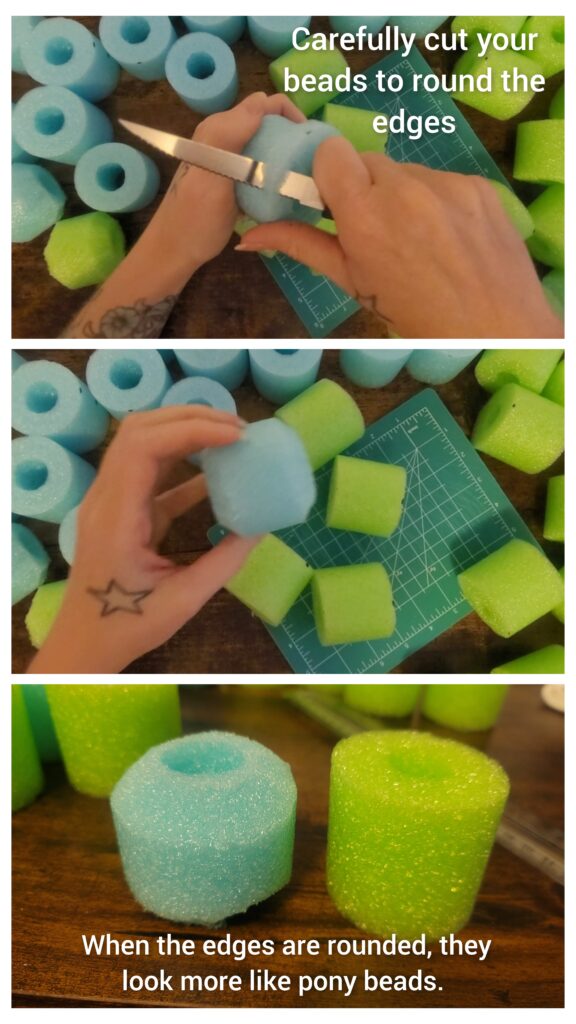
The next part of this step is rounding your beads so they look more like proper pony beads. This is done by carefully cutting the corner off of your bead, as shown in the photo below.
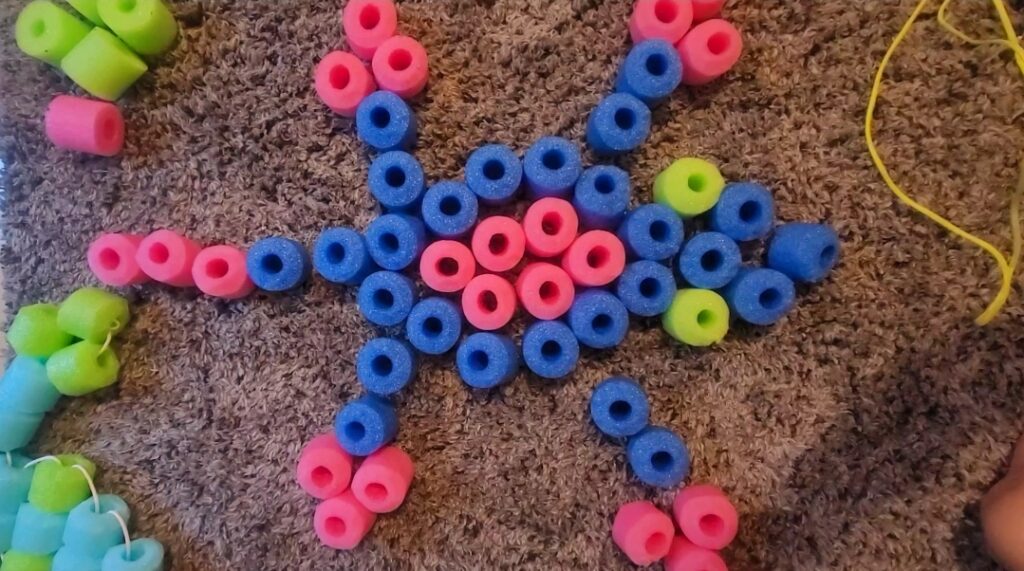
Step three: Prepare your giant beaded lizard
It is easiest to set your lizard out on your floor or workspace. This will make it easier to see which beads need to go next. Here is a photo of what it should look like. The holes are only facing up now so the beads don’t roll away.
Step four: Weaving your giant beaded lizard
To make sure your lizard stays together and is sturdy, a heavy cord works best. A link for the cord used here is above in the supply list.
Remember, the video tutorial is a above as well, and can help as an extra visual tool. To begin, find the middle point of your cord. Starting at the nose, thread the first bead so the bead is at the middle of the cord.
Take one end of string and put it through the next two beads. Take the other end of the cord and thread it through the next two beads in the opposite direction. Pull the two ends snug.
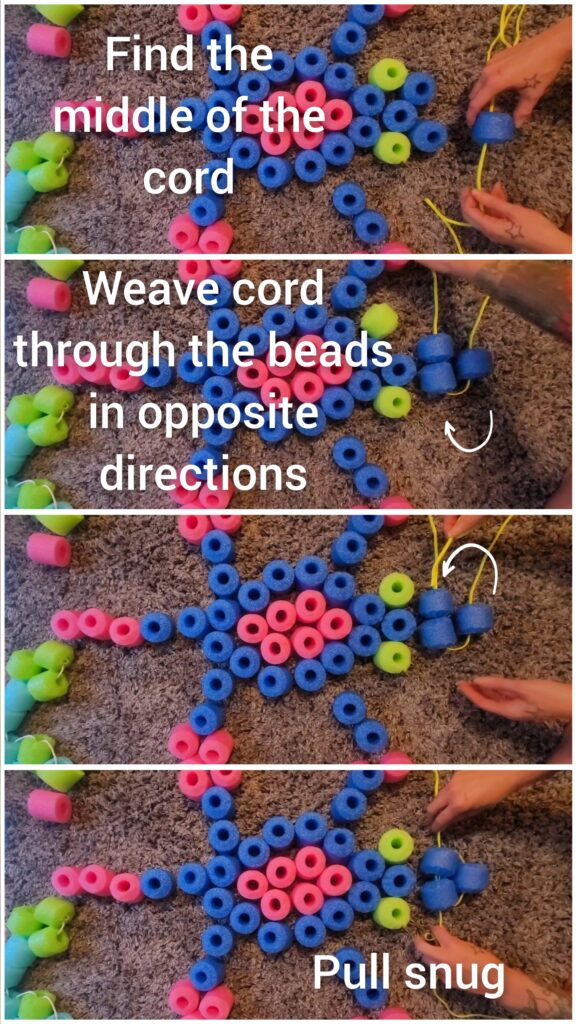
Repeat this step for the next three beads; weave the two ends in opposite directions so both ends of the cord run through the beads. Next do the fourth row, weaving the next two beads. Until the head is complete.
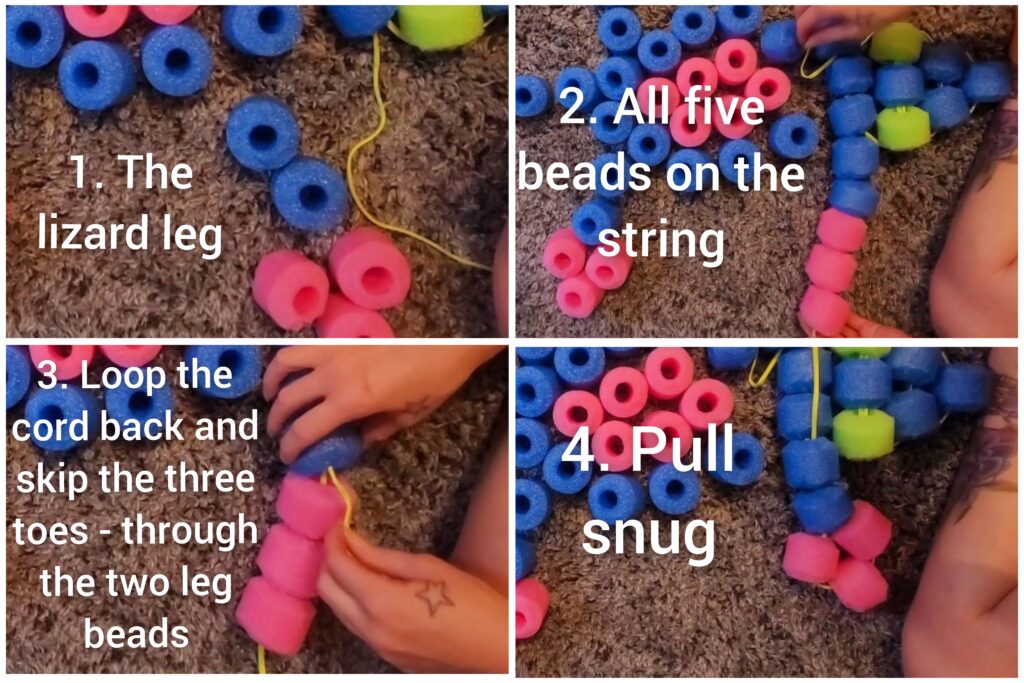
Next we will weave the front legs on to our giant beaded lizard. Start with one side, weave the cord from that side through the five beads that make up the leg and foot. Next, turn the cord back, skip the three toes and thread your cord through the two leg beads. Repeat this step on the other side.
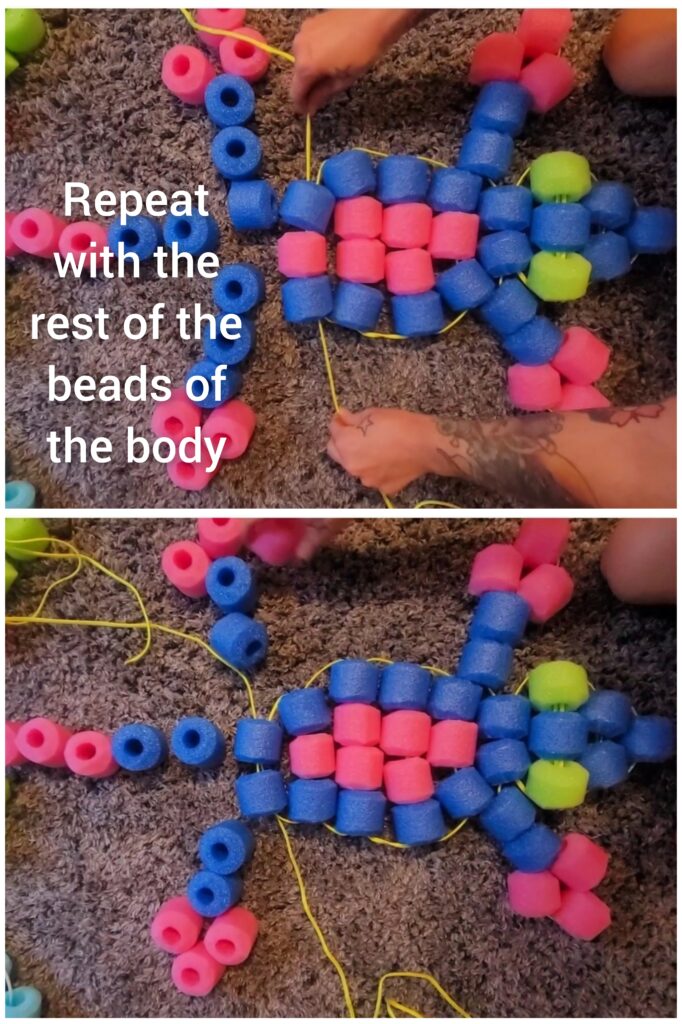
Now take the cord from one leg and thread it through the next row of three beads. Do the same on the opposite side as shown in the photo below.

Continue to weave your cord through the next three rows. You should be completed with the head, front legs and belly at this point.
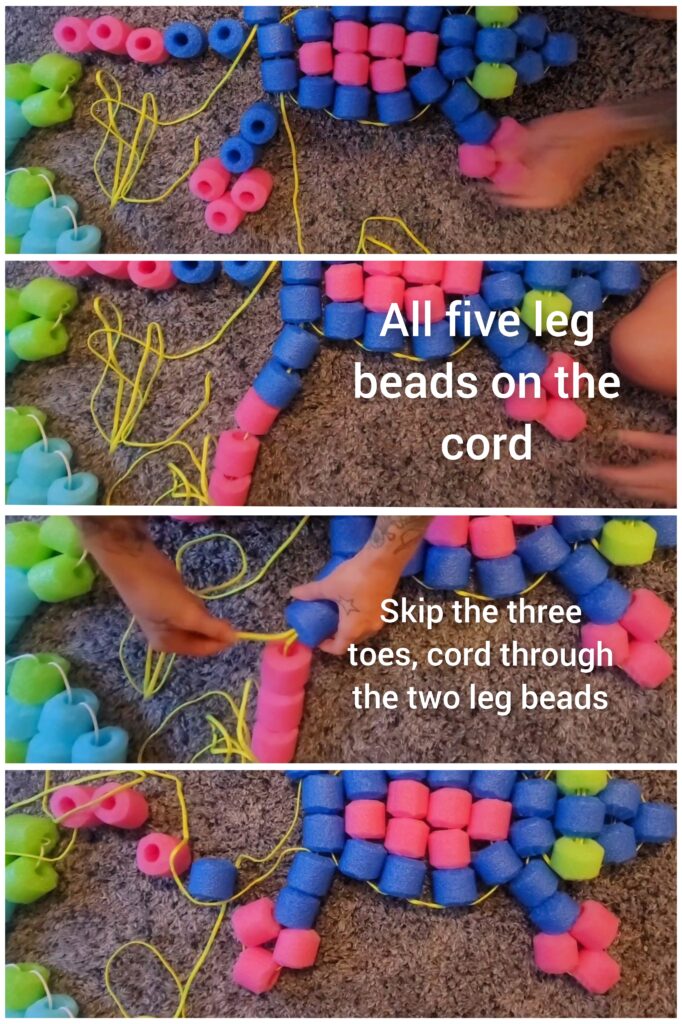
Now we’re on to the back legs. Just like with the first two legs, take the cord from one side of your lizard and thread it through all five beads that make up the leg and toes. Come back, skip the three toe beads, and thread the cord through the two leg beads. Do the same on the other side.
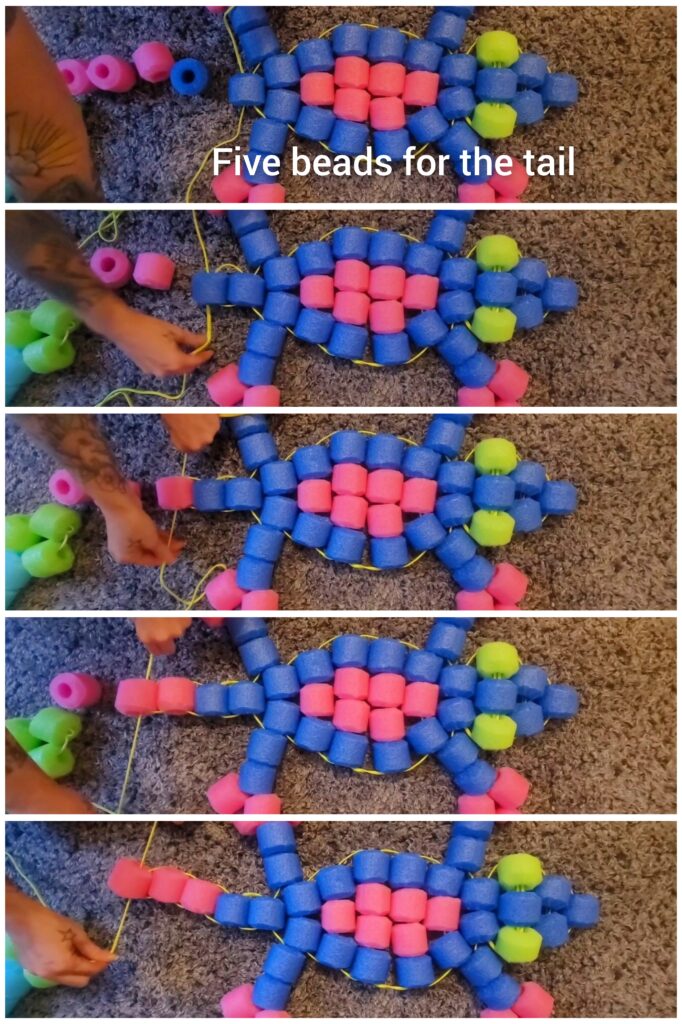
With your two cords, weave in opposite directions through each bead that makes up the tail until you get to the end. The tail can be as long as you’d like, but we’ve made these tails with five beads.
Tie a knot at the end and cut off the excess cord.

Step five: You’ve learned how to make a giant beaded lizard!
Show off your awesome nostalgic artwork!
We are a participant in the Amazon Services LLC Associates Program, and affiliate advertising program designed to provide a means for us to earn fees by linking to Amazon.com and affiliated sites.