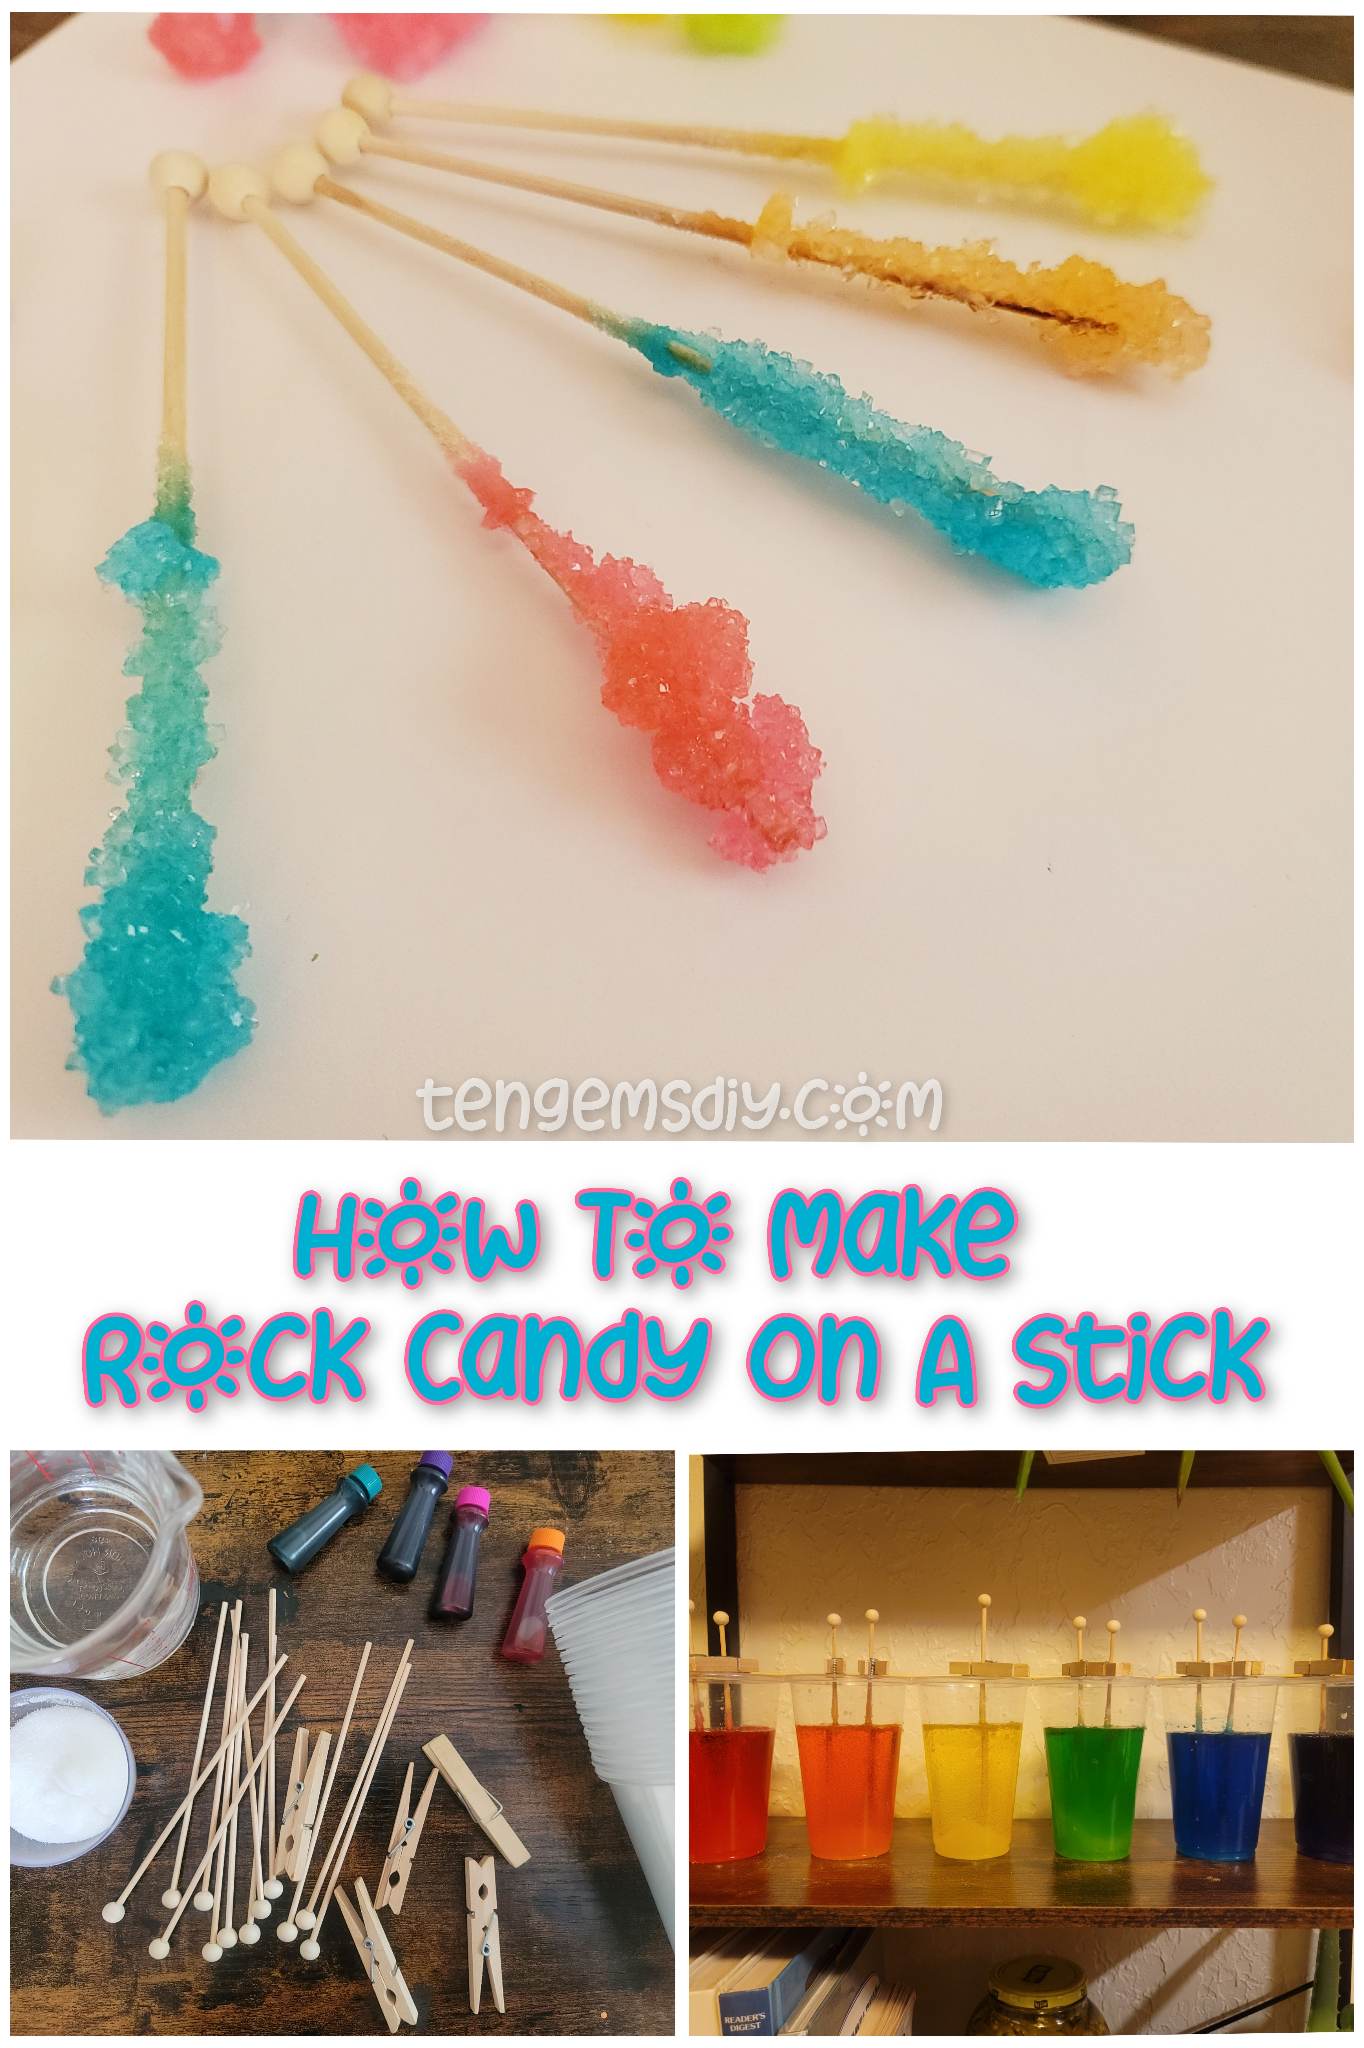
Thinking back on all the amazing things we ate as a kid, rock candy has to be one of them. Here you can learn how to make rock candy on a stick right in your kitchen. Create your own sparkling sugar crystals for your family and friends, make them with a young one you care about, or keep them all for yourself! They are almost too good to share! Only a few supplies are needed, most you can find in your kitchen. The hardest part of making rock candy on a stick is waiting for them to be finished.
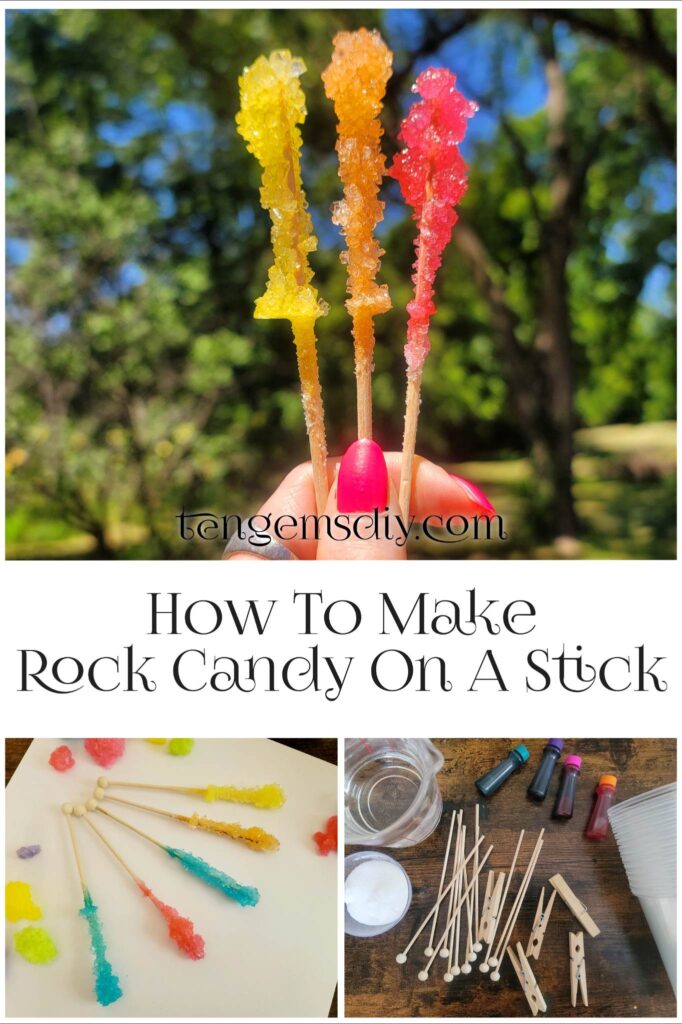
The rock candy stick recipe consists of four cups of water and ten cups of sugar. You can use either plastic cups or mason jars. Watch your beautiful old fashioned rock candy grow in a matter of days in to something that makes your taste buds so happy.

TenGemsDIY is a DIY and craft blog. Some of our posts contain affiliate links for products we have tried and recommend. While clicking the links will not cost any money, we may receive a commission for items purchased, which helps keep our website up and running. Here is the privacy policy for more information: https://tengemsdiy.com/?page_id=3
After you learn how to make rock candy on a stick, take a peek at these other easy DIY tutorials:
- How To Make Shrinky Dink Handprint Keychains – https://tengemsdiy.com/how-to-make-shrinky-dink-handprint-keychains/
- How to make Rainbow Pony Bead Keychains – https://tengemsdiy.com/how-to-make-rainbow-pony-bead-keychains/
- How to make DIY Glitter and Canvas Wall Art – https://tengemsdiy.com/how-to-make-diy-canvas-and-glitter-wall-art/
- How To Preserve Flowers In Oil – https://tengemsdiy.com/how-to-preserve-flowers-in-oil/
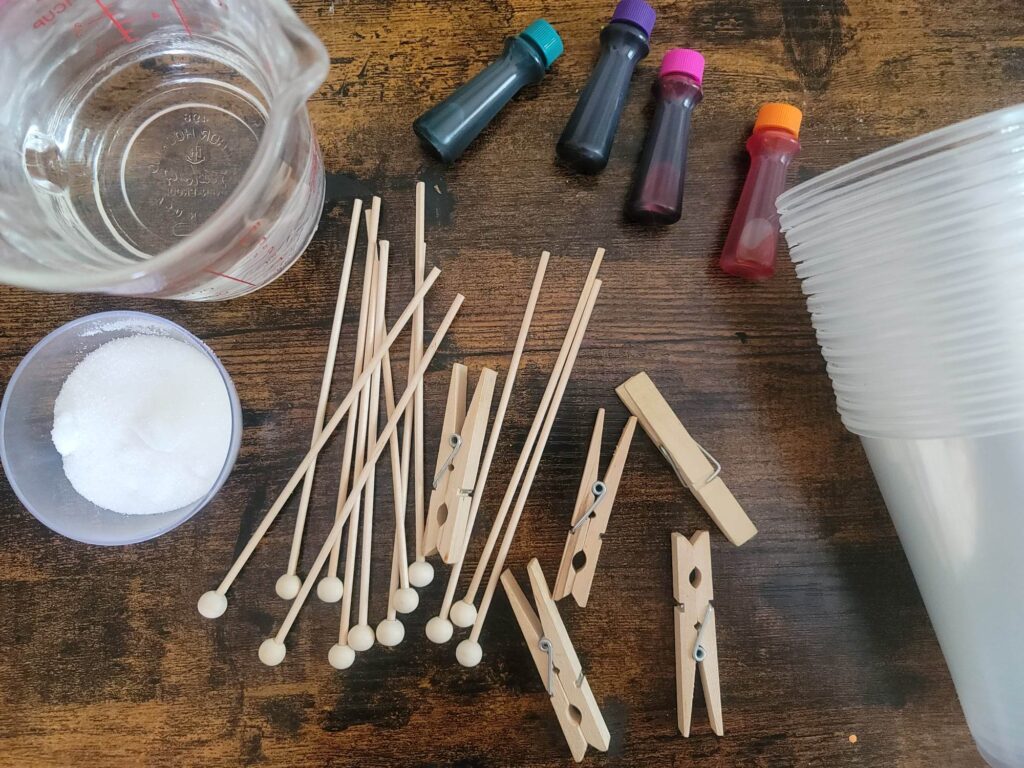
Supplies you’ll need to make rock candy on a stick and where to easily find them:
- Lots of sugar – ten cups plus extra – https://amzn.to/3XBfwF3
- Candy sticks – https://amzn.to/3D20xKP
- 5 – 6 clear plastic cups or mason jars – https://amzn.to/3PMiYLe
- Clothespins – https://amzn.to/43fQEDM
- Popsicle sticks or skewers – optional – https://amzn.to/3O17bqX
- Water – four cups – https://amzn.to/44y8F1u
- Food coloring – optional – https://amzn.to/3JNdxaO
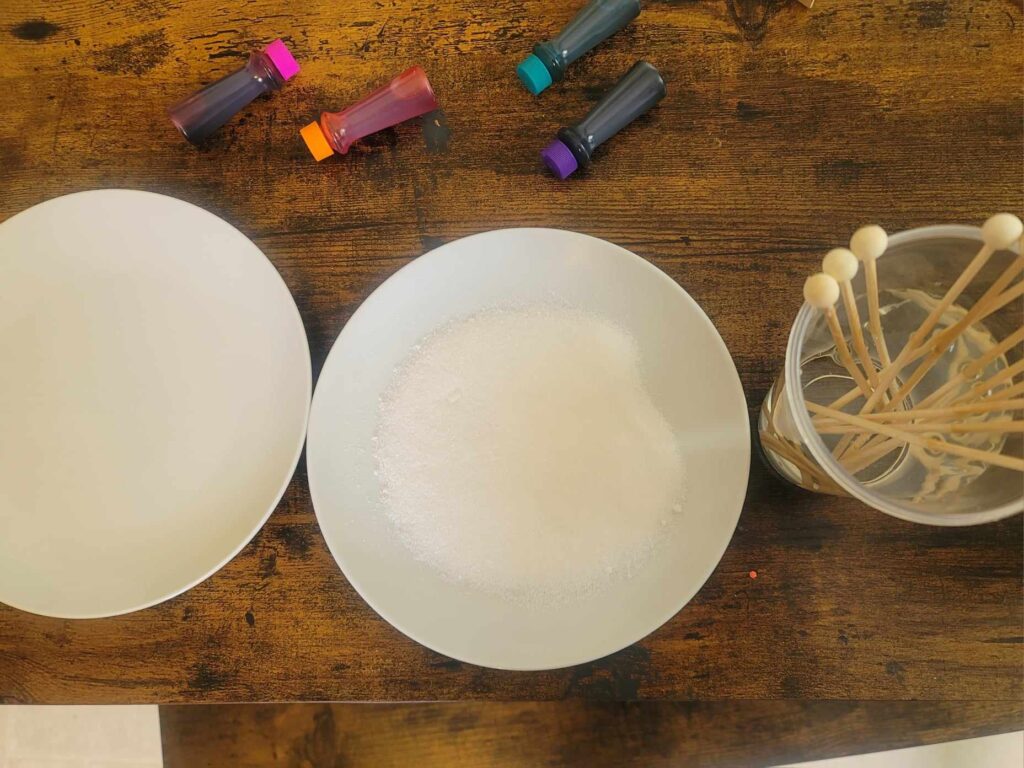
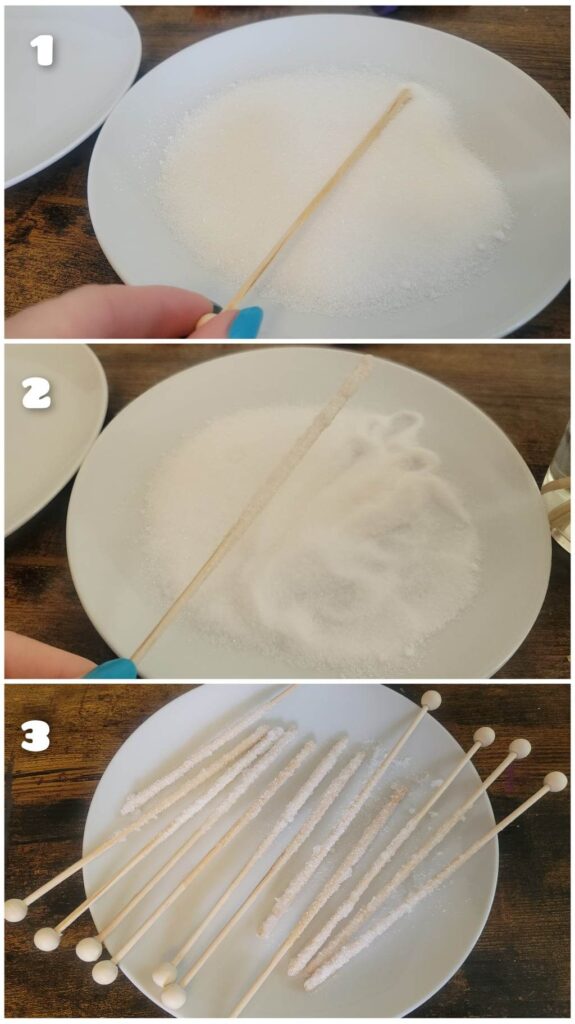
Step one: Prepare your candy sticks
The first step to preparing your candy sticks is to soak them in water. Let them soak in a cup of water as you are making your rock candy. Set them aside. At this time you can set up your sugar coating station to use for later. You’ll need two saucers or bowls. In one saucer, add a layer of sugar. Give or take about 1/4th of a cup or granulated sugar. Leave these to the side for now.
A word of caution, I would suggest one skewer per cup of rock candy solution unless you have wider cups. This will keep the cups from becoming over crowded and also keep candy skewers from forming together, becoming difficult to separate.
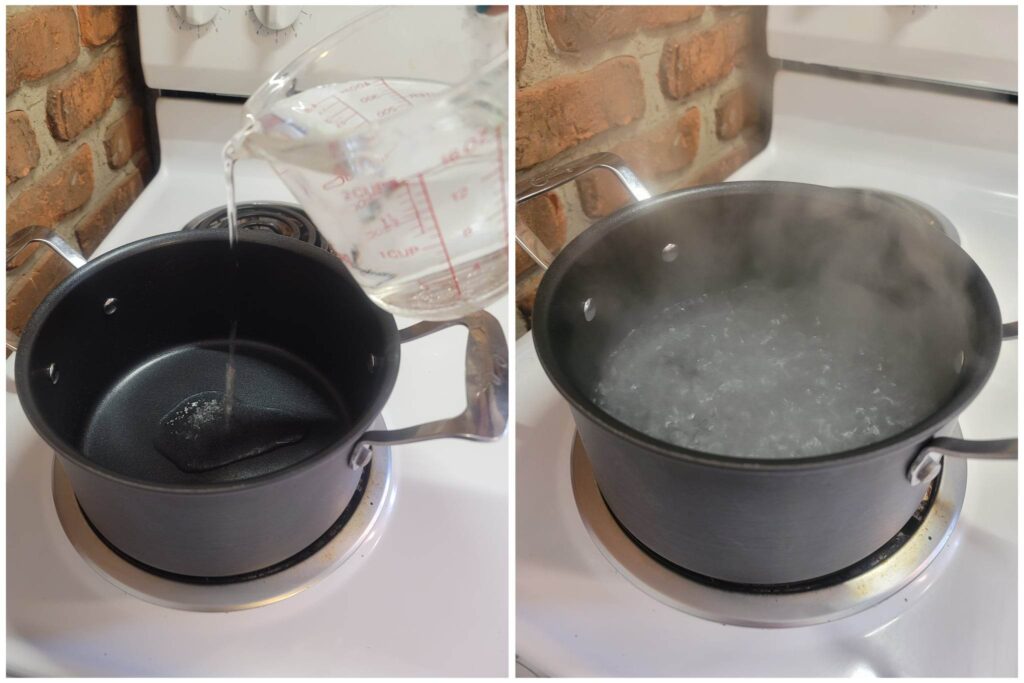
Step two: How to cook the rock candy
In a large pot, boil four cups of water. As the water reaches boiling, add in five cups of your granulated sugar and stir until all of the sugar has dissolved. Add in the remaining five cups of granulated sugar and stir until it has also all dissolved. It will take longer to dissolve as you continue to add sugar, but keep stirring. The sugar mixture will become more translucent as the sugar dissolves.
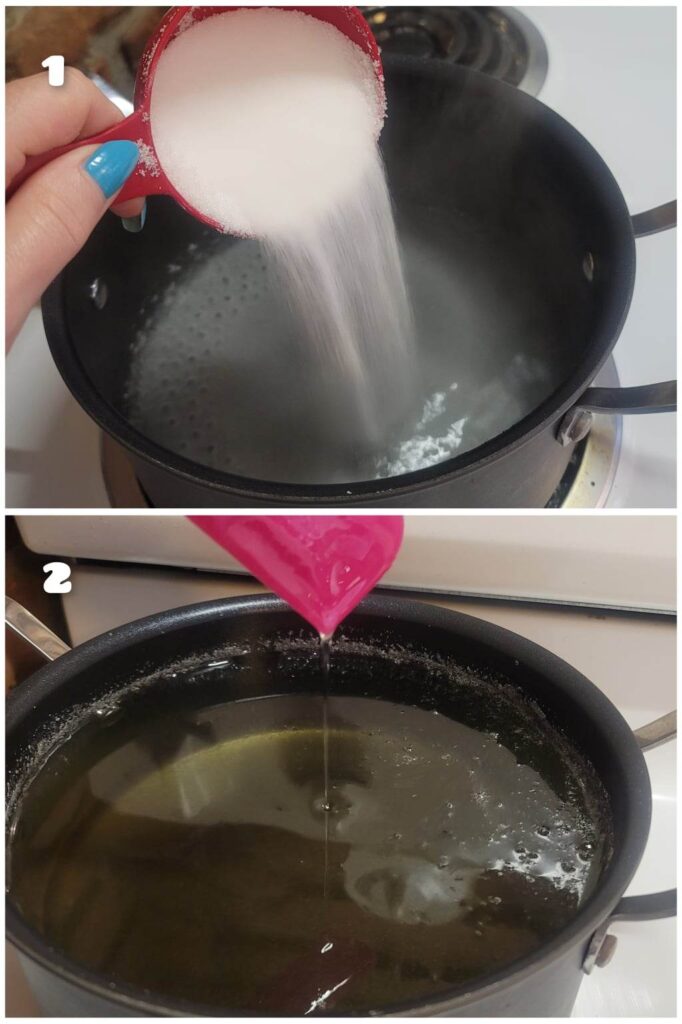
Turn down the heat a little bit and let this simmer for five minutes, stirring until the timer goes off. After five minutes has passed, remove your rock candy sugar mixture from the heat and let it rest and cool for 25 minutes.
Step three: Giving your crystals something to grow on
The purpose of soaking the crystals while cooking your rock candy is to give the wooden sticks time to saturate with water. With your pre-made assembly line of your soaking candy sticks, your saucer of sugar and your empty saucer in front of you, you can begin! Take one stick from the water cup and gently roll it in the sugar. Coat it evenly, being careful not to get sugar on the handle of the stick. Place your sugar coated stick on your clean plate to dry. Repeat with five more candy sticks. One stick for each cup of candy solution. You can also complete this step prior to beginning any cooking and can even do this up to a day in advance.
Step four: Distributing the candy solution in to your cups
As your candy solution finishes cooling for 25 minutes or so, gather your cups or jars. You will need 5 or 6, depending on the size you use.
Even after 25 minutes of cooling, your rock candy solution will still be fairly warm, maybe even hot. Do be careful and use caution with hot candy. This step should be done by an adult to keep little hands out of the warm liquid candy.
Carefully ladle the candy mixture equally into your cups. I ladled a scoop of rock candy solution one at a time in to one cup, then one scoop in to the next, then one scoop in to the next until they were equally full.
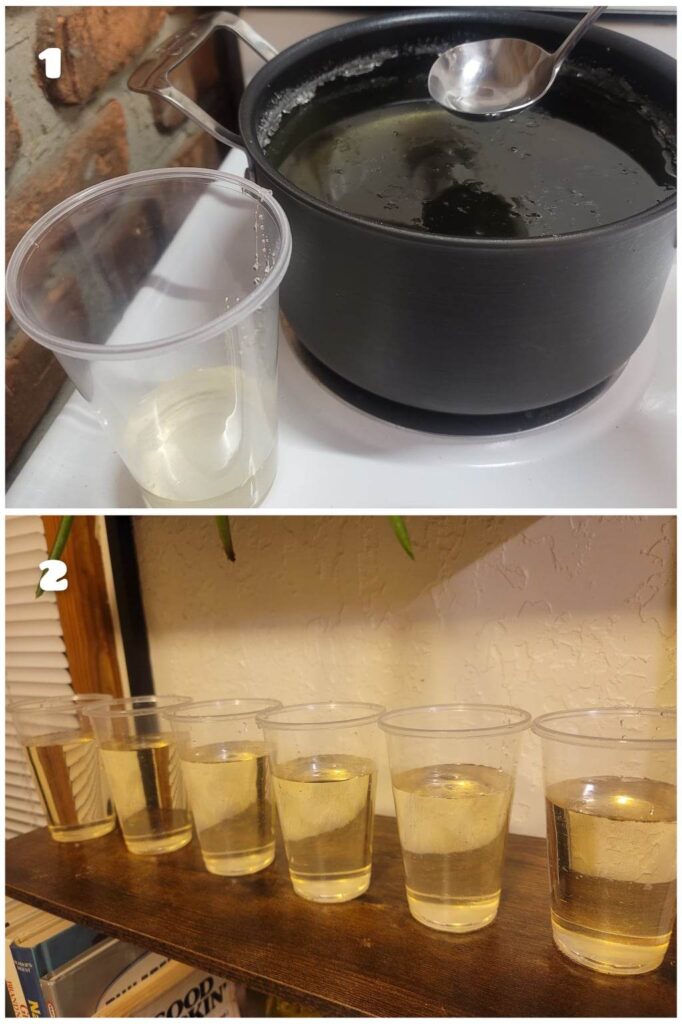
Bring your cups of liquid candy to a location out of the way, where they can rest for the next 6-7 days.
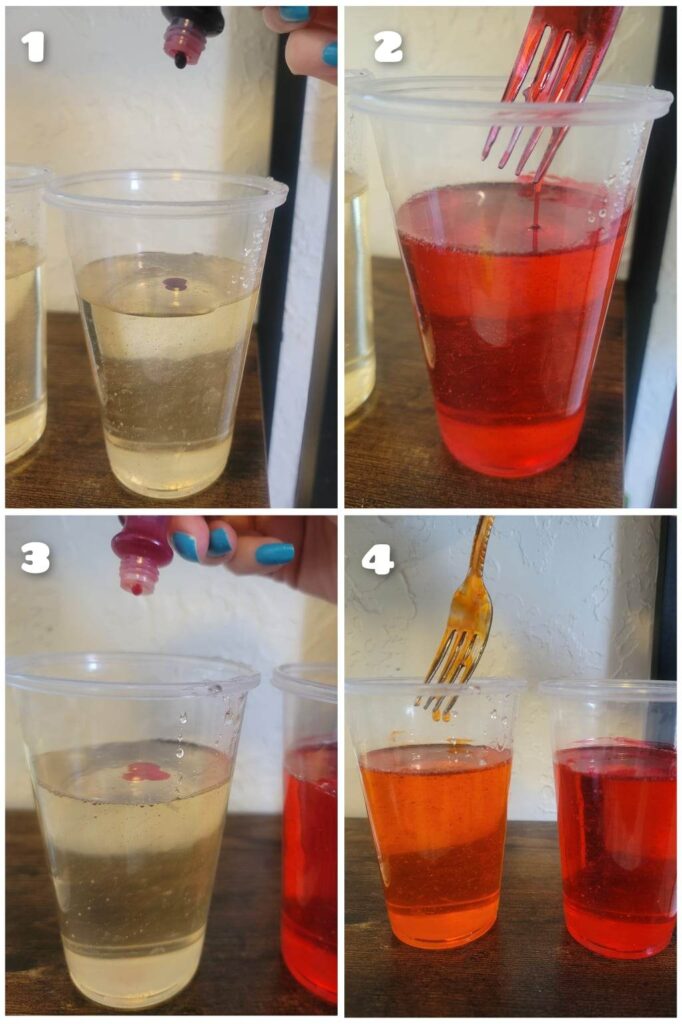
Step five: We loved our rainbow rock candy on a stick!
Here is where you can add your optional food coloring. Liquid or gel food colors will both work. Add a few drops and stir it in to your solution. Do keep in mind, your finished rock candy will come out lighter than the color of your liquid solution, so here we have added enough food color to make the liquid solutions fairly dark.
Step six: Add your candy sticks to the liquid candy solution
After your sugar coated rock candy sticks have dried a little bit, it is safe to put them in the solution. Make sure your candy solution isn’t terribly hot anymore and has cooled some. If we add the sugar coated sticks to the candy solution while it is too hot, it will just dissolve the sugar off the sticks. But if your candy solution has cooled a little bit, we can begin to add the sticks.
Secure a clothespin to the handle of the candy stick. Suspend the candy stick in to the candy solution so the the clothespin balances on to of the rim of the glass or jar. If the mouth of the jar is too wide, you can use a popsicle stick or skewer to assist in keeping the clothespin from falling in.
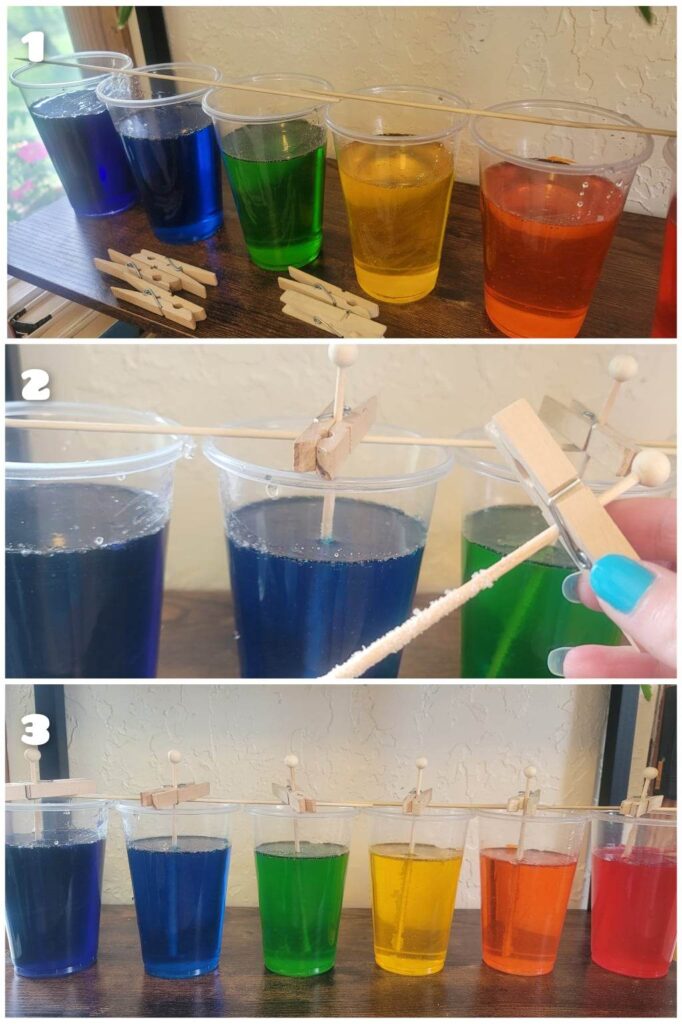
Be sure to keep the end of the candy stick about an inch from the bottom of the glass. This is because rock candy crystals can form on the bottom of the glass up to the stick and make if very difficult to release the rock candy stick from the bottom of the cup. One stick per cup is great and keeps the sticks from becoming overcrowded, but if you are adding two sticks to a cup, be sure to give them about an inch of room in between.
Step seven: Watch your rock candy sticks grow!
This is the hardest part, but so worth the wait! For the next 6-7 days, watch as your rock candy sticks form. Each day you will see your crystals grow more and more. They begin with very small crystals the first day, and by the last day they are good enough to eat!
Step eight: Your rock candy on a stick is complete!
After the long wait, it’s time to take the candy sticks out of their glasses. Gently crack the layer of sugar coating the top of the liquid sugar solution and wiggle the candy stick to release it if necessary. Lay your candy sticks over a bowl to drip and dry.
Can I reuse my leftover rock candy solution?
Why waste all of the wonderful leftover rock candy solution? Take your cups of leftover solution and empty the liquid in to a pot. Over medium heat, warm the solution and add another half cup of sugar, stirring to dissolve. Repeat the process of sugar coating sticks and adding to recycled solution in a new cup or jar. Give them another 6-7 days as well to form new crystals.
Why did my rock candy not grow?
One of the most common problems had when making old fashioned rock candy is creating an under saturated sugar solution. This happens when not enough sugar is added to the water while cooking. The water must be saturated with sugar, almost to the point where it becomes difficult for sugar to dissolve in the mixture. Ten cups of water to four cups of sugar is a great recipe and can easily be cut in half if desired.
What to do with all of the crystals in the bottom of the cup?
Scoop them out of the liquid and let them dry on a foil lined baking sheet and there you have rock candy chunks! Just as good without the stick!
We are a participant in the Amazon Services LLC Associates Program, and affiliate advertising program designed to provide a means for us to earn fees by linking to Amazon.com and affiliated sites.