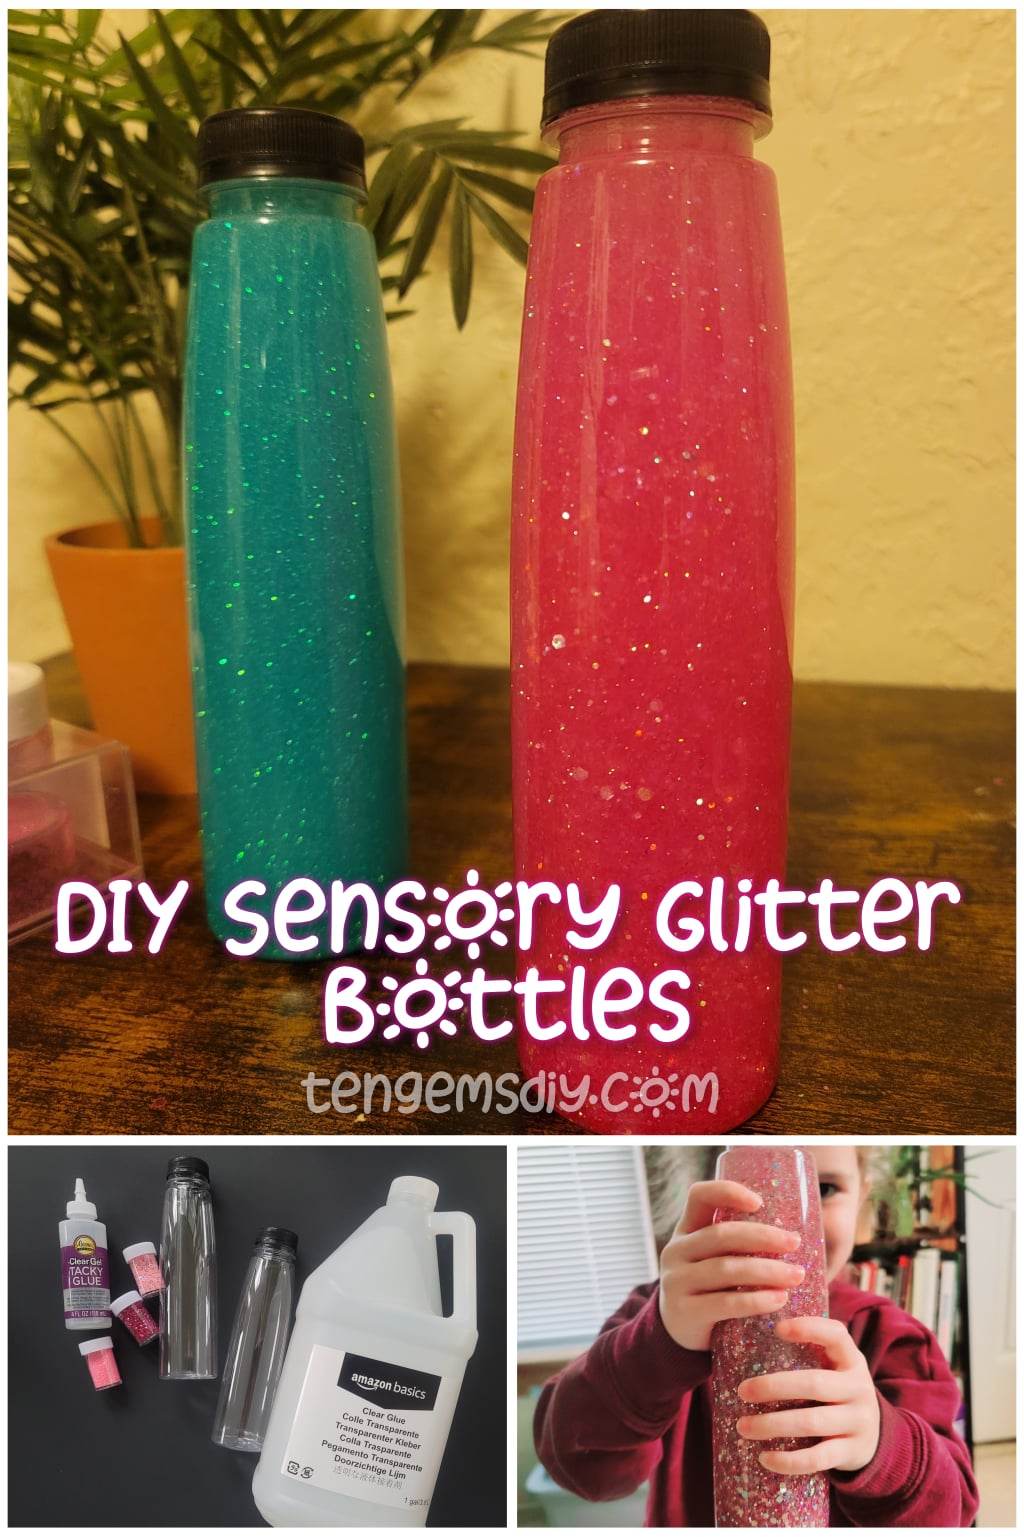
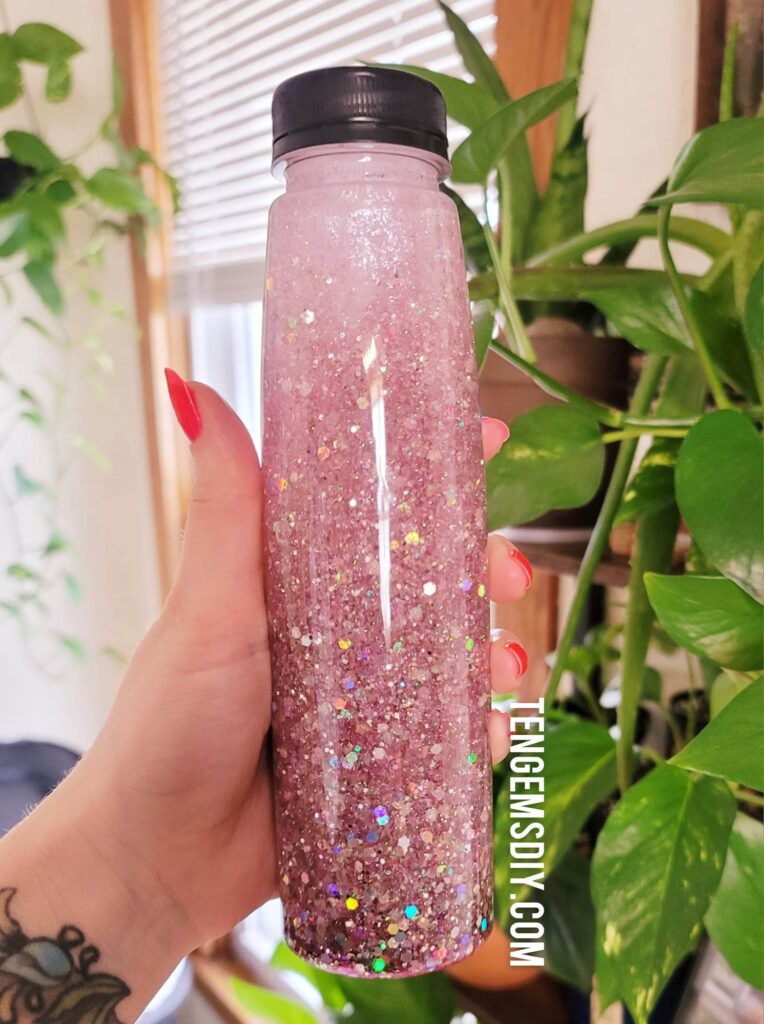
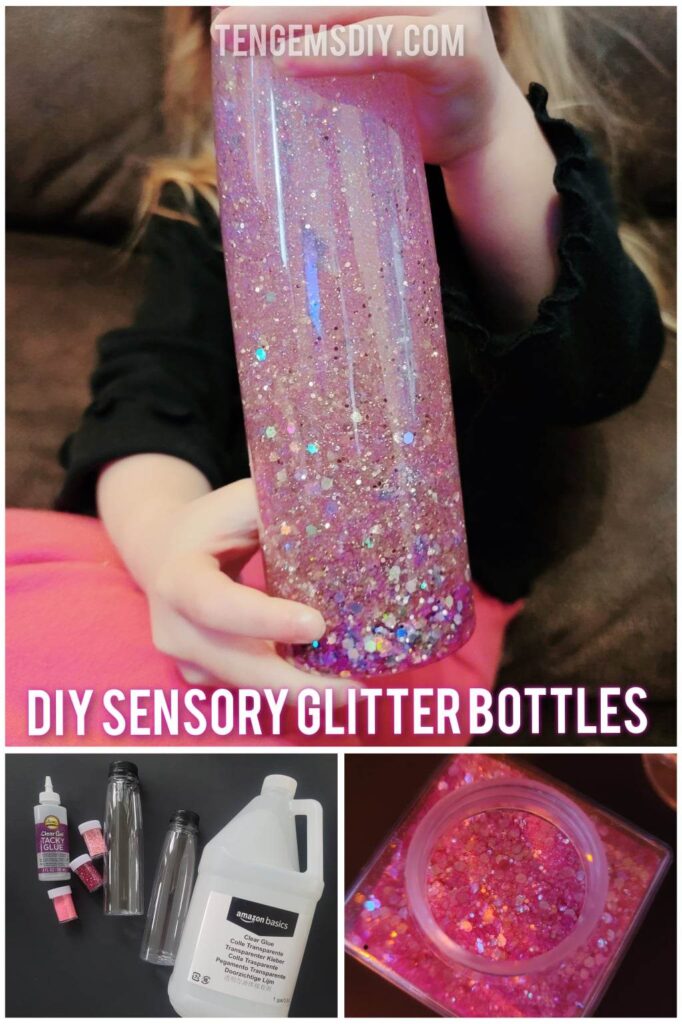
We all know that glitter is amazing, let’s make it the highlight of these sweet DIY Sensory Glitter Bottles! This project is great for any person of any age. I’ll tell you what, my daughter and I made a bunch of these because I knew she would love them, then also made them for her fourth birthday party, but I can’t stop myself from watching the pretty glitter swirl endlessly. They’re sensory in a way because they have this calming effect – you’ll see! Make one for yourself, as a gift, or make one with your little one and use it to distract them next time you sense a melt down coming on.
TenGemsDIY is a DIY and craft blog. Some of our posts contain affiliate links for products we have tried and recommend. While clicking the links will not cost any money, we may receive a commission for items purchased, which helps keep our website up and running. Here is the privacy policy for more information: https://tengemsdiy.com/?page_id=3
When you’re done with this project try one of these other sweet DIYs from TenGemsDIY!:
- How To Make DIY Canvas And Glitter Wall Art – https://tengemsdiy.com/how-to-make-diy-canvas-and-glitter-wall-art/
- How To Make Rainbow Pony Bead Keychains – https://tengemsdiy.com/how-to-make-rainbow-pony-bead-keychains/
- How To Make A Neon Sign Painting – https://tengemsdiy.com/how-to-make-a-neon-sign-painting/
- How To Make Shrinky Dink Keychains – https://tengemsdiy.com/how-to-make-shrinky-dink-handprint-keychains/
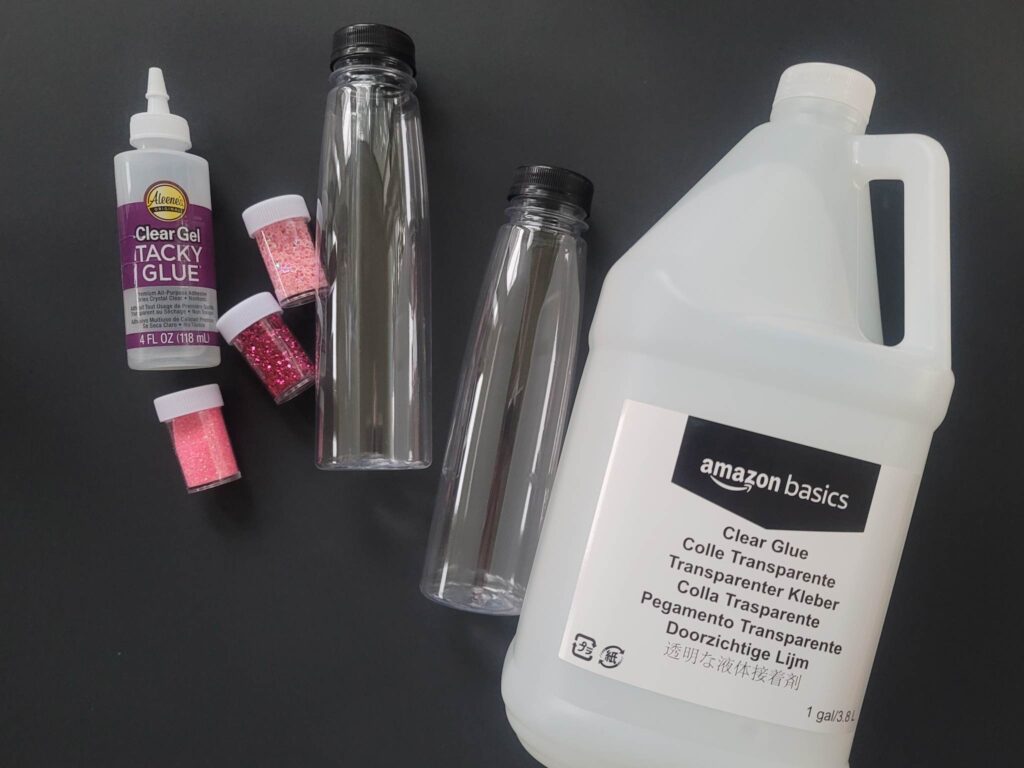
What you’ll need for your DIY Sensory Glitter Bottles and where to easily find it:
- Clear bottles – https://amzn.to/4255OLP
- Clear glue – https://amzn.to/3oC9sPx
- Chunky glitter – https://amzn.to/438ayla
- Water
- Super glue or strong tacky glue – https://amzn.to/3WzrY7N
Step one: Gather your supplies
There are so many different ways to personalize this craft and make it your own. From the size and shape of the bottles you choose to the different colors of glitter you use. We decided to do these DIY Sensory Glitter Bottles for my daughter’s fourth birthday. Little kids love glitter and getting to choose the colors for their glitter bottles. I chose these 14oz clear plastic bottles. I wanted something not too small, but also not too big, they turned out to be the perfect size.
Next, decide what colors of chunky glitter you might like. You can also use fine glitter, but it moves slower in the bottle when shaken up. Chunky glitter is easier to see, but it is also heavier, so moves a little faster when shaken. We had fun mixing colors! You can even add little pieces of contrasting sequins if you want a little extra pizzazz.
Clear school glue is necessary. White school glue will not work. For each of our 14 ounce bottles, we used about ½ a cup of clear glue or 4 ounces. I picked up this amazing gallon of clear school glue for our DIY Sensory Glitter Bottles. I had never seen such a big bottle of glue before!
Make sure y ou have everything else ready to go as well. It’s not fun to start a project and realize halfway through that you’re missing something.
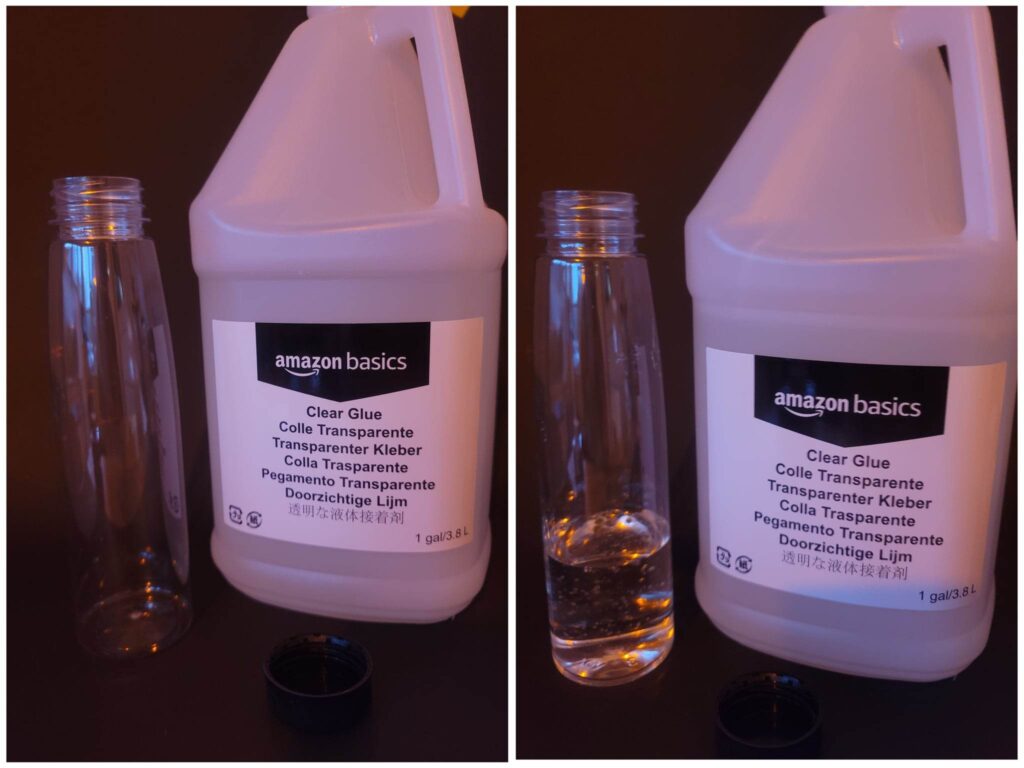
Step two: Try not to get glue on you!
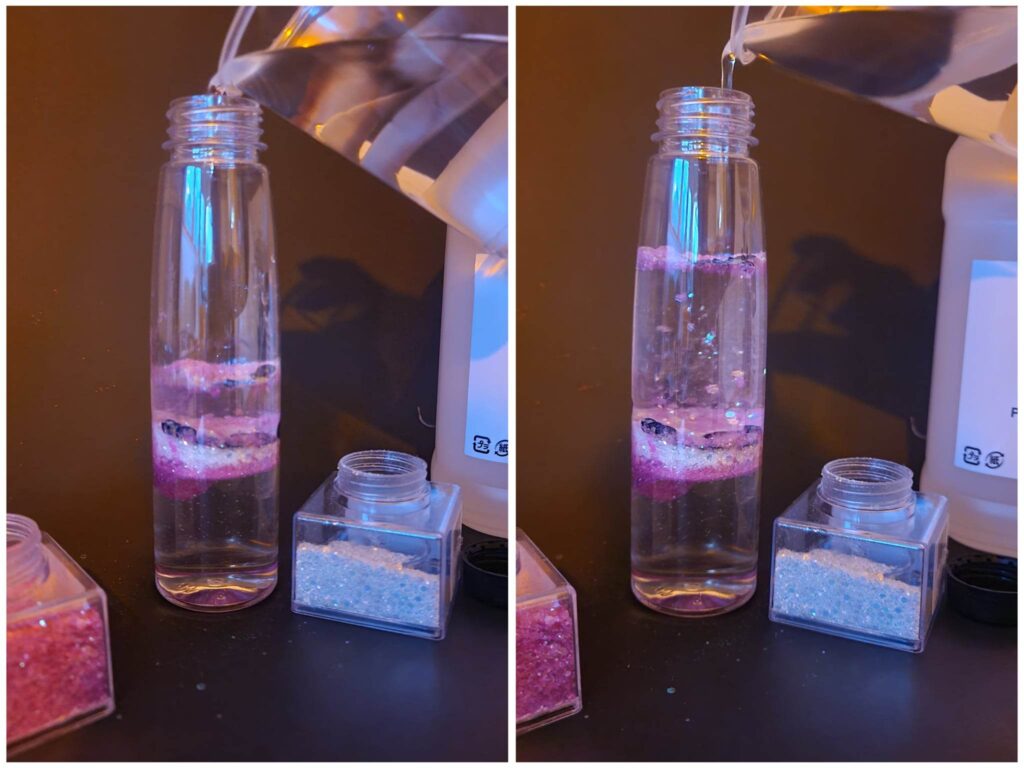
This is the part where we start our DIY Sensory Glitter bottles off by adding ½ cup of clear school glue to our clear plastic bottles. If you’re wild a crazy, you could probably just eyeball enough glue to fill the clear bottle to around ¼ – 1/3 of the way full with the clear school glue.
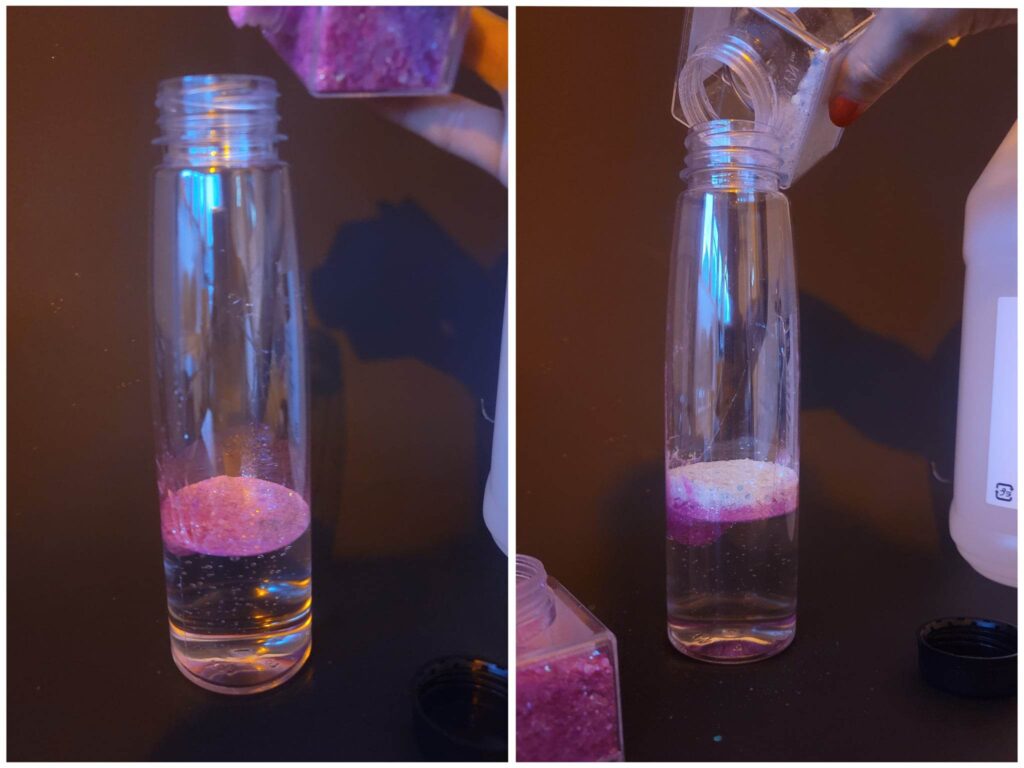
Step three: Oh my Glitter! We love glitter!
What colors of chunky glitter did you choose to add to your DIY Sensory Glitter bottles? Add around three tablespoons total of all your favorite colors combined. You can absolutely add more or add less.
Step four: We’ll need a little water here
After you’ve added your clear school glue and your brightly colored chunky glitter, we’ll fill the rest of the bottle all the way to the very top with plain water. Water from the sink is just fine. Carefully pour it in to the bottle. This water and the glue together will make a mixture that will allow the glitter to float slowly around the bottle in the most mesmerizing way.
Step five: The last – and arguably the most important step
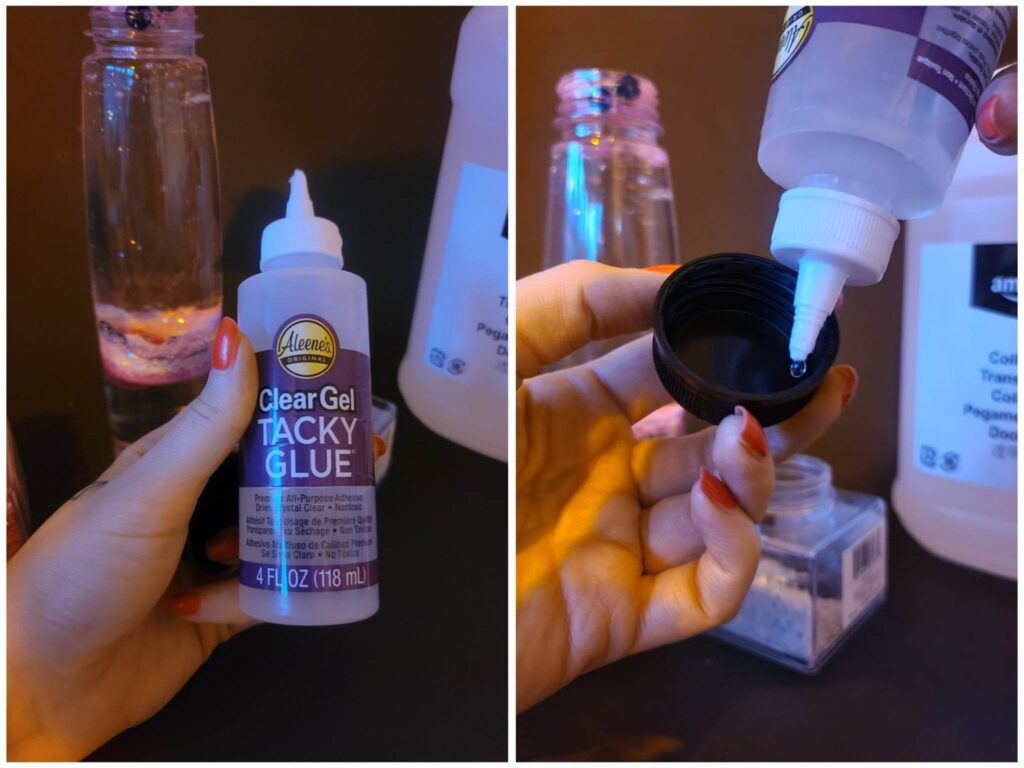
Now, I never initially did this step the first few times we went through this DIY. There are others out there who I have light-heartedly debated with about the importance of gluing the lid on. I always just screwed the lid on VERY tightly. BUT! I am not going to ignore the folks who just wanna glue the lid down. If you want to and if it would make you feel a little more at ease about avoiding a possible spill, glue that bad boy down. I love this tacky glue, or you could use your favorite super glue.
Twist the cap on very tightly. As tight as you can.
The first bit of shaking is fun because you have to get everything mixed together. The glue, water and all your glitter. Some of the glitter might stick to the bottom of the bottle until it really get mixed well. Have fun with this project! These DIY Sensory Glitter bottles are meant for fun. The best thing about art is that there is no expectations. All you have to do is enjoy your time spent creating.
We are a participant in the Amazon Services LLC Associates Program, and affiliate advertising program designed to provide a means for us to earn fees by linking to Amazon.com and affiliated sites.