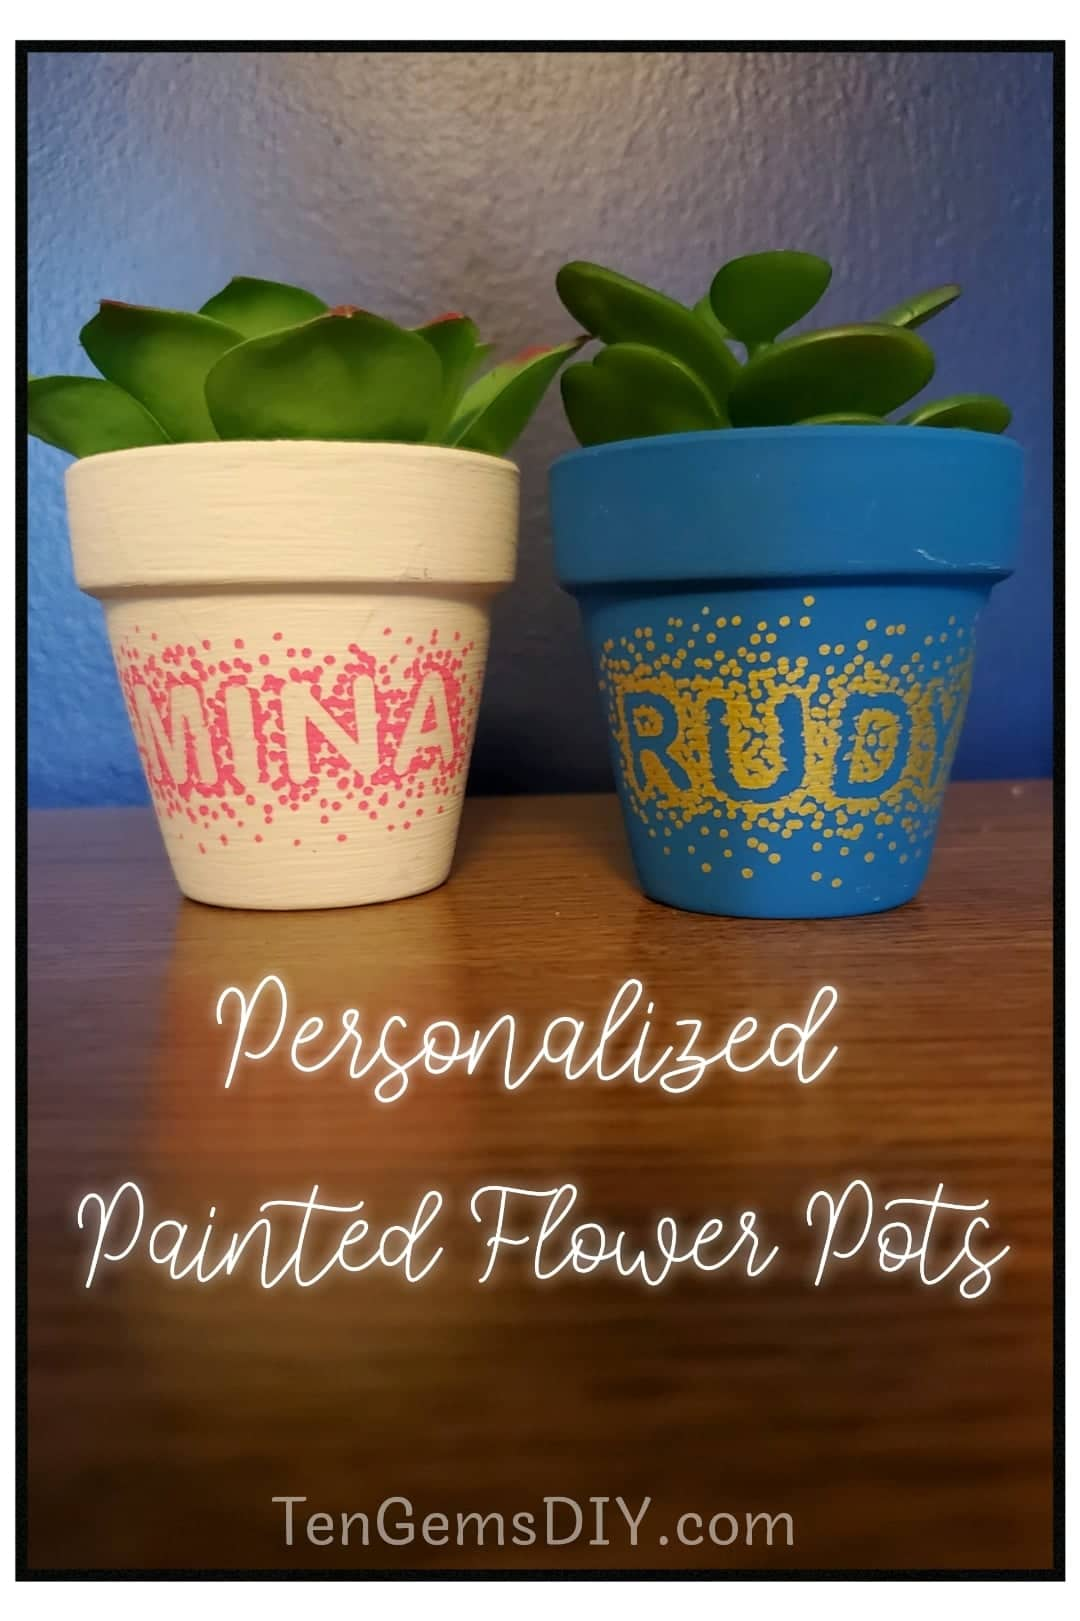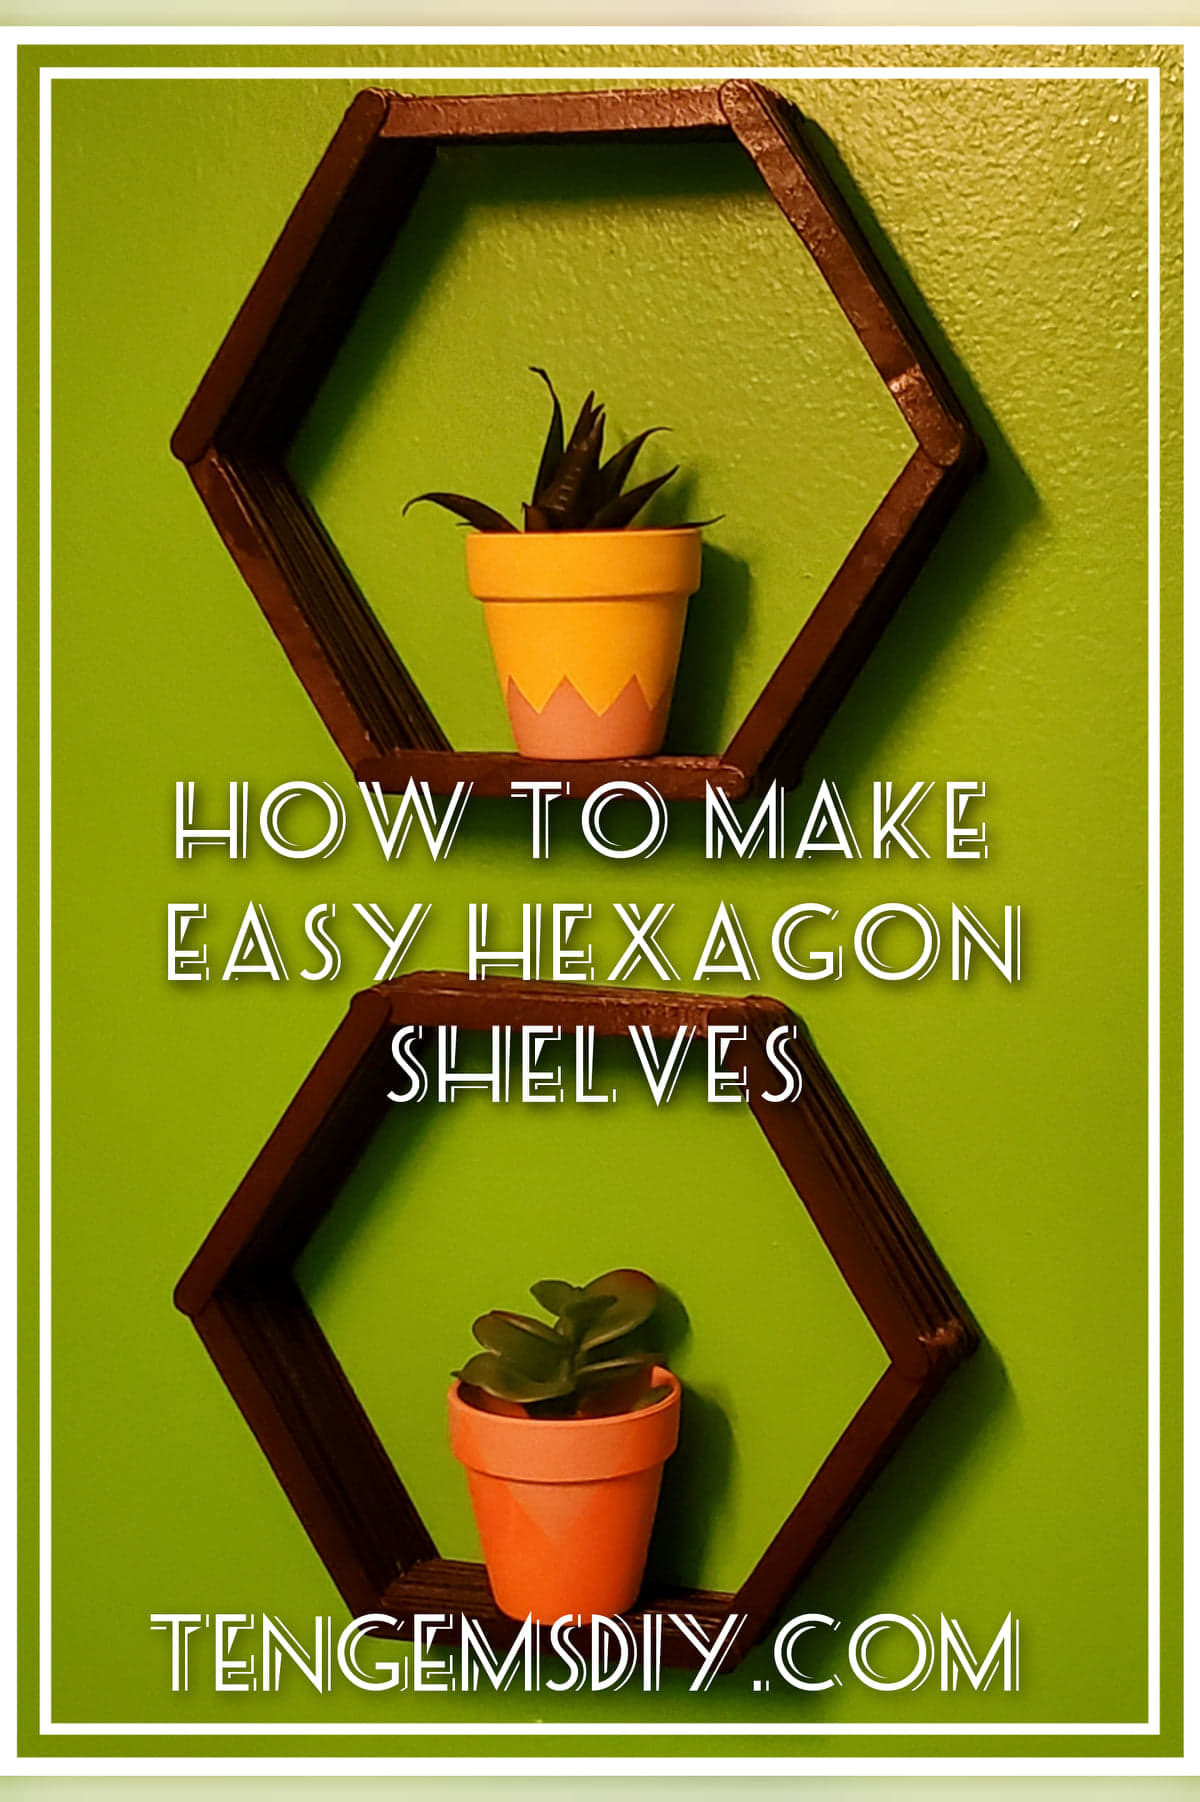
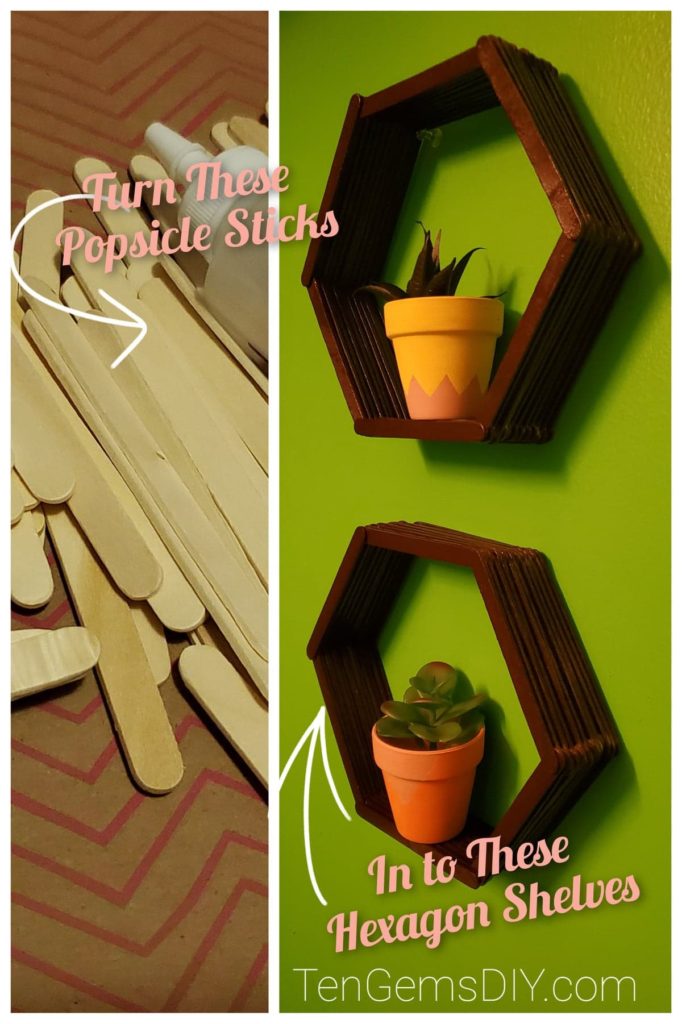
Let me show you this great tutorial on how to make hexagon shelves. This is a super easy DIY and only requires a few supplies. Wall decor is always fun to look at and it’s even more enjoyable if you made it yourself. These shelves are interesting in the fact that they are geometric and they’re cute! You can paint them any color you’d like or even just leave them plain with the raw wood finish. Add something cute like little potted plants, you can check out the tutorial for these colorful painted pots here! https://tengemsdiy.com/?p=416
There are a ton of How-To’s here for amazing wall art! Here is one for an easy geometric painting! https://tengemsdiy.com/how-to-make-geometric-wall-art/
Or this post on How To Make Easy Canvas Cutout Art!>> https://tengemsdiy.com/how-to-make-easy-canvas-cutout-art/
Disclosure: TenGemsDIY is a DIY and craft blog. Some of our posts contain affiliate links for products we have tried and recommend. While clicking the links will not cost any money, we may receive a commission for items purchased, which helps keep our website ad free. Here is the privacy policy for more information: https://tengemsdiy.com/?page_id=3
Supplies you’ll need, and where to find them:
- 2 – 3 packages of popsicle sticks – https://amzn.to/3bF3Km6
- Glue – I prefer clear tacky glue for all projects! – https://amzn.to/3eXXpV2
- Spray paint – I used a glossy finish – https://amzn.to/2Qt7Oyu
Step one: Gather your supplies
So here is where you’ll set down some scrap paper to protect your work surface and get everything together. Depending on how thick your shelf is, you’ll need between 60 and 80 popsicle sticks for one shelf. The popsicle sticks used here were 1/2 inch wide. I really like my clear tacky glue because it there isn’t any off white dried glue residue on my projects when they’re finished. And for the paint, I used a glossy “Kona” brown. It is a darker shade and looks more natural on the wall. There is a link above for each item I’ve used.
Step two: Getting sticky
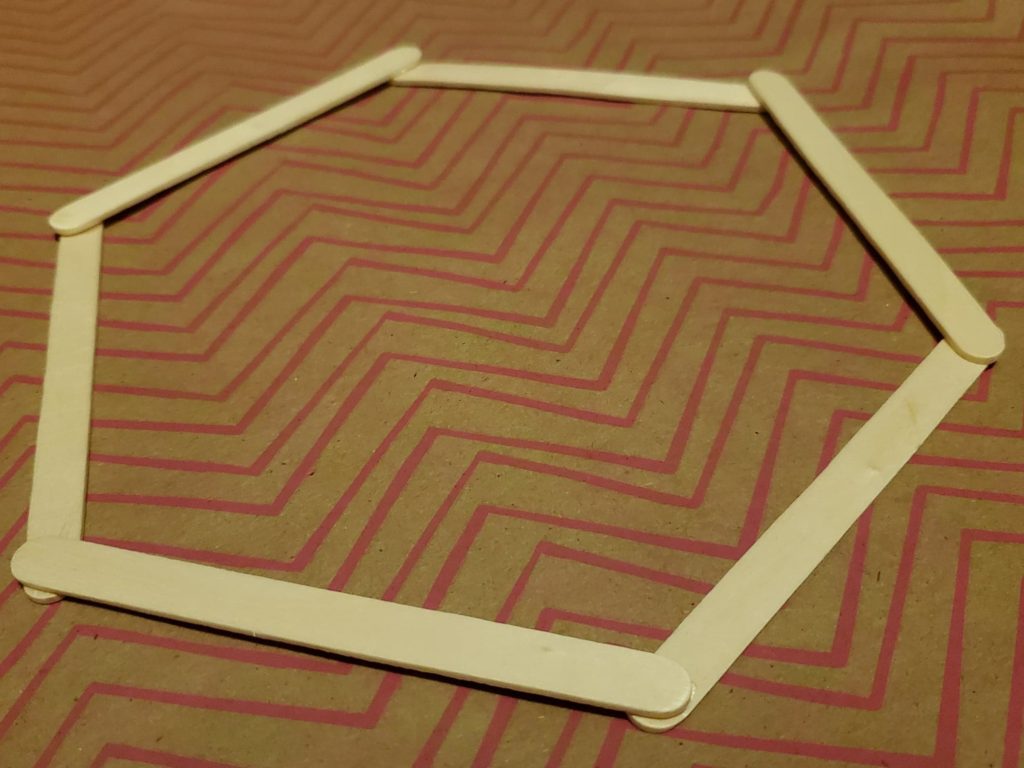
I found it easier to lay down six popsicle sticks in the shape of a hexagon without gluing. Three sticks will be on top, overlapping the ends of three sticks that will be on bottom. Here is a picture, because that can sound confusing.
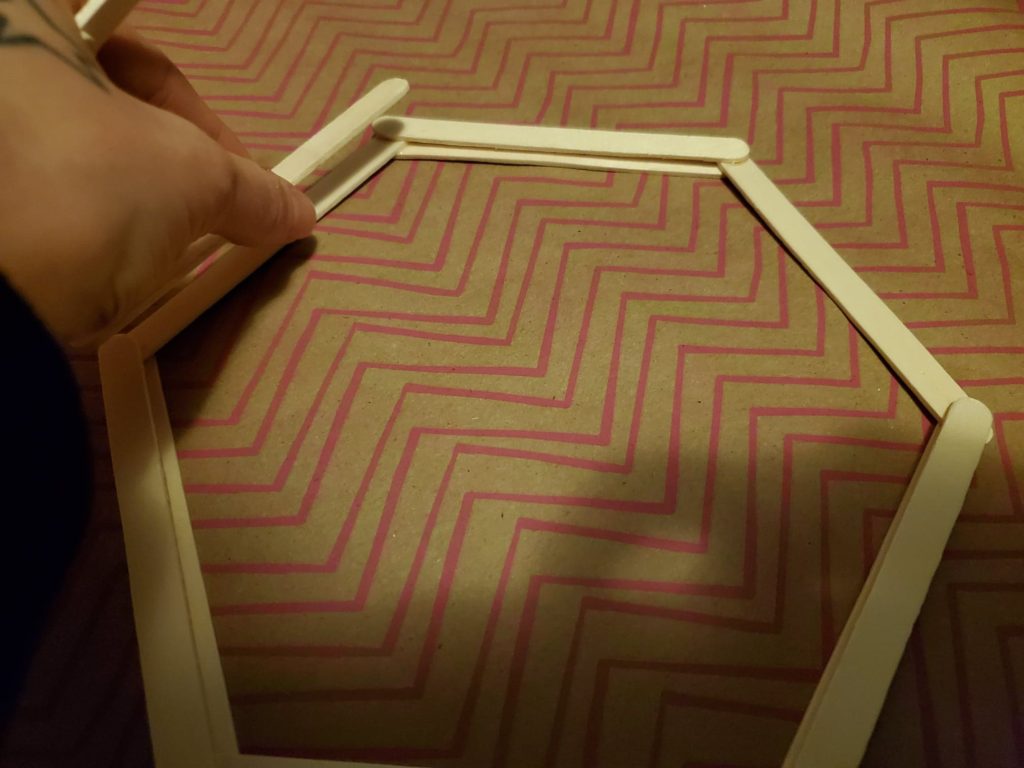
You’ll glue each end and lay down more popsicle sticks in layers until you reach the shelf depth you desire. These shelves were allowed to dry overnight.
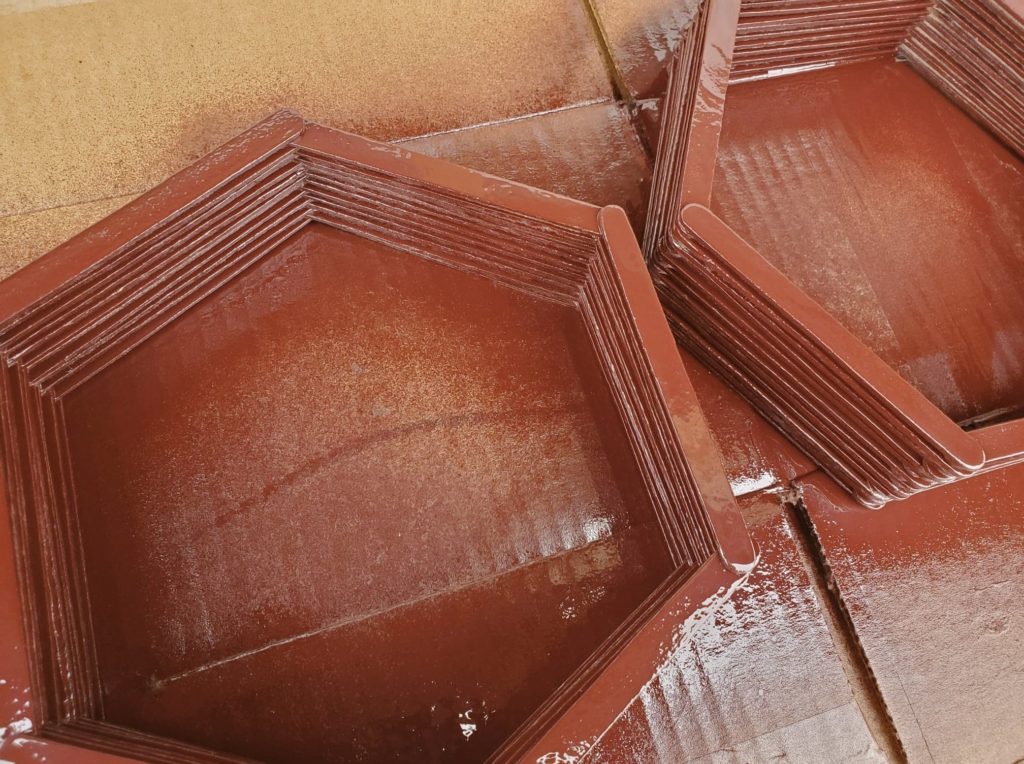
Step three: Painting the hexagon shelves
After letting the glue dry, and picking the paint color for the shelves, it’s time to go outside to get these babies colored. I made sure to lay down a barrier for my work surface and gave the shelves the first coat, making sure to get all angles and in between the sticks. Two coats of paint worked well and these shelves look great.

Step four: Hanging the hexagon shelves
When it comes to hanging your shelves, you have a few options. you could put a few small nails or thumb tacks in the wall, or you can use some double sided adhesive wall strips. I like these double sided strips for a lot of my wall art, and I used them for these shelves. You just have to watch out for how much weight is on the shelf and how much your picture hanging tape can hold. Check them out here: https://amzn.to/3fxVbuN
WE ARE A PARTICIPANT IN THE AMAZON SERVICES LLC ASSOCIATES PROGRAM, AN AFFILIATE ADVERTISING PROGRAM DESIGNED TO PROVIDE A MEANS FOR US TO EARN FEES BY LINKING TO AMAZON.COM AND AFFILIATED SITES.