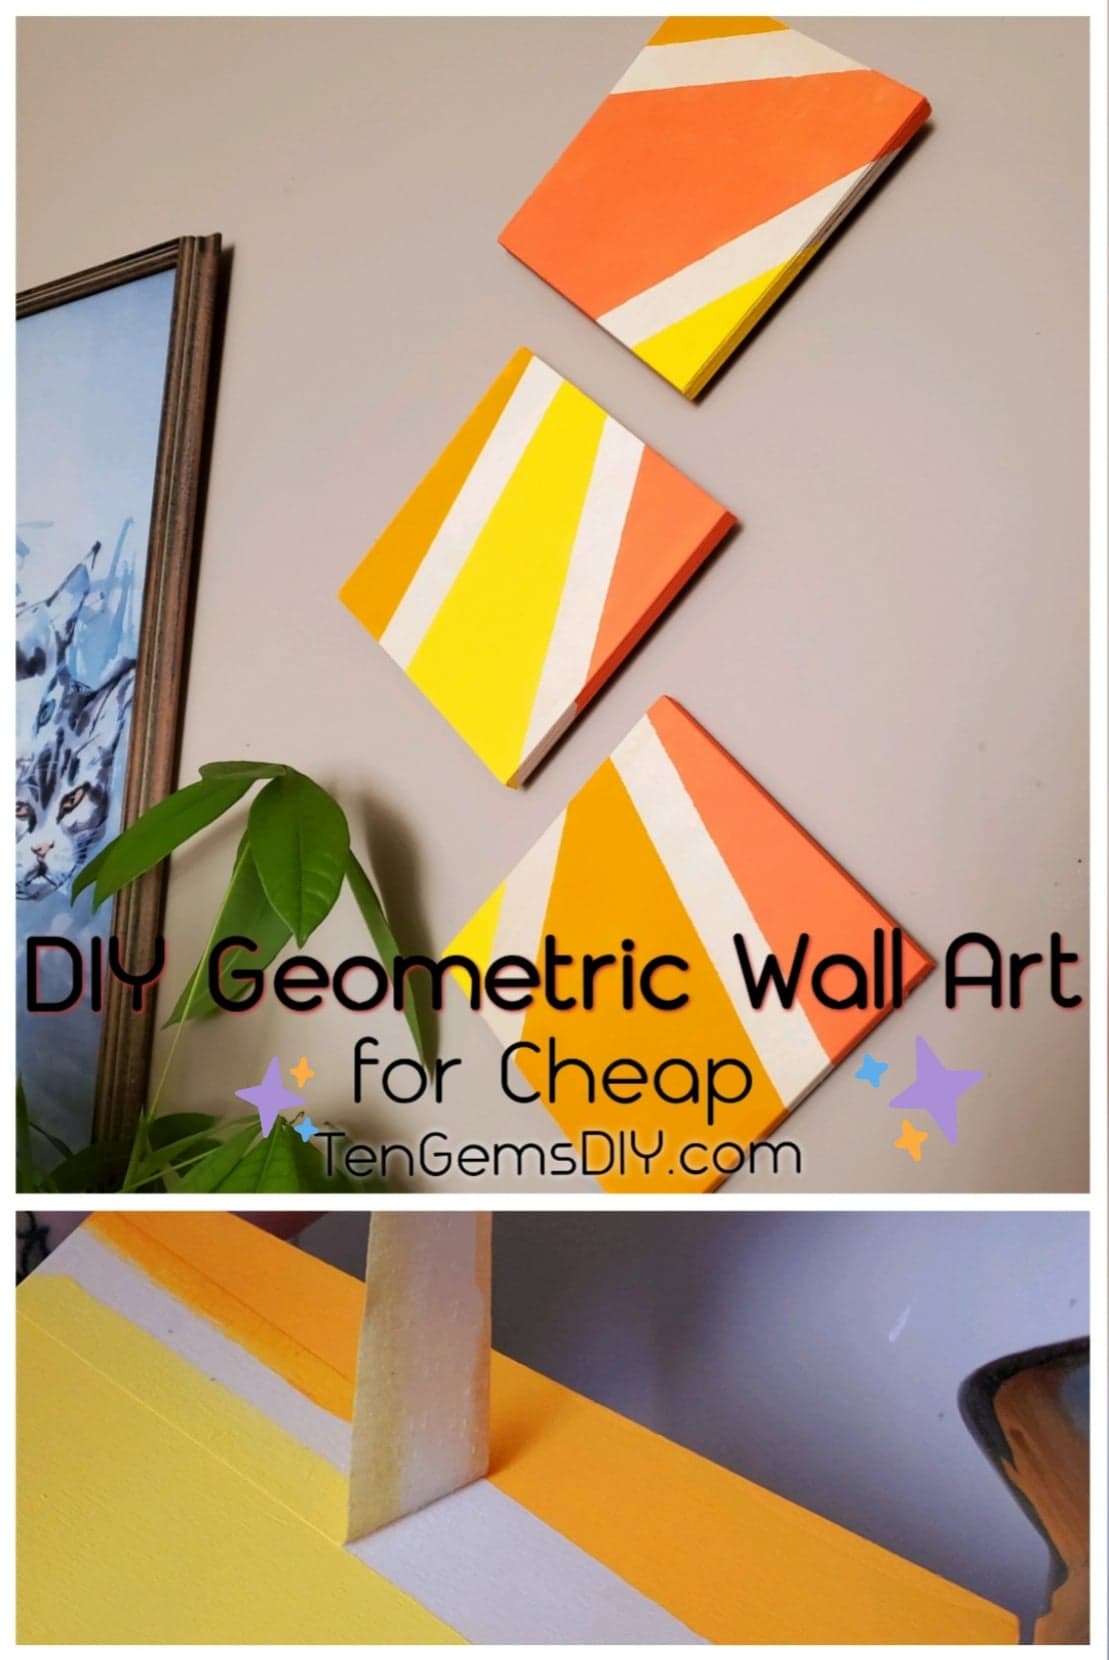

I love this project for DIY Geometric Wall Art because it can be switched up so many ways. It can be made more or less intricate, the colors can be changed, and the pattern is so customizable. You can make it more organized with parallel lines, or let them flow in different angles. Geometric is beautiful! Here is another super fun geometric project! >> https://tengemsdiy.com/?p=166
This project is so easy and budget friendly, and also leaves you feeling accomplished when it’s done. Art is an amazing thing, and yours deserves to be displayed![]()
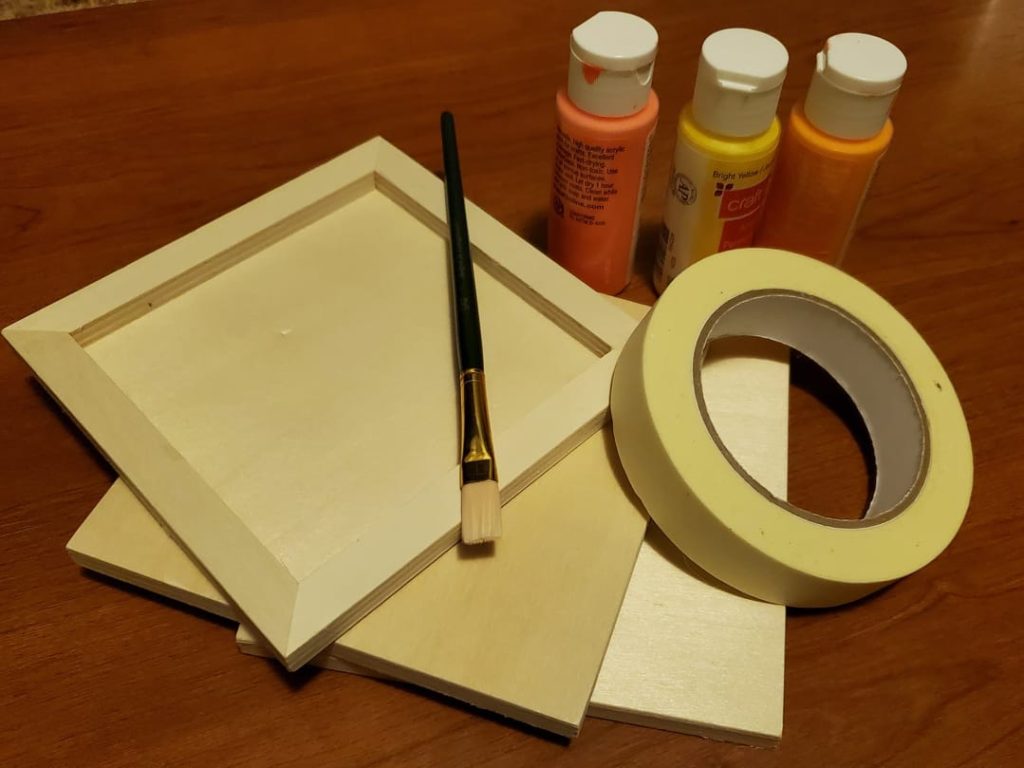
What you’ll need for your DIY Geometric Wall Art:
- Three wooden squares – I picked these up at my local craft store. Most craft stores have multiple sizes to choose from!
- Painter’s tape – mine was from the dollar store and was one inch wide.
- Acrylic paints – in any color you fancy.
- A paintbrush
Step one: Keep it clean
Like with any art project, it’s always good to get your work area set up for a potential mess. The mess factor with this activity isn’t high, but I’d recommend setting down some scrap paper just to prevent paint from getting on anything other than your wooden squares.
Step two: Making your geometric pattern
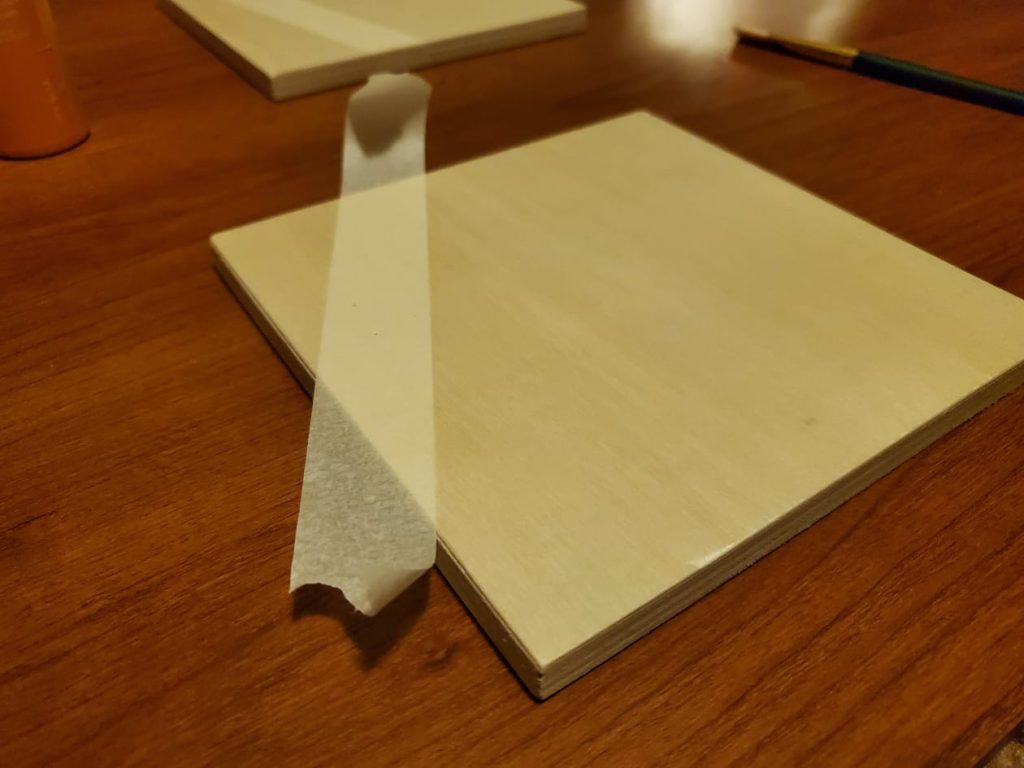
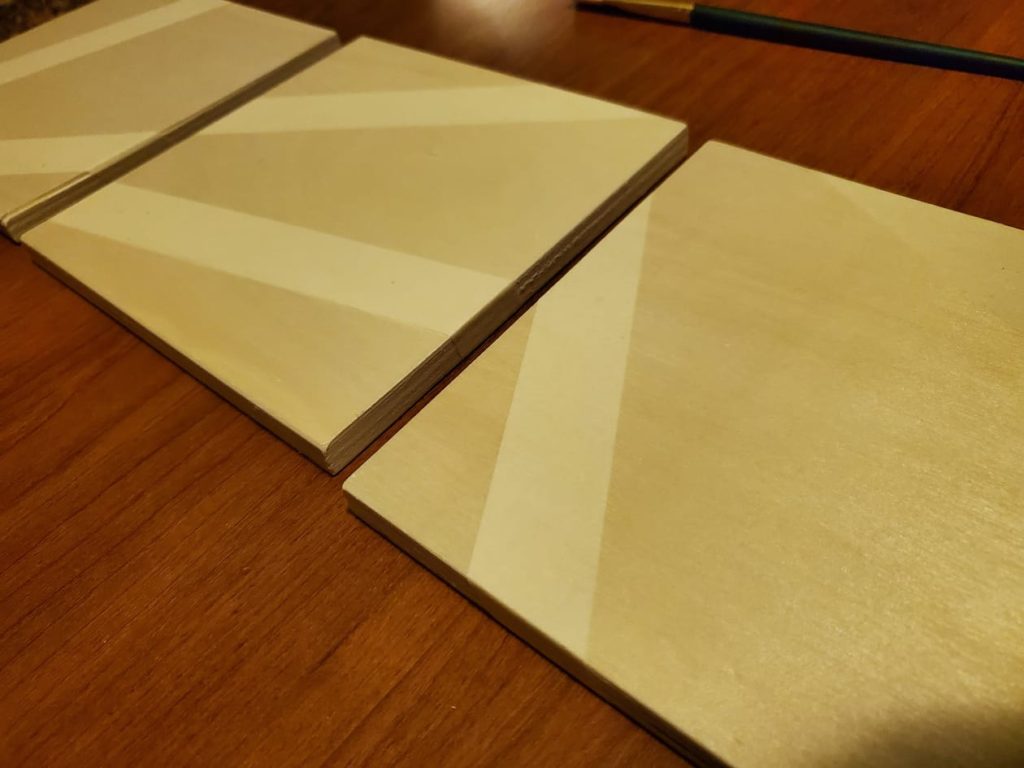
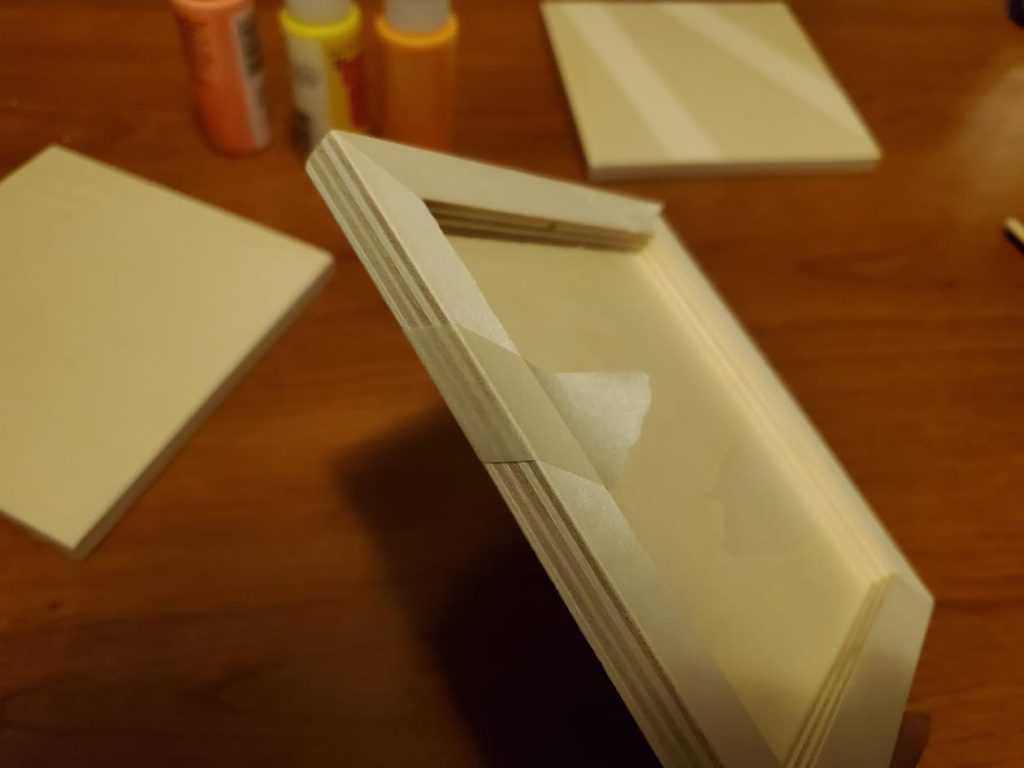
Here we’re going to decide where to put the tape. The idea with the tape is to keep the nice wood grain as part of the art. The wood grain is interesting to look at in contrast to the paints. I’ve made a simple geometric pattern with my tape. I’ve also made sure to wrap the painter’s tape over the edge all the way to the back of the wood. Make a pattern on each wooden piece. It can be the same pattern or different.
Step three: What colors will you choose?
Now that the tape is in place and we’re sure of our decisions, we’ll paint! You can see I’ve chosen three warm colors that compliment each other. The great thing about it being your project is that you get to decide what colors to choose.

Paint all the way on to the tape to make sure you have a nice, straight line when you pull up the painter’s tape. Also, make sure to paint the edges of your wood so they aren’t naked when your DIY geometric wall art is hanging up! When you’re done with your first wooden piece, lay it face up on the scrap paper to dry. Move on to paint the next piece. Let all of your geometric pieces dry.
Step four: The most satisfying part
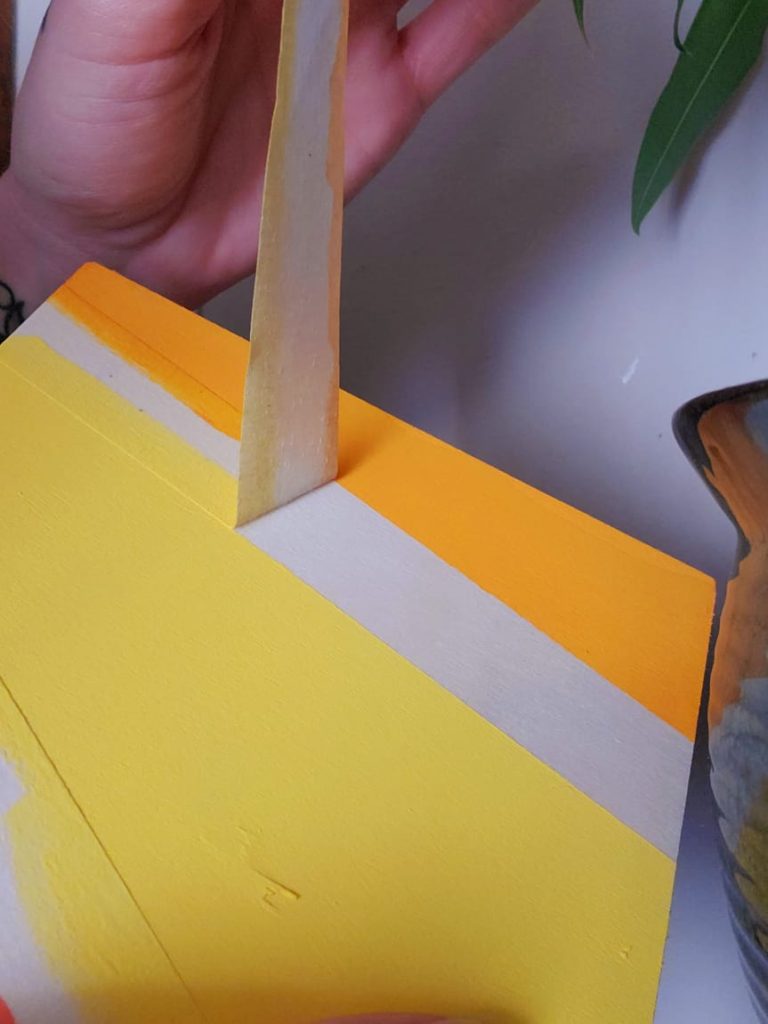
After all of your paint is done drying, you get to take the tape off. This part is sooo satisfying. Peel up the tape from the back of your art project and slowly peel it all the way off. Look at those nice lines! You did great!
Step five: Display your DIY Geometric Wall Art!
Hang those babies up! Your geometric wall art is amazing and is custom made for only a few dollars. There are no others like it!