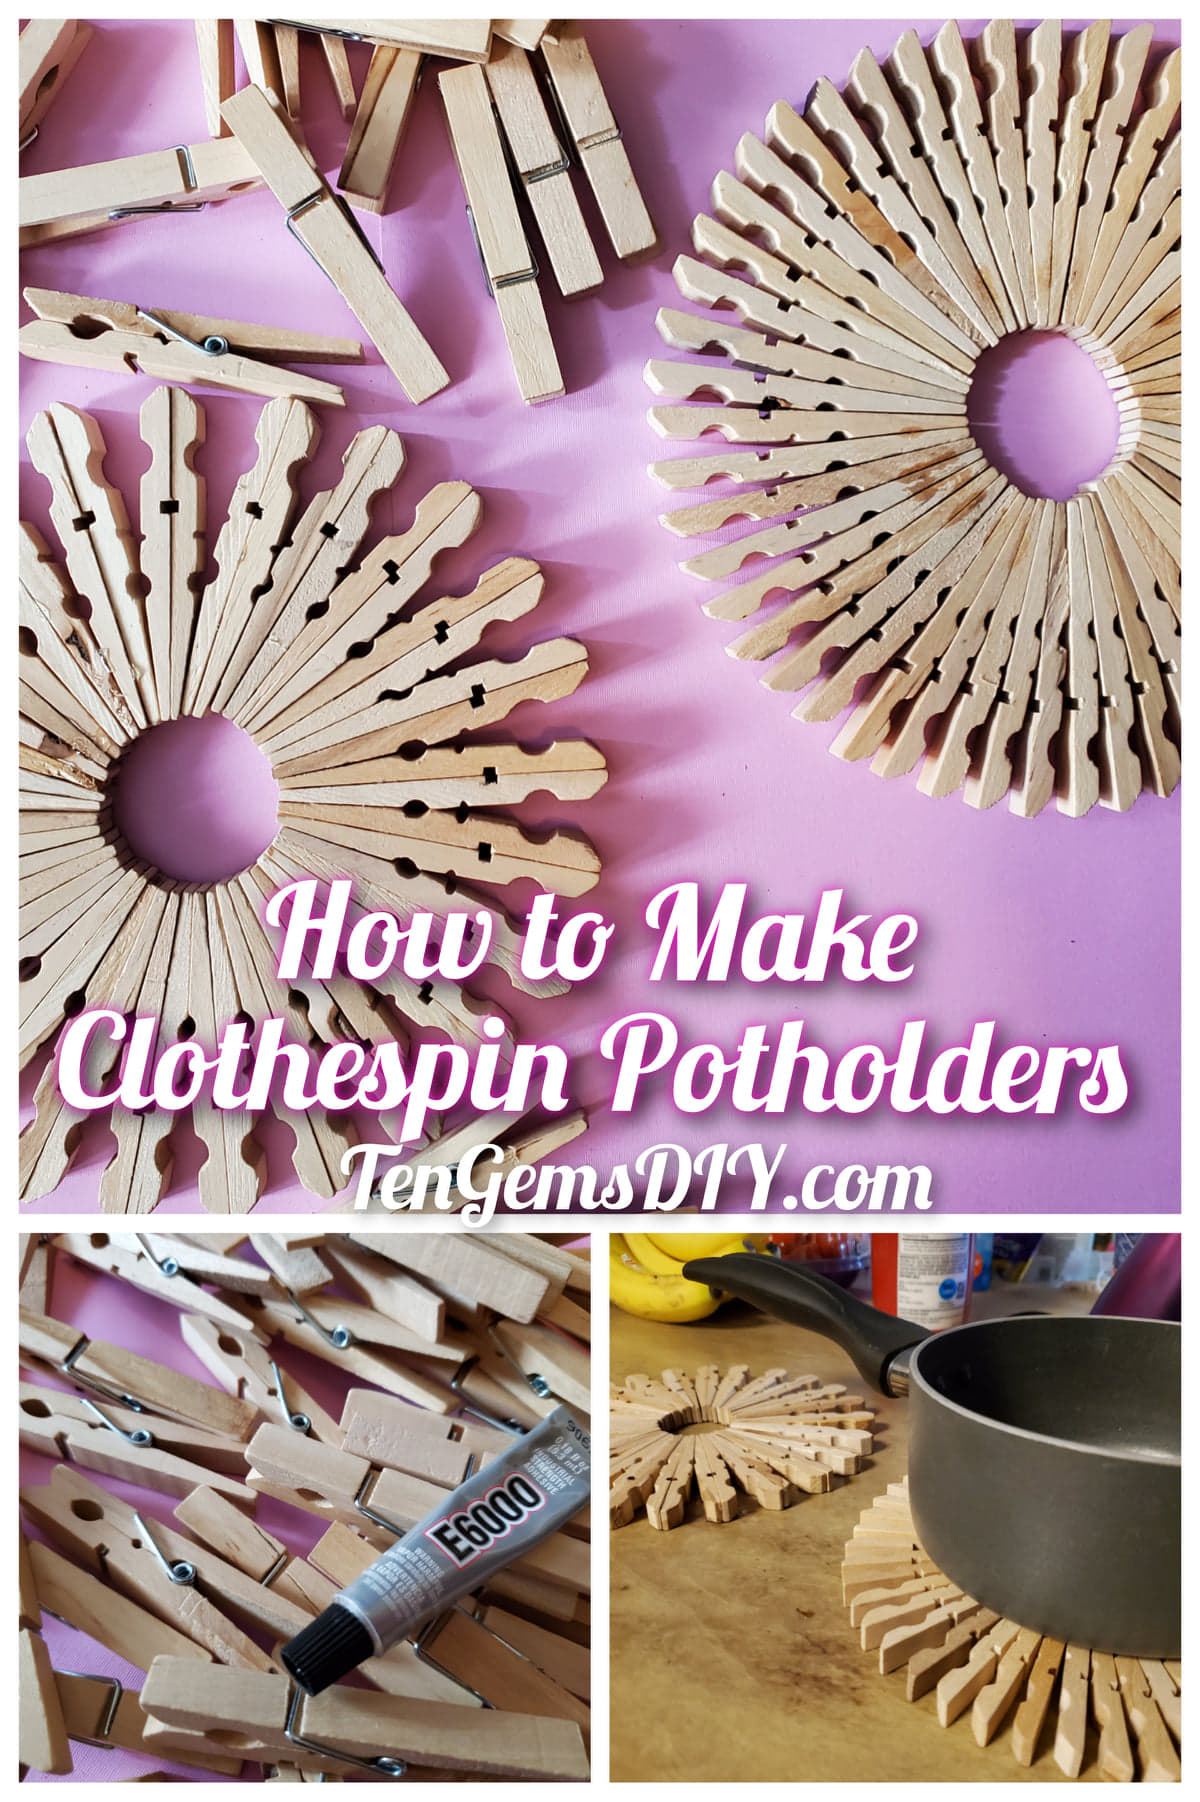
This is a super fun tutorial on how to make clothespin potholders. These are pretty simple and only use a few supplies. Even though the process of making them is simple and straightforward, they make an interesting statement when it comes to the dining table. They can also be placed under anything else for a little bit of zazz. The finished product can be used under potted plants or jars and containers as well!
If you’re feeling extra crafty after this project, try this one next for colorful painted DIY flower pots – https://tengemsdiy.com/colorful-diy-painted-flower-pots/
Or this tutorial for Personalized Painted Flower Pots – https://tengemsdiy.com/how-to-make-personalized-diy-painted-flower-pots/
Disclosure: TenGemsDIY is a DIY and craft blog. Some of our posts contain affiliate links for products we have tried and recommend. While clicking the links will not cost any money, we may receive a commission for items purchased, which helps keep our website up and running. Here is the privacy policy for more information: https://tengemsdiy.com/?page_id=3
Here are the simple supplies you’ll need for how to make clothespin potholders and where to find them:
- Clothespins – https://amzn.to/3v7PslY
- Super glue – I used my trusty E6000 super glue – https://amzn.to/3hEFCEf

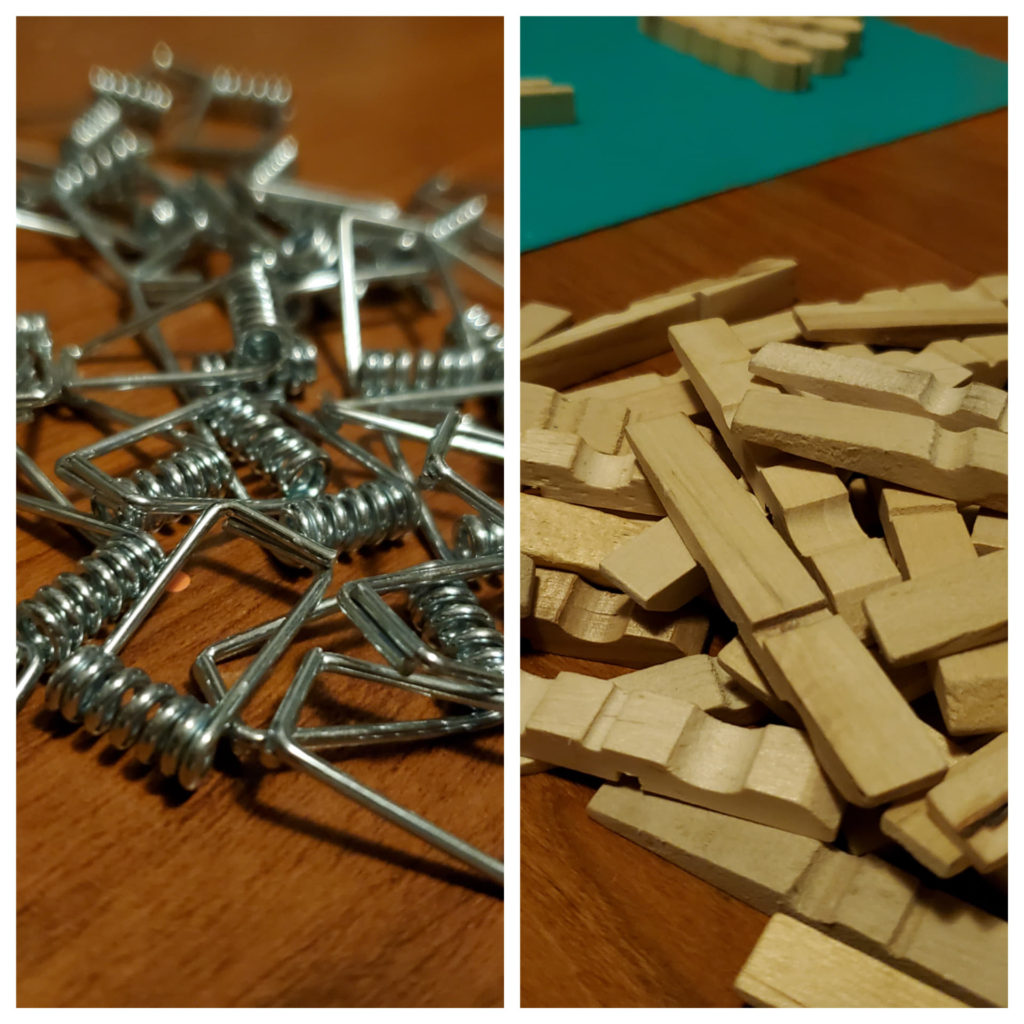
Step one: Disassembling the clothespins
This is the part where you’ll get rid of the metal piece that connects the clothespins. Carefully separate the two wooden pieces and discard the metal spring. It took 50 clothespins to make two potholders, but the amount could vary if you use a different brand of clothespin.
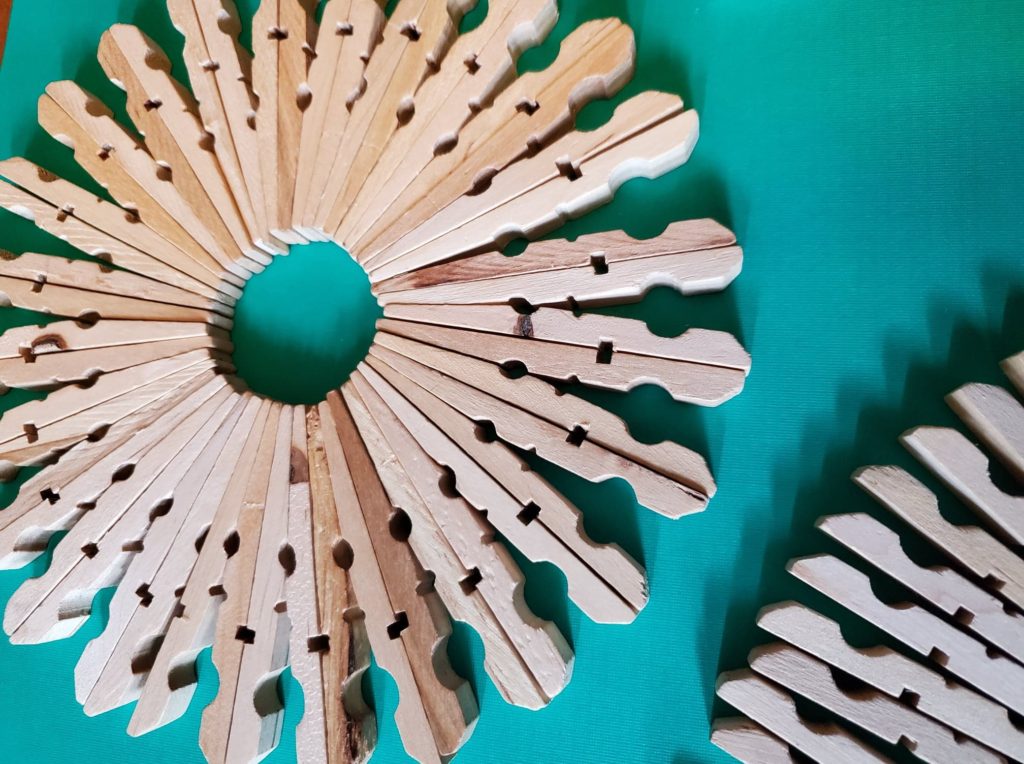
Step two: Laying out the trial potholders
Start out here by first laying down the clothespins without gluing them. This will give you an idea of how big the potholder should be and if you’ll have enough clothespins.
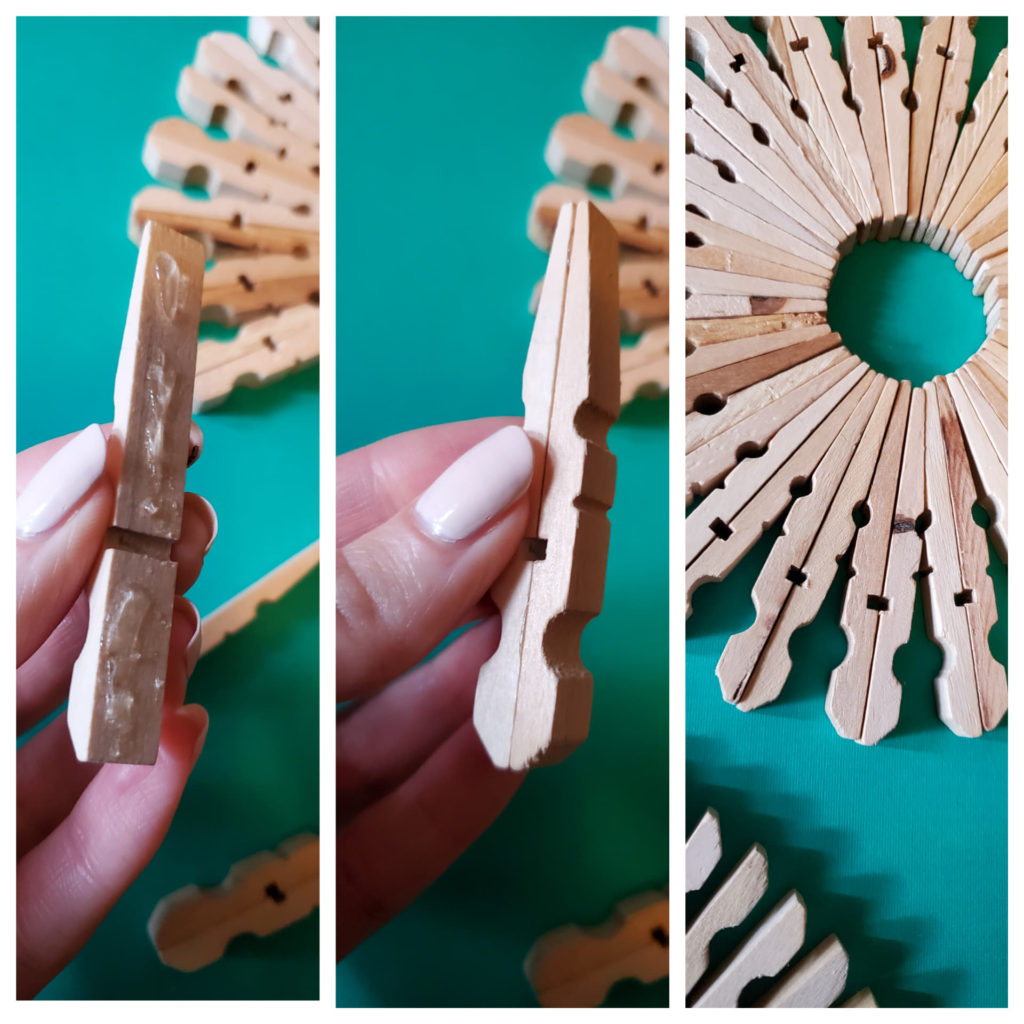
For this first potholder, use your super glue to glue two of the wooden pieces together on their flattest side. Glue each pair together and let them dry. Then glue each of those pairs together on the smaller flat side to form a circle. It is easiest to lay them down as you go and add pieces with glue on them instead of trying to hold a bunch at a time.
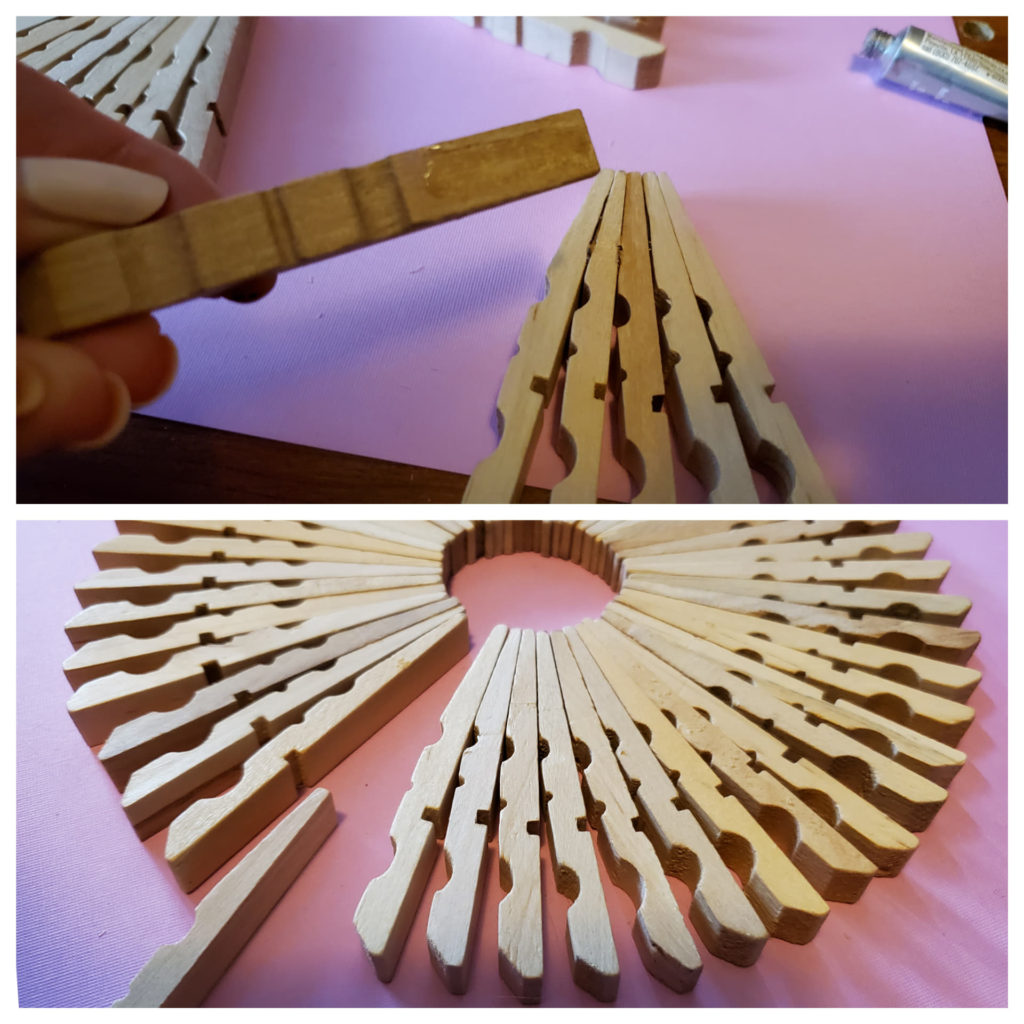
The second potholder is a little different. here you’ll glue the smaller flat side of the wood piece. Lay them down and add glued pieces as you go until a circle is formed.
Step three: The hard part after you’ve learned How to Make Clothespin Potholders!
The worst part is waiting for the glue to dry! After the glue is set, show off your super sweet new pot holders to your dinner guests. Or add them as an accent to your houseplant collection!

We are a participant in the Amazon Services LLC Associates Program, and affiliate advertising program designed to provide a means for us to earn fees by linking to Amazon.com and affiliated sites.