This is a unique one that can be changed up to your own preferences. The supplies are easy to gather and it’s fun from start to finish.
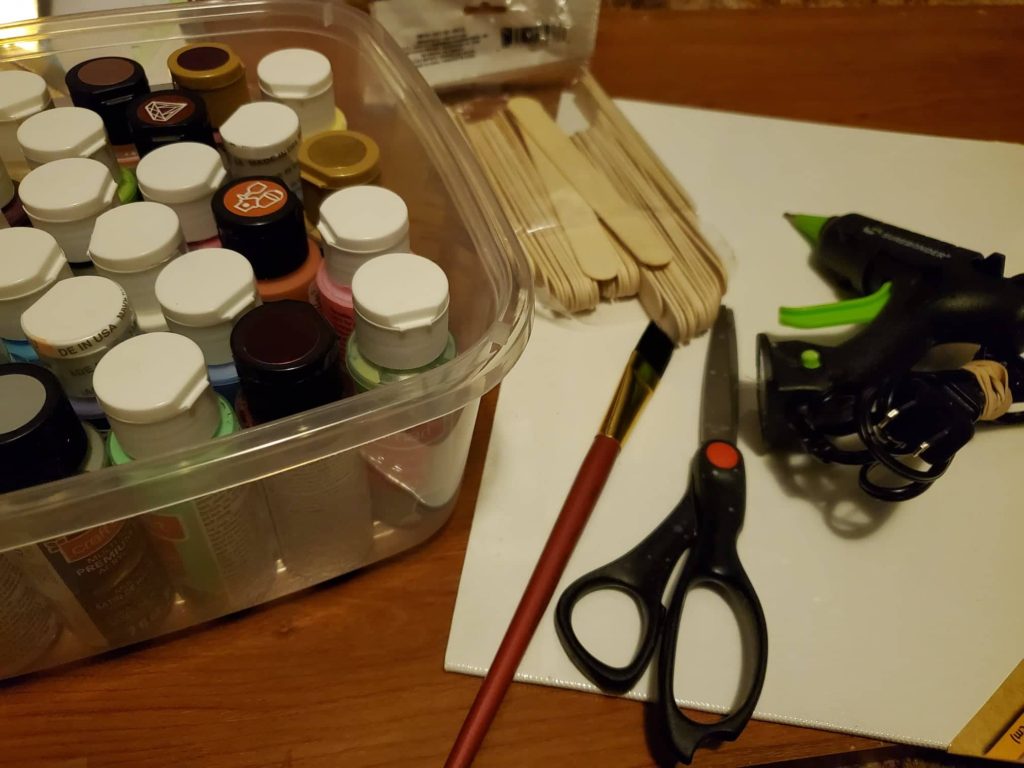
What you’ll need:
- Paint colors of your choice – I used acrylic because it’s almost all purpose and adheres well to wood.
- A canvas or thin wood board – cardboard would even work. It needs to be sturdy enough to hold some weight. I found my canvas at the dollar store along with my popsicle sticks.
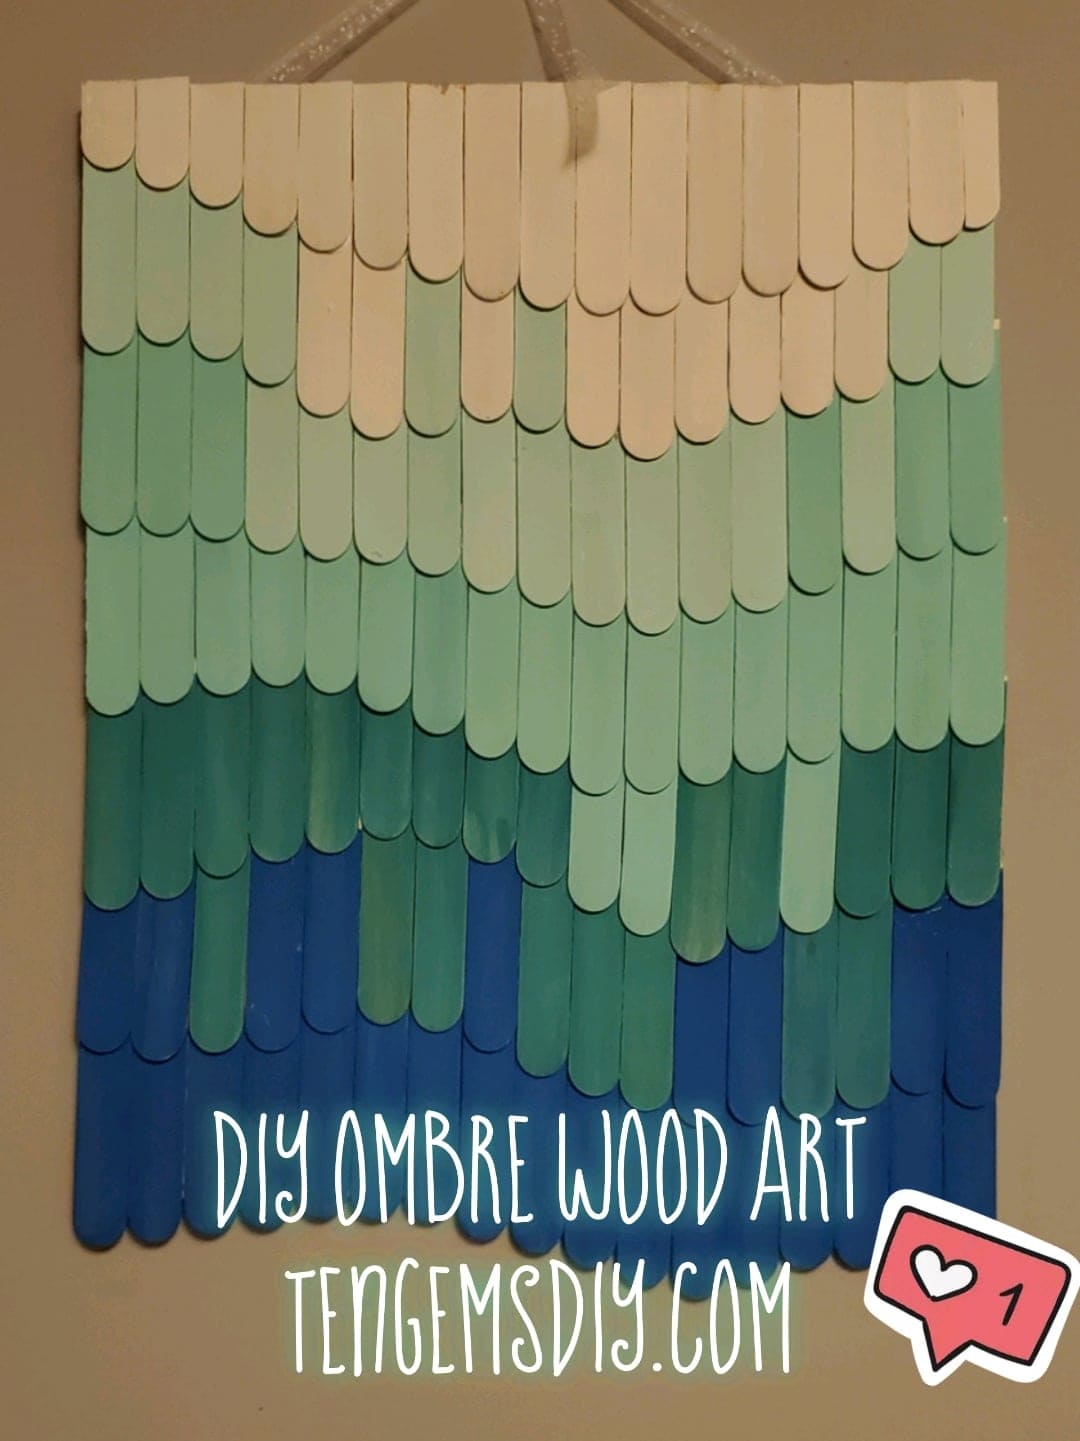
- Wide popsicle sticks – The amount you will need will vary. My canvas is 11in x 14in. After the project was completed, I used a total of 60 whole popsicle sticks that had been cut in half (119 halves).
- Hot glue gun and plenty of glue sticks
- A pencil
Step one:
This step will take a little bit of muscle and a good pair of scissors. Also, I won’t lie; my hand started to cramp a tiny bit toward the end! If you need to, be sure and give your hand a rest. Carefully cut your popsicle sticks in half. I used about 60 whole sticks and ended up needing 119 halves. If your canvas is smaller, you will probably need less sticks. Also, I used the wide popsicle sticks. They are a little less than an inch wide.

Step three:
I laid my popsicle sticks out on my canvas to first make sure I had enough. This also allowed me to see how I wanted them arranged before I committed to gluing them.
Before you start your next step, you may want to set down some scrap paper so you can allow your freshly painted popsicle sticks to dry without it getting too messy.

Step four:
You’ve picked out your nice colors, you’ve set out your scrap paper and your popsicle sticks are ready to go. Let’s get this thing rolling. I used a wide paintbrush so I could paint my sticks with one brush stroke. I did make sure to get the sides of the sticks just to keep everything neat and pretty. Some of your colors may need two coats. Luckily acrylic paint dries pretty quick, so you won’t have to wait too long to apply the second coat or to move on to the next step!

Step five:
After you’ve let your paint dry, you can totally start with the hot glue. Starting at the bottom of your canvas, glue your first row of popsicle sticks down. I started with my darkest color first for this ombre art.
For the second row, and moving up, it’s easiest to hold your stick, like in the picture, and add a little bit of glue to both ends. Then while you’re still holding it the same way, you can easily place it where you want it to go. Take your time and try to make sure your popsicle sticks are snug side by side.

Stop before you get to the last layer for step six.
Step six:
Once you’re almost to the last layer, wait for a minute. Without glue, set your popsicle sticks down as you’d like them to be arranged. Here I’ve marked with my pencil where I’d like them all to be cut. If I didn’t cut them, they’d be too long and the sticks wouldn’t look nice and flush. Then you can lift yours up and cut them to the length you’d like. Glue the top layer down the same as the other layers, a little glue on both sides and laid down so they’re even with the top of your canvas,

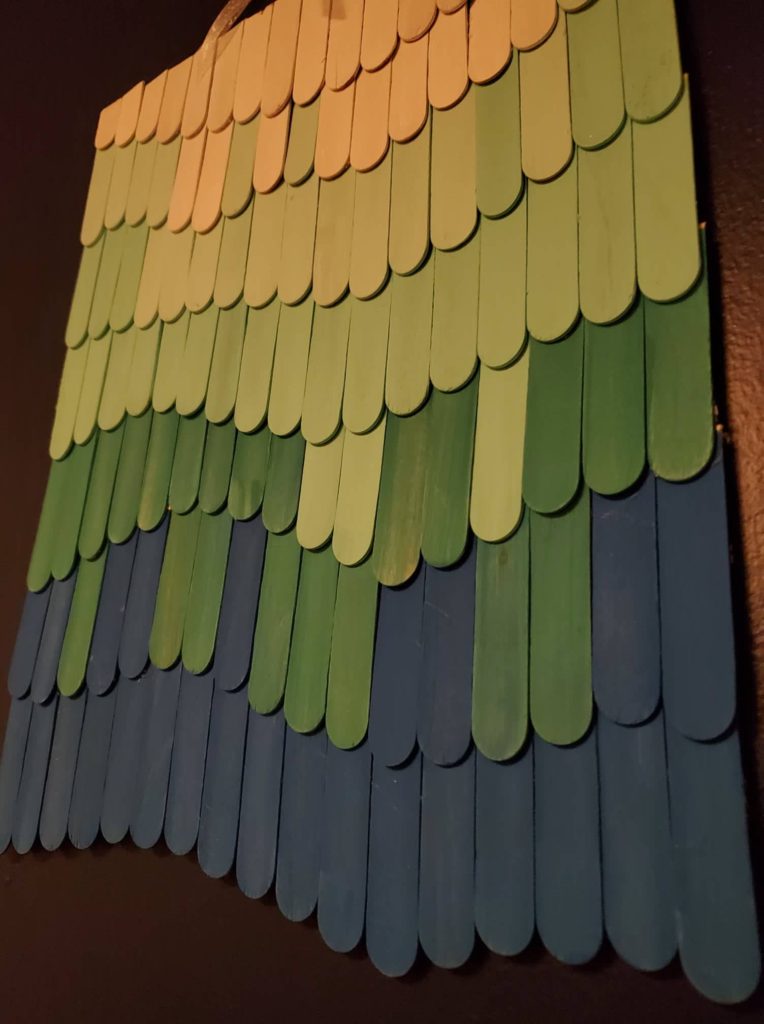
Your art is amazing! Hang it and let the world love it!