Disclosure: TenGemsDIY is a DIY and craft blog. Some of our posts contain affiliate links for products we have tried and recommend. While clicking the links will not cost any money, we may receive a commission for items purchased, which helps keep our website ad free. Here is the privacy policy for more information: https://tengemsdiy.com/?page_id=3
Here is an easy to make color matching game for kids! This tutorial takes few supplies and minimal time and effort, which might be the best part. Anyone who spends time with kids knows it can be difficult to find fun and educational activities that are also low cost and low commitment. Here’s one you can do at home! After you’re done with this color activity, check out this tutorial for pizza counting game! >> https://tengemsdiy.com/how-to-make-a-pizza-counting-game-for-kids/
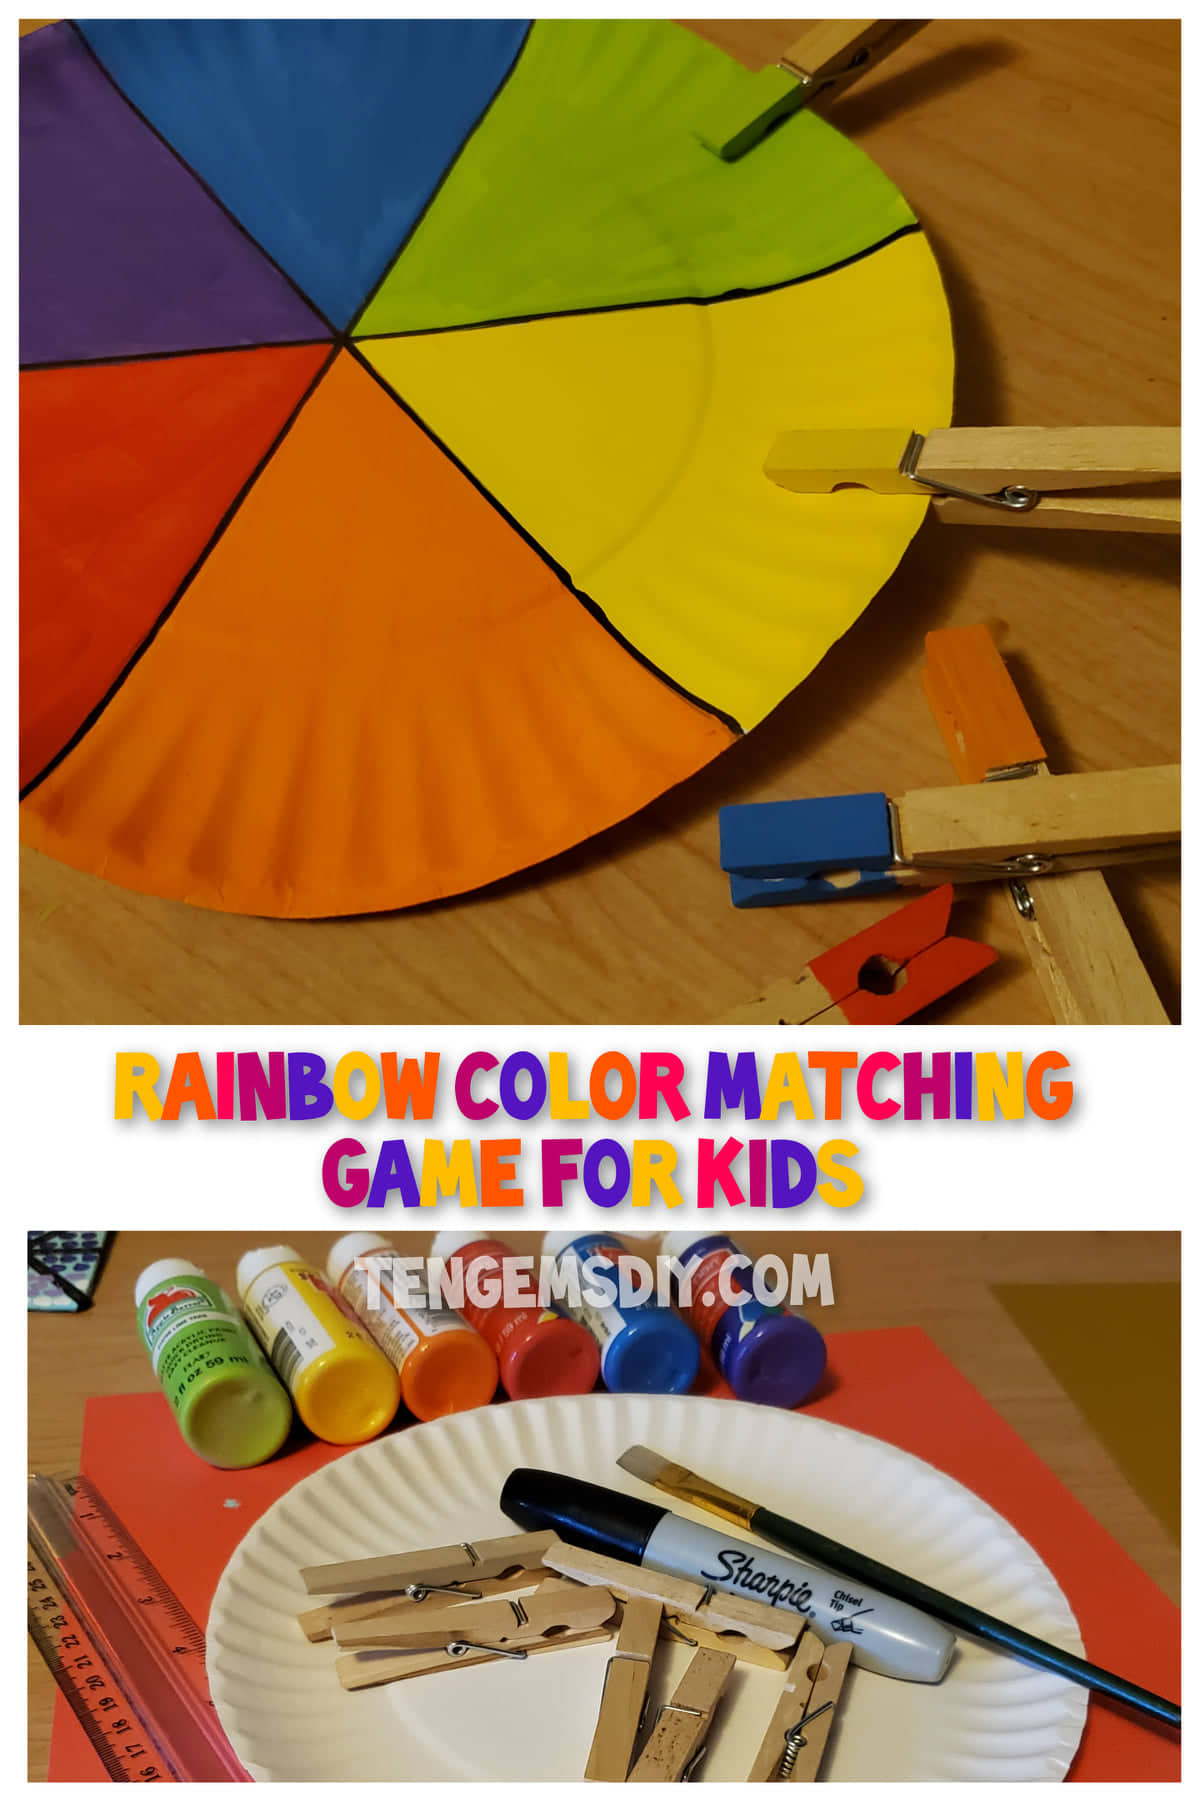
I love this color matching game for kids because it can be an educational tool in quite a few ways. Use it to talk to kids about primary colors and the secondary colors that come after you’ve mixed your primary colors.
Your primary colors are red, yellow and blue. They are primary colors because when they are mixed, they make up the other colors of the rainbow. No other colors can be mixed to make primary colors.
Secondary colors are named because they come second and are made as a result of mixing primary colors. Secondary colors are green, orange and purple!
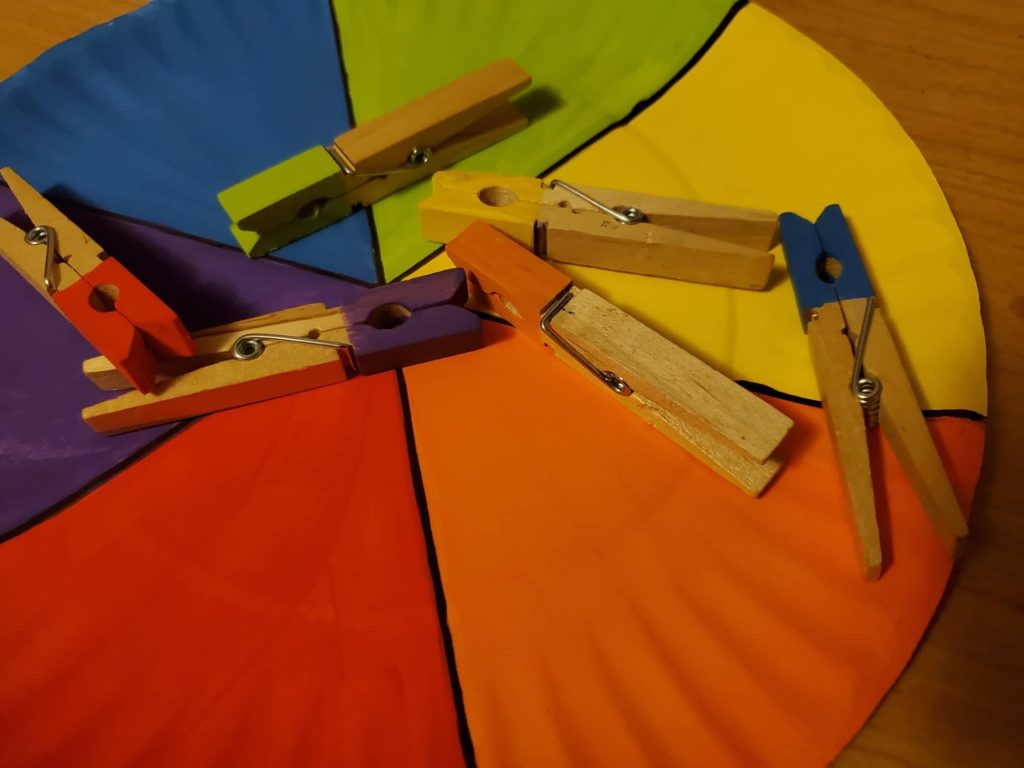
Let your little ones have fun matching the colors and learn as they go. Color stimulates little minds and helps create an early avenue for creativity!
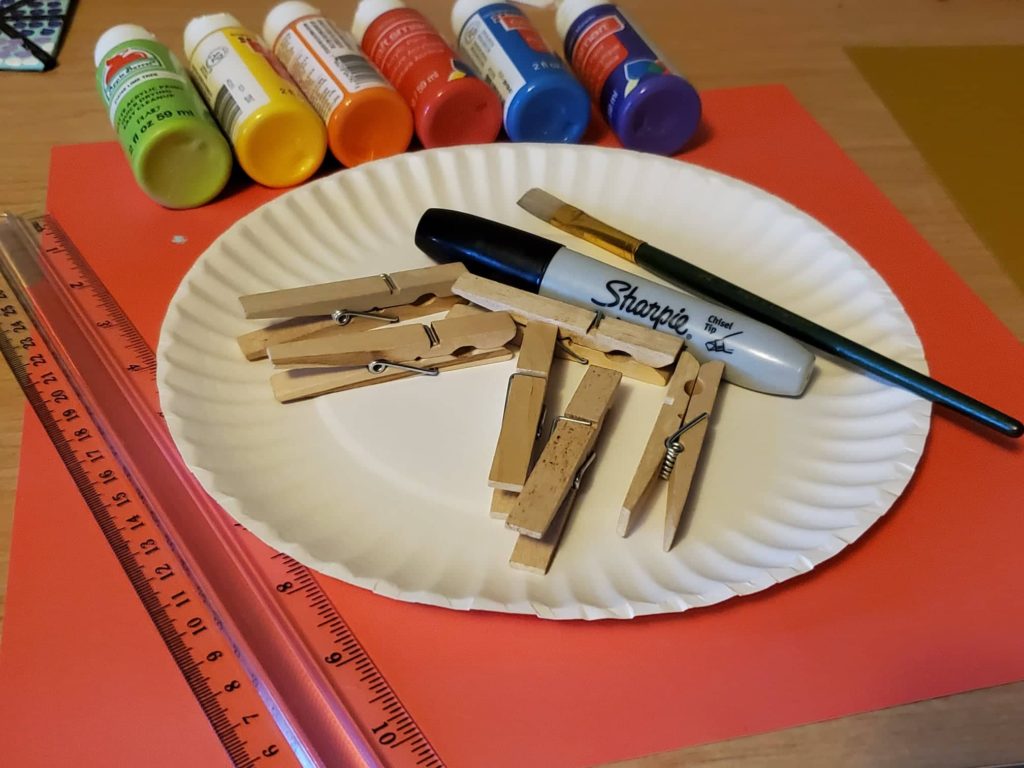
Supplies you’ll need for your color matching game for kids, and where to easily find them:
- Paper plates – https://amzn.to/3pWMy1v
- Clothespins – https://amzn.to/2TEq2yw
- Acrylic paints – https://amzn.to/3wwqsVU
- Ruler – https://amzn.to/3wwqI7k
- Black marker – https://amzn.to/3vtXxAP
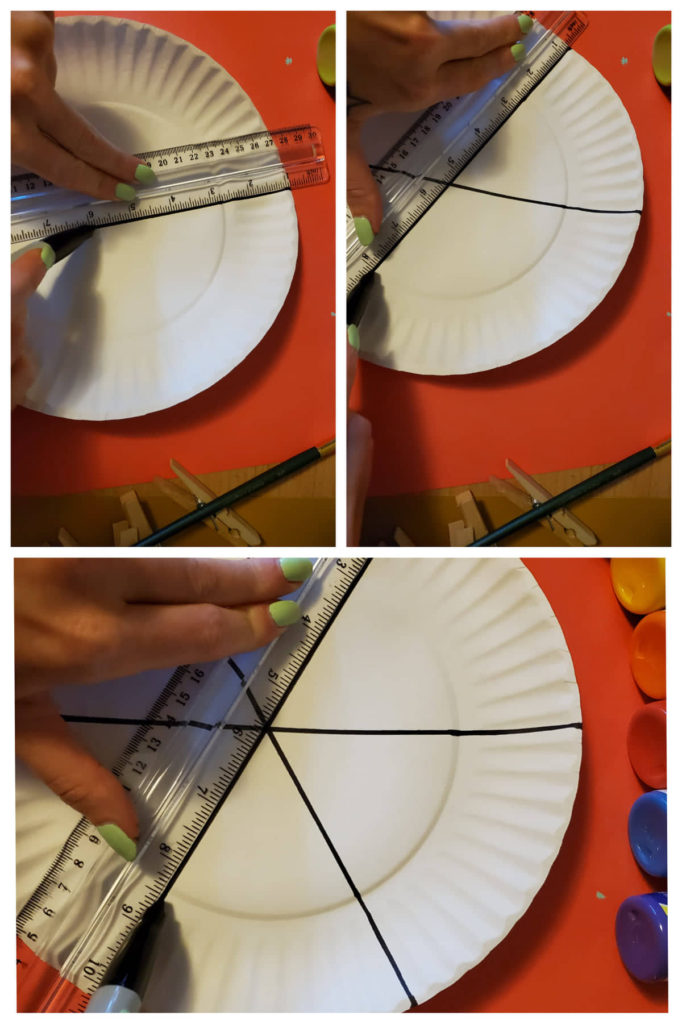
Step one: Making space for your colors
So here you will create six spaces for your six colors of the rainbow. First, using your ruler to help guide you in making a straight line, draw a line down the middle of the paper plate with your black marker. Turn your ruler a little bit and make your second line at an angle. Then make your third line to complete your six spaces. Use the picture here for reference.
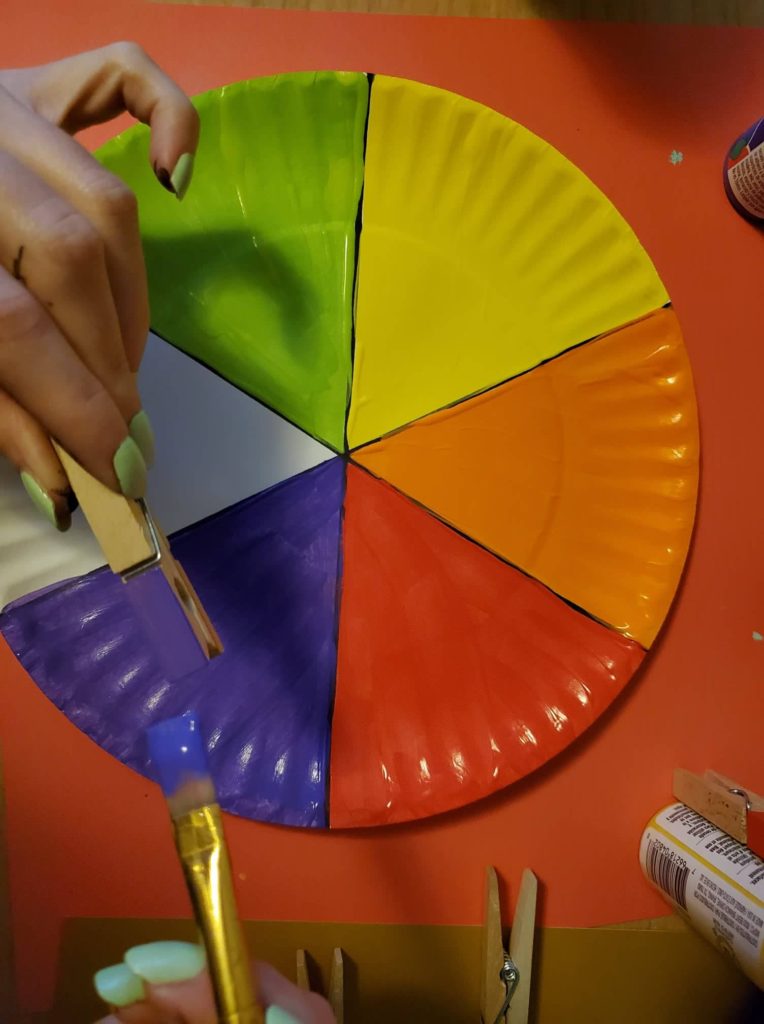
Step two: Getting colorful!
Use your paints and paintbrush to make your color wheel look fabulous. The colors will go in the order of red, orange, yellow, green, blue, and purple! As you can see here, I put just a little bit of paint on the space I wanted to paint, and then I painted it in, being careful not to go over my black line. With each space I painted, I painted the end of one clothespin and set the clothespin aside to dry. Then clean your paintbrush and move on to the next color space and its clothespin until you have filled your rainbow color wheel. Let the little rainbow dry.

Step three: An optional extra step
After our color wheel was dry, I used the black marker to retrace over the lines I had previously made. This just made it look a little more tidy, but is definitely optional.
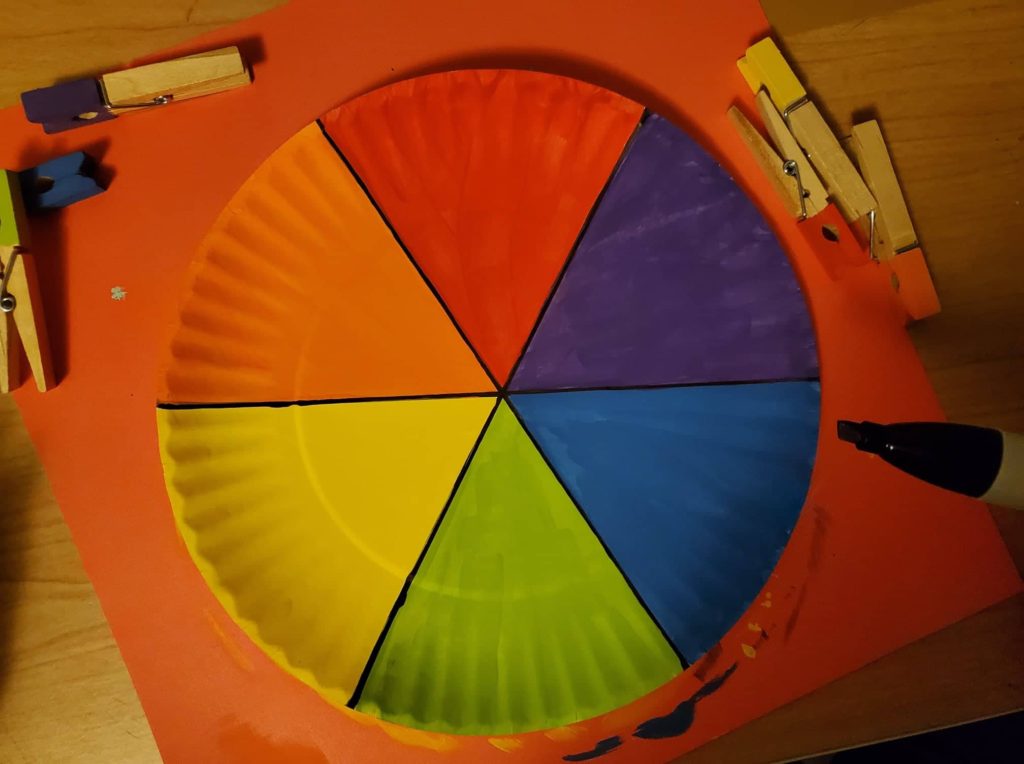
Work with your young one to talk about colors. Match the colored clothespins to their corresponding space on the color wheel. Say the names of the colors aloud together as you work through to the end. For kids, art and learning are fun and best done together with the help of a trusted adult.
We are a participant in the Amazon Services LLC Associates Program, and affiliate advertising program designed to provide a means for us to earn fees by linking to Amazon.com and affiliated sites.