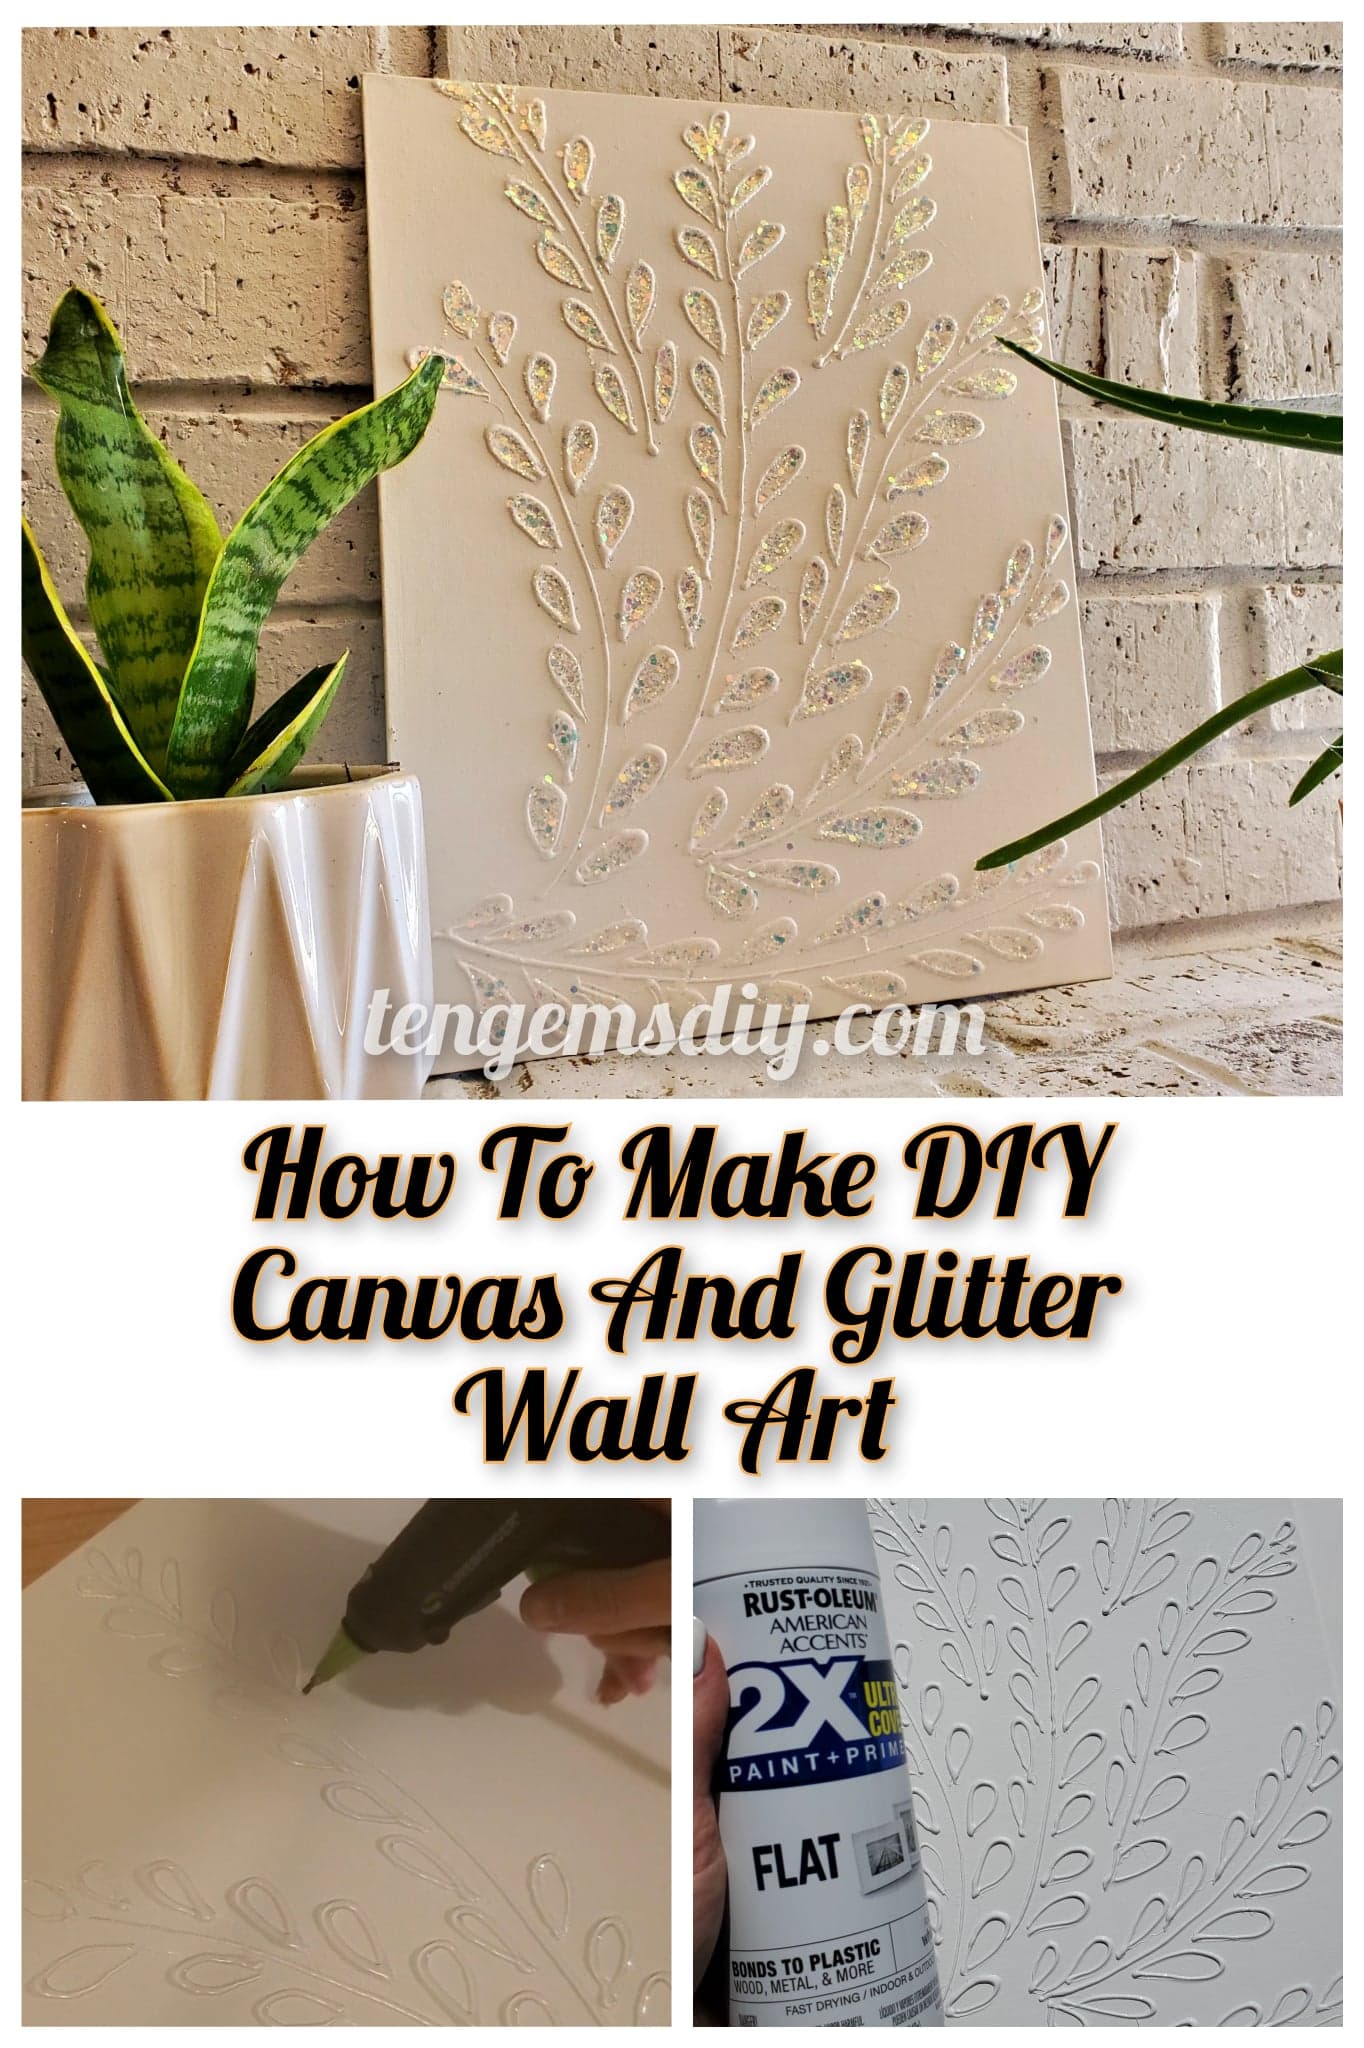
You have all these extra canvases laying around, and might not know exactly what you want to do with them! Here is some inspirational DIY canvas and glitter wall art! You see these amazing, but also expensive canvas glitter art pieces all over the internet; you could definitely make your own with just a little bit of time and effort. Yours will be one of a kind, unique and super elegant, no matter what design you’ve got in mind.
If you’re looking for other wall art ideas, check these out after you’re done with this tutorial:
- How to make a giant beaded lizard – https://tengemsdiy.com/how-to-make-a-giant-beaded-lizard/
- How to make a neon sign painting – https://tengemsdiy.com/how-to-make-a-neon-sign-painting/
- How to make DIY retro starburst wall art – https://tengemsdiy.com/how-to-make-diy-retro-starburst-wall-art/
- How to make Geometric wall art – https://tengemsdiy.com/how-to-make-geometric-wall-art/
- How to make an easy DIY greenery wreath – https://tengemsdiy.com/how-to-make-an-easy-diy-greenery-wreath/
TenGemsDIY is a DIY and craft blog. Some of our posts contain affiliate links for products we have tried and recommend. While clicking the links will not cost any money, we may receive a commission for items purchased, which helps keep our website up and running. Here is the privacy policy for more information: https://tengemsdiy.com/?page_id=3
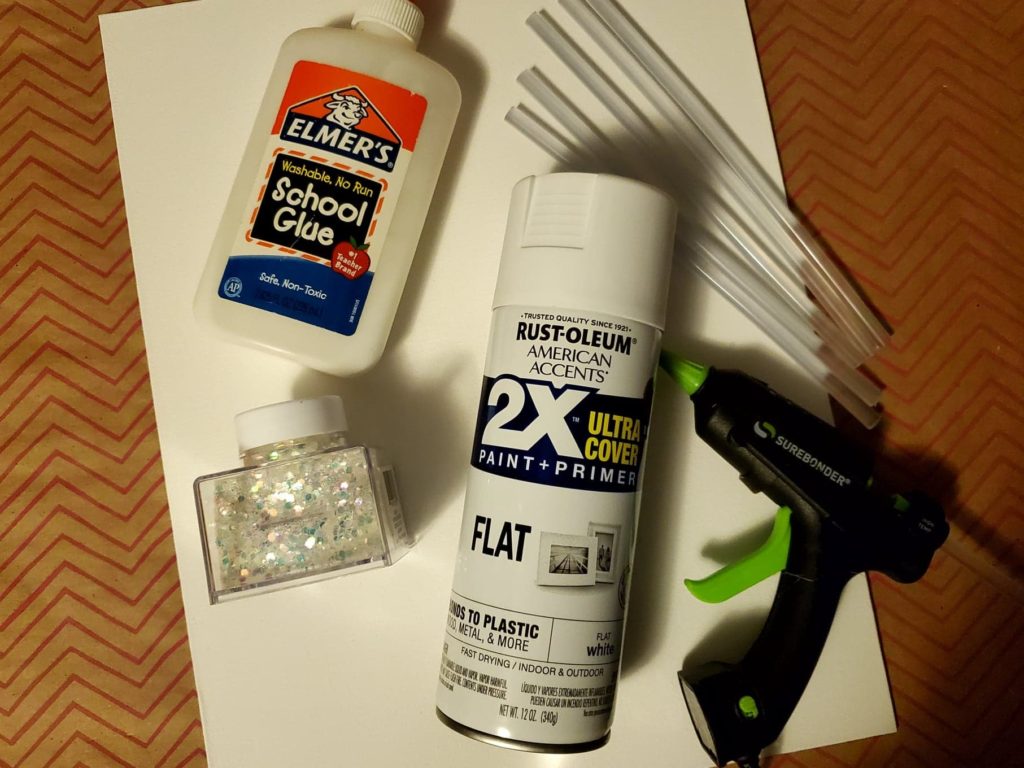
Supplies you’ll need for your DIY canvas and glitter wall art and where to easily find them:
- Canvases – This one is 11″x14″, but you can use any size you want! – https://amzn.to/3Je8cXS
- Hot glue gun – https://amzn.to/37s3MyF
- Extra hot glue sticks – https://amzn.to/3t76vpo
- White spray paint – https://amzn.to/3t7H3QM
- School glue – https://amzn.to/3CIGGzs
- Chunky iridescent glitter – https://amzn.to/3i11skh
Step one: Choosing your design
Think of an image you’d like to see on your canvas. Maybe something a little simple, not too complex as to take away from the glitter later on. If you need to, sketch out a rough draft on a spare piece of paper so you can be sure that’s the image you want. You can also lightly sketch your design on to your canvas so it’ll be easier to glue over eventually.
Once you’re sure of your image, let your hot glue gun warm up. For this craft, the extra long hot glue sticks helped a lot so I didn’t run out of glue. These are 10″ long glue sticks.
Step two: Drawing out the image for your DIY canvas and glitter wall art
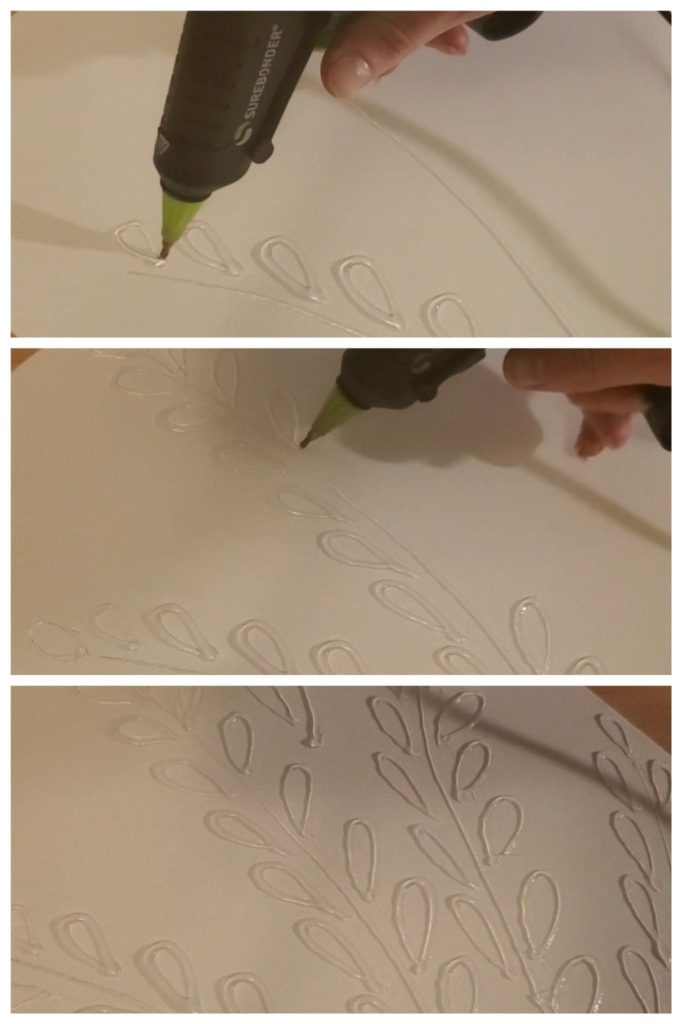
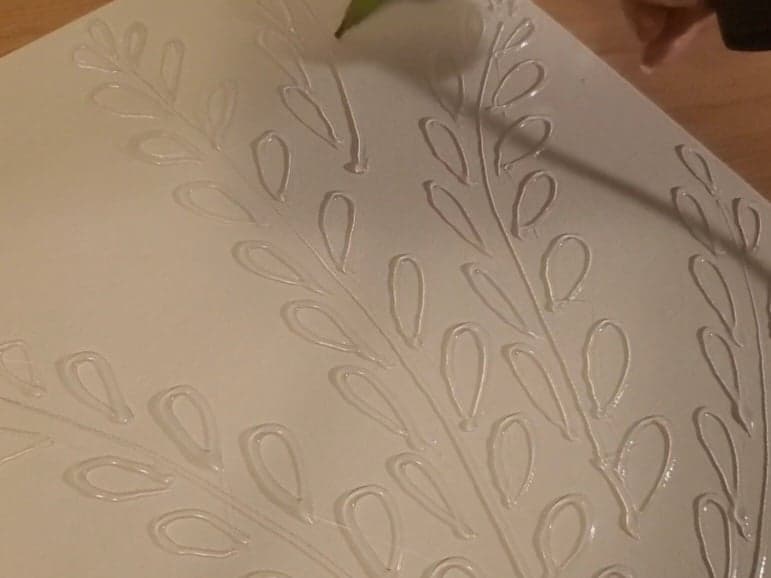
After your glue gun is ready to go and you know what image you’re going to do for your wall art, start using your glue gun to trace or draw out your image. As it dries, the hot glue is creating a 3-D sketch of your art! Take your time with your art. There is no rush. Let the hot glue dry for a little while.
Step three: Creating one solid color with your spray paint
We want to create a solid base color for your DIY canvas and glitter wall art. This will make the hardened glue so it is the same color as the canvas and not clear anymore. White is always a great and simple choice. With my white spray paint ready, I sat up a work area outside.
Before I began, I laid down an old poster board between my artwork and the ground. I didn’t want to get white paint everywhere. Lay your canvas down and in a side to side motion, start spray painting over your canvas. Paint in even, light layers.
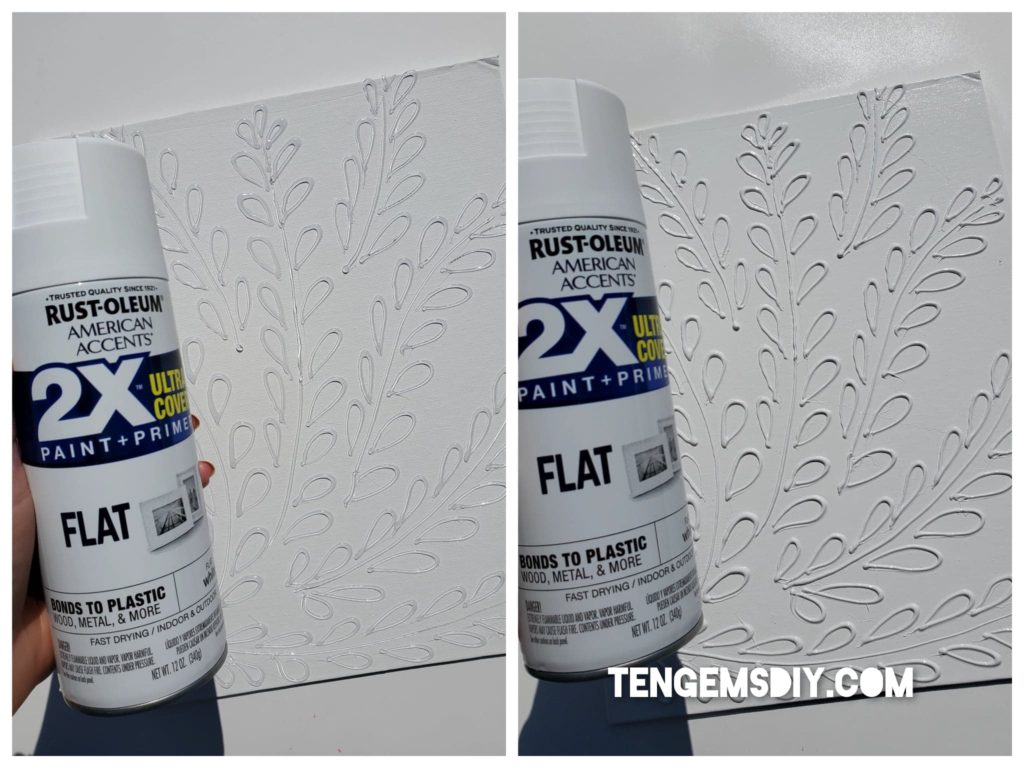
In the photo above, you can see the difference between the before and after photos. The white paint makes your glued lines really look 3-D. After you’ve completely covered your canvas in paint, let it sit and dry well for a couple of hours. Again, you can find all of the materials, including the spray paint I’ve used, in the supply list above.
Step four: Okay, are you ready for the glitter???
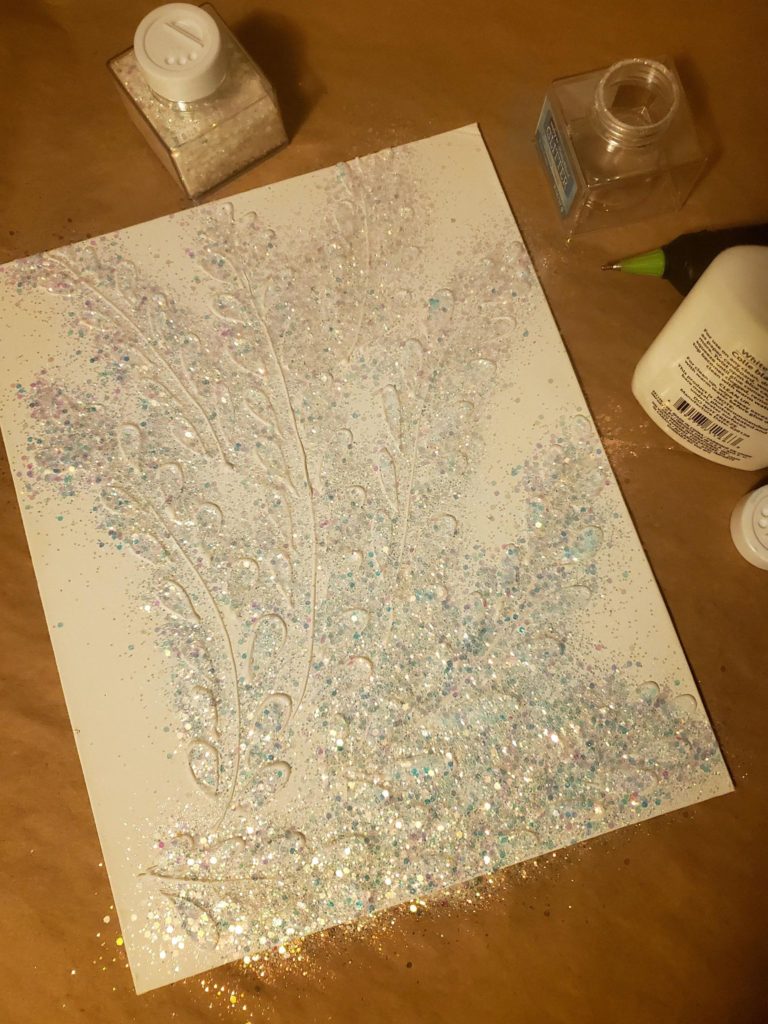
Set up your area before you start with the glitter to help minimize the glitter mess lol. I set down a large piece of scrap paper on top of my work area to catch the extra glitter. Get your school glue ready here.
Wherever you want glitter to be, put school glue down in that spot. For my DIY canvas and glitter wall art, I put glue in all of the leaves so the glitter would stick in that specific spot. I did the leaves of one or two branches at a time, so the school glue wouldn’t have time to dry at all before I put glitter on top of it. Chunky iridescent white glitter works best for this project, as it catches the light really well.

Working in sections, use your school glue in the places you want, and sprinkle glitter on top. Use as much glitter as you need in order to feel satisfied! Allow your DIY canvas and glitter wall art to rest and dry over night.
Step five: Revealing your DIY canvas and glitter wall art
If you haven’t yet, set down some scrap newspaper or something under your glitter covered artwork. Slowly tilt the dried canvas so all of the extra glitter is able to fall off and collect on the scrap paper. Gently tap your canvas on the table a few times to get the glitter off that needs a little extra convincing. You can use your scrap paper to pour your excess glitter back in to its original container.
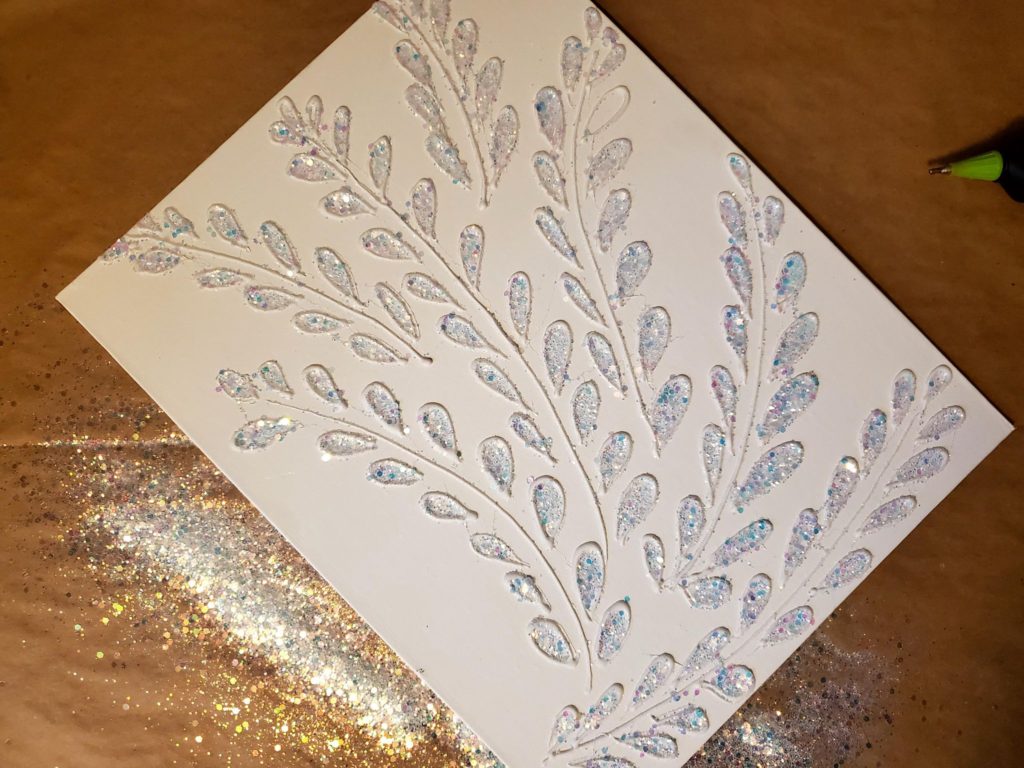
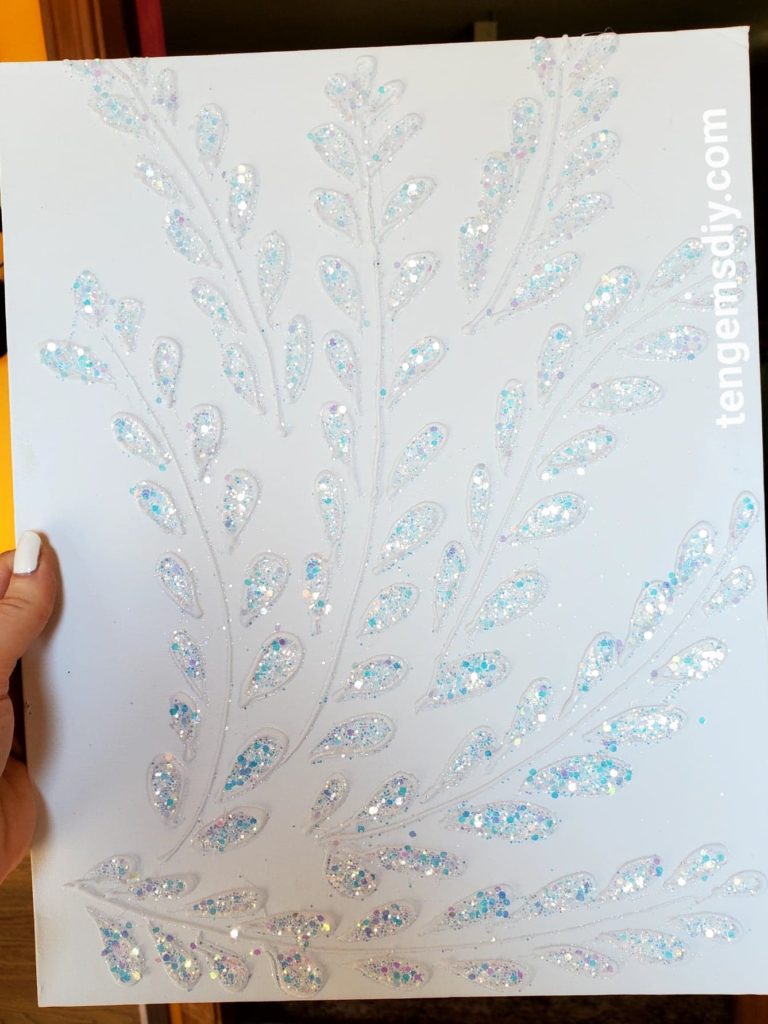
There you have it though! look at your beautiful DIY canvas and glitter wall art! All you gotta do now is find the perfect place to put it so that everyone can see it!
We are a participant in the Amazon Services LLC Associates Program, and affiliate advertising program designed to provide a means for us to earn fees by linking to Amazon.com and affiliated sites.
