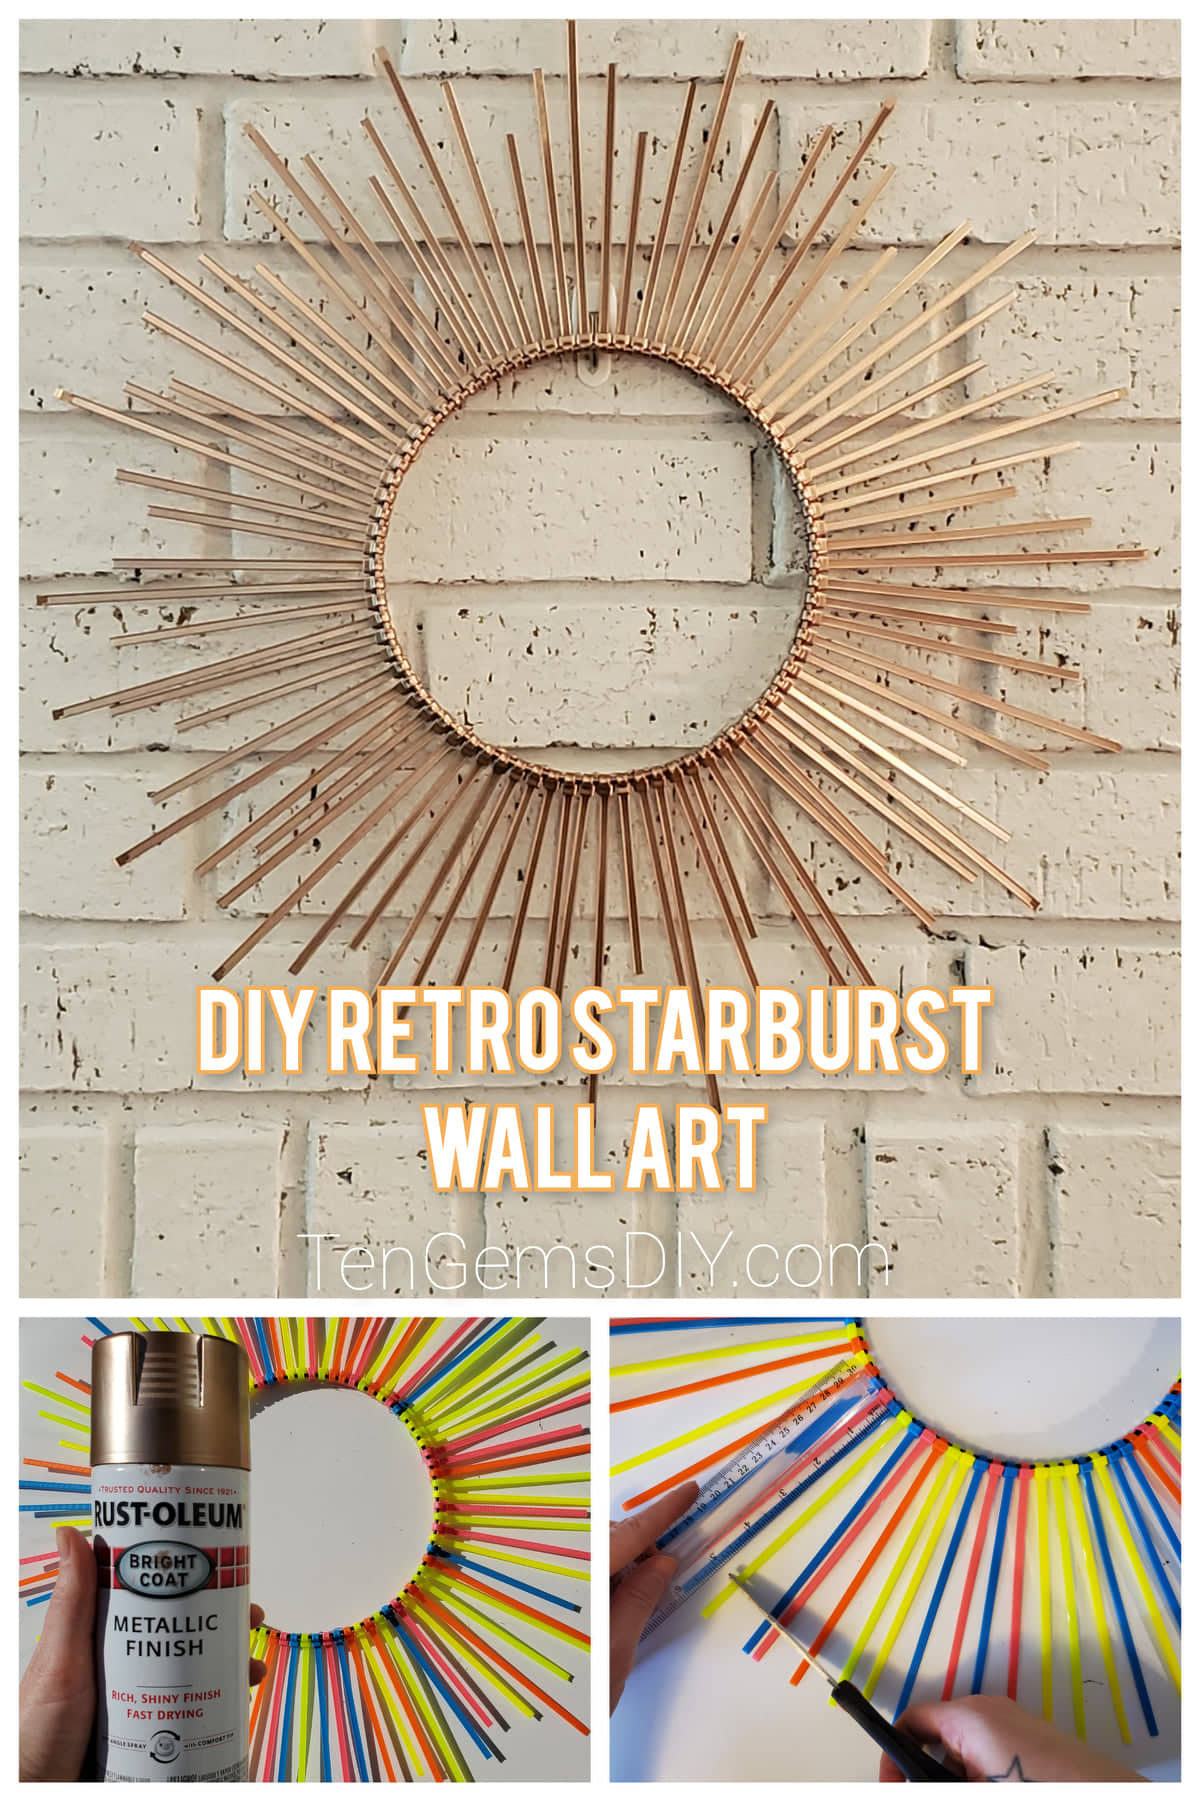
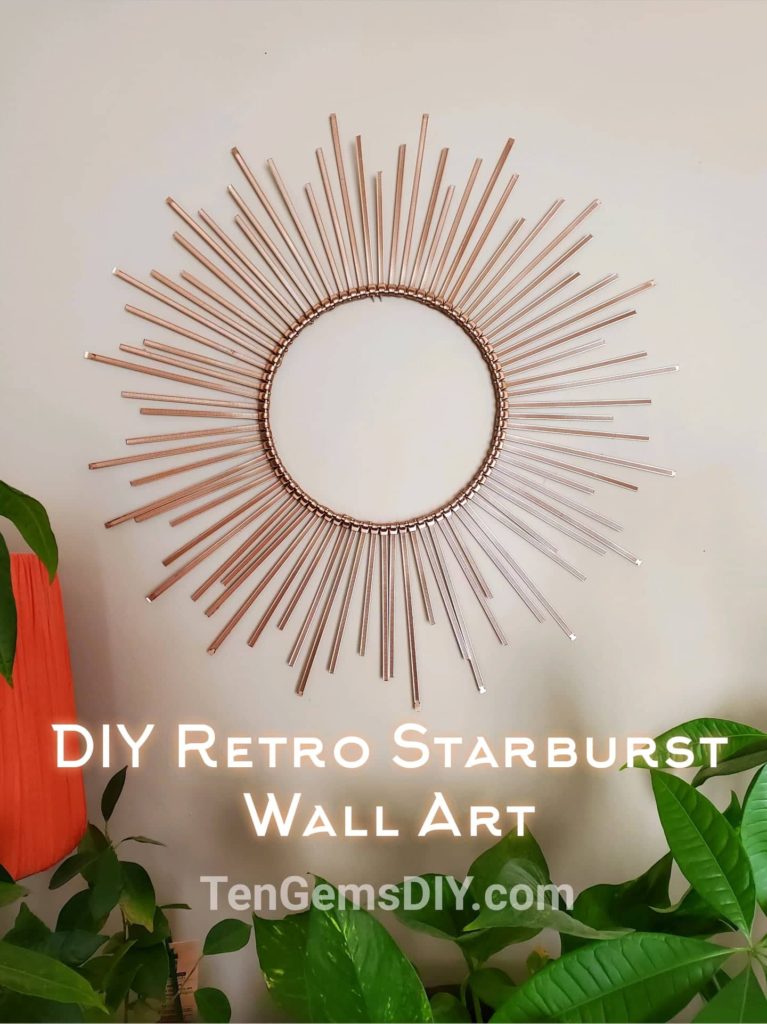
You’re thinking of all the DIY Retro Starburst Wall Art and how it all looks so groovy and hip. Everything in past decades has a certain kind of appeal, especially the art. This tutorial will show you step-by-step how to make your own DIY Retro Starburst Wall Art. Your groovy grandparents would be impressed to see your finished retro wall art! Easily find all of the supplies below in the supply list, and be sure to check out these other ideas for wall art as well!
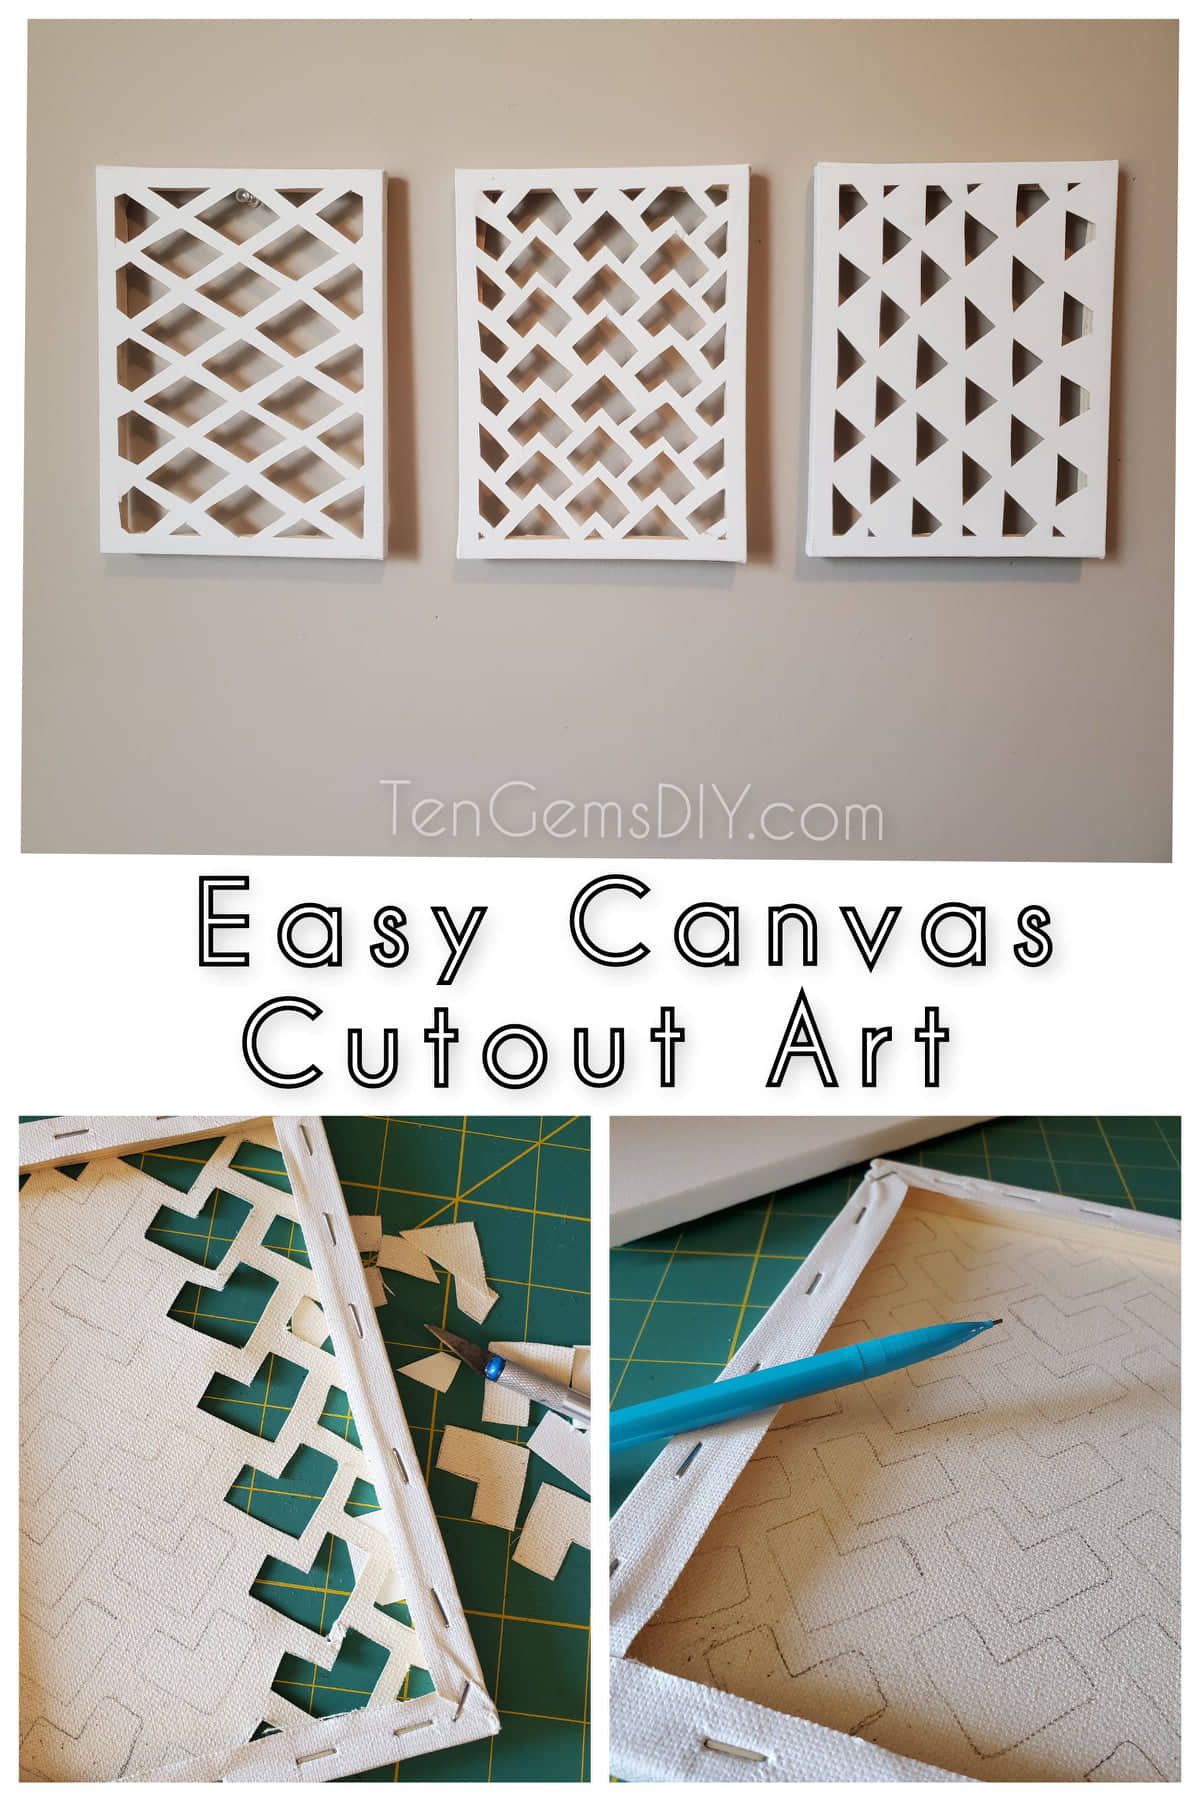
Easy Canvas Cutout Art – https://tengemsdiy.com/how-to-make-easy-canvas-cutout-art/
How To Make Geometric Wall Art – https://tengemsdiy.com/how-to-make-geometric-wall-art/
How To Make Easy Hexagon Shelves – https://tengemsdiy.com/?p=440
TenGemsDIY is a DIY and craft blog. Some of our posts contain affiliate links for products we have tried and recommend. While clicking the links will not cost any money, we may receive a commission for items purchased, which helps keep our website up and running. Here is the privacy policy for more information: https://tengemsdiy.com/?page_id=3
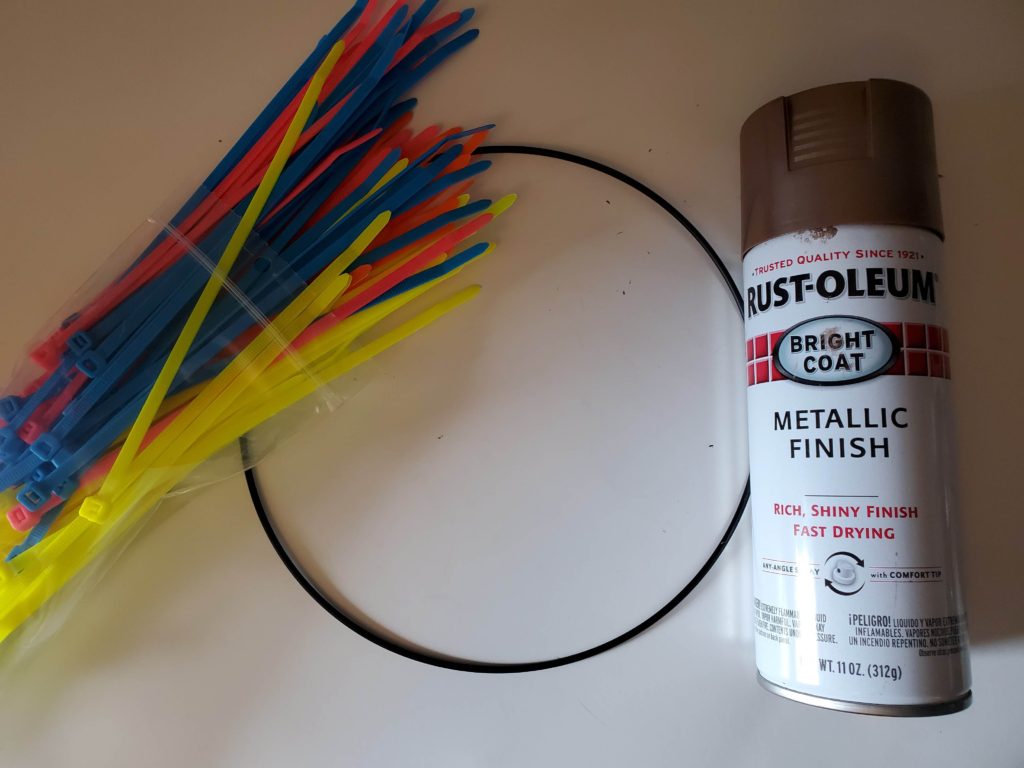
Supply list and where to easily find everything:
- 8″ wire wreath ring – https://amzn.to/32sQJdB
- 8″ Zip Ties – https://amzn.to/3yPXYsh
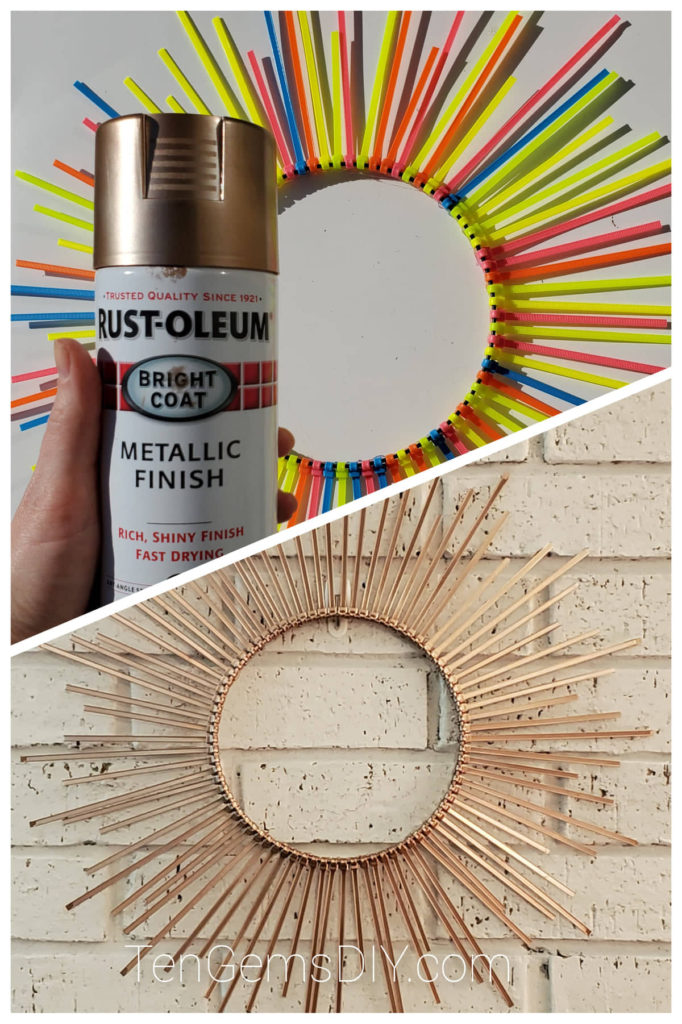
- Rustoleom Bright Coat Rose Gold Spray Paint – https://amzn.to/3yNvOOL
- Glue gun – https://amzn.to/3yQ0mzl – My Surebonder glue gun has lasted years
- Extra long glue sticks – https://amzn.to/3Ed2a6w
- Ruler – https://amzn.to/3b04CBi – Clear rulers let you see everything underneath!
Step one: Zippin’ them zip ties
Here you’ll begin putting all of the zip ties on your DIY Retro Starburst Wall Art. One by one, add the zip ties to your wire ring. Beware: when you tie them on, secure them so they are all facing the same way. This will make it so the center of your wall art is uniform and clean looking.
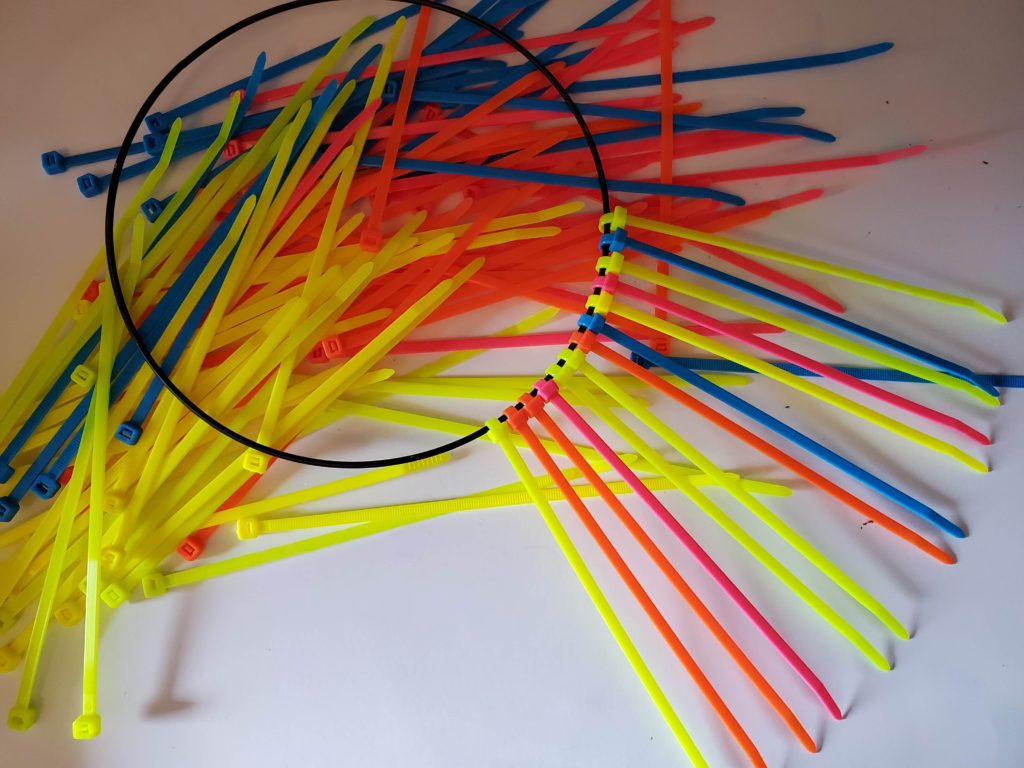
For one 8″ wire wreath, I used 84, 8″ zip ties. When you are finished, lay your wire wreath down, either way. You can decide here which way you want your zip ties to face. I laid mine face down so the squared parts of the zip ties were facing up. Whichever part faces up is going to be the back of your DIY Retro Starburst Wall Art.
Step two: Cutting your zip ties for the DIY retro starburst wall art
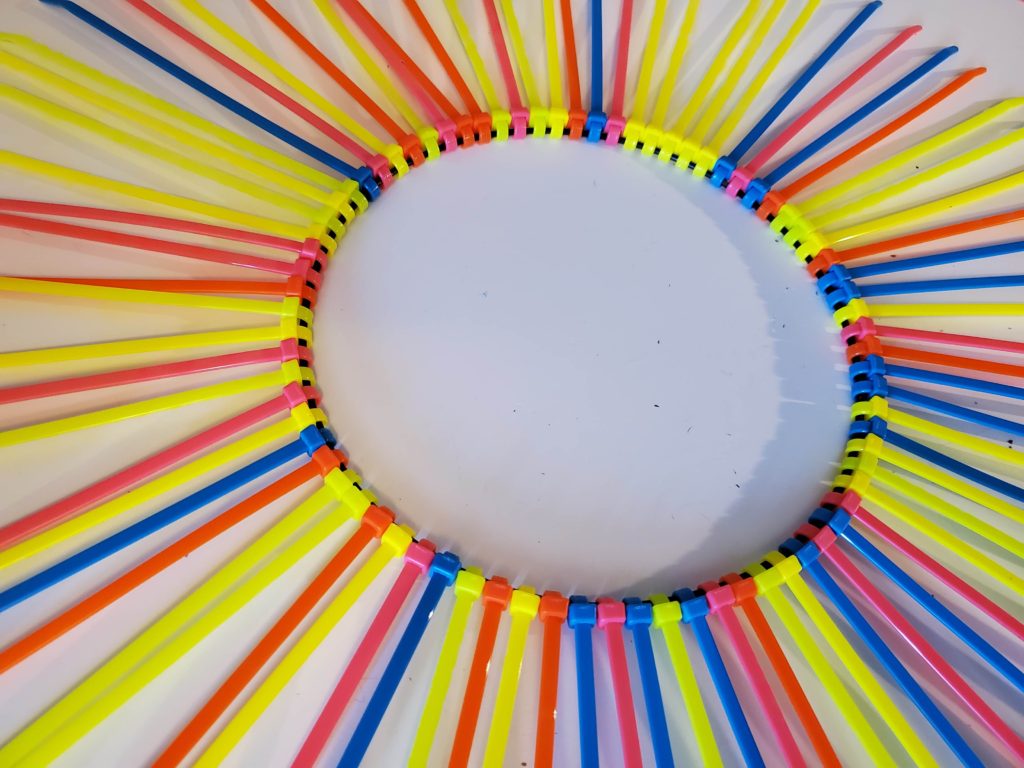
Now that we have all out zip ties on, we’ll cut them to the desired length. For the starburst effect, you will want to cut alternating lengths. You can see in the picture below there is a pattern: short, medium, long, medium, short. This will form a point for your starburst effect. When you measure, measure from the wire outward.
This is how I cut the lengths of my zip ties:
- Short: 4″ long
- Medium: 5″ long
- Long: 6″ long
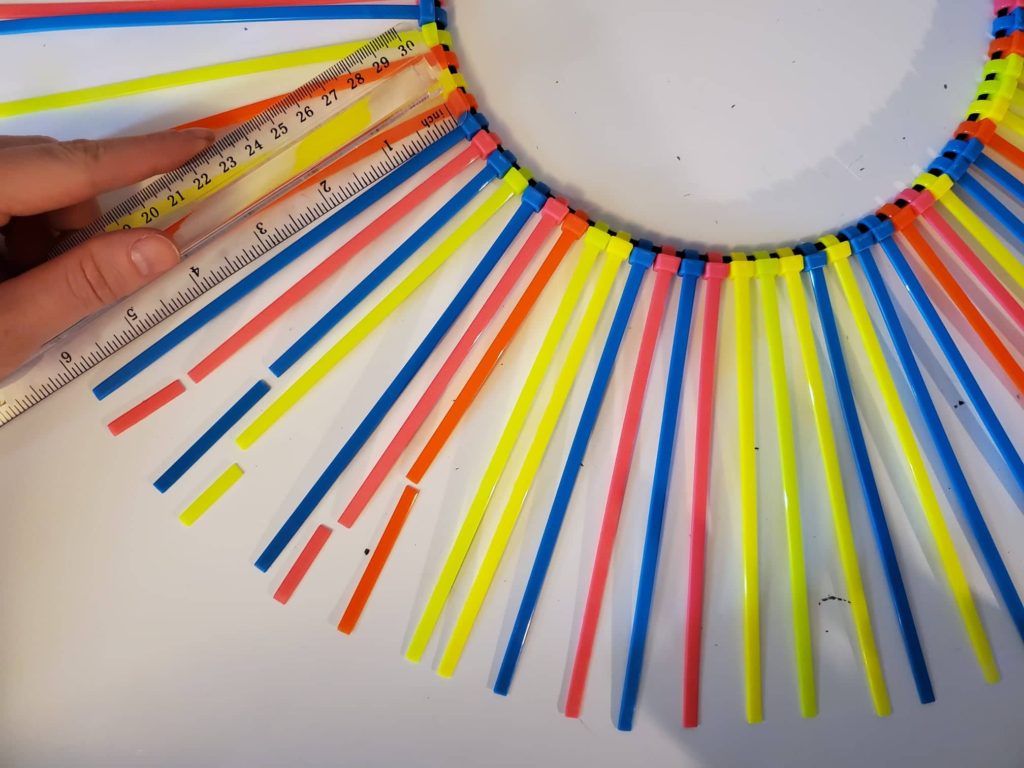
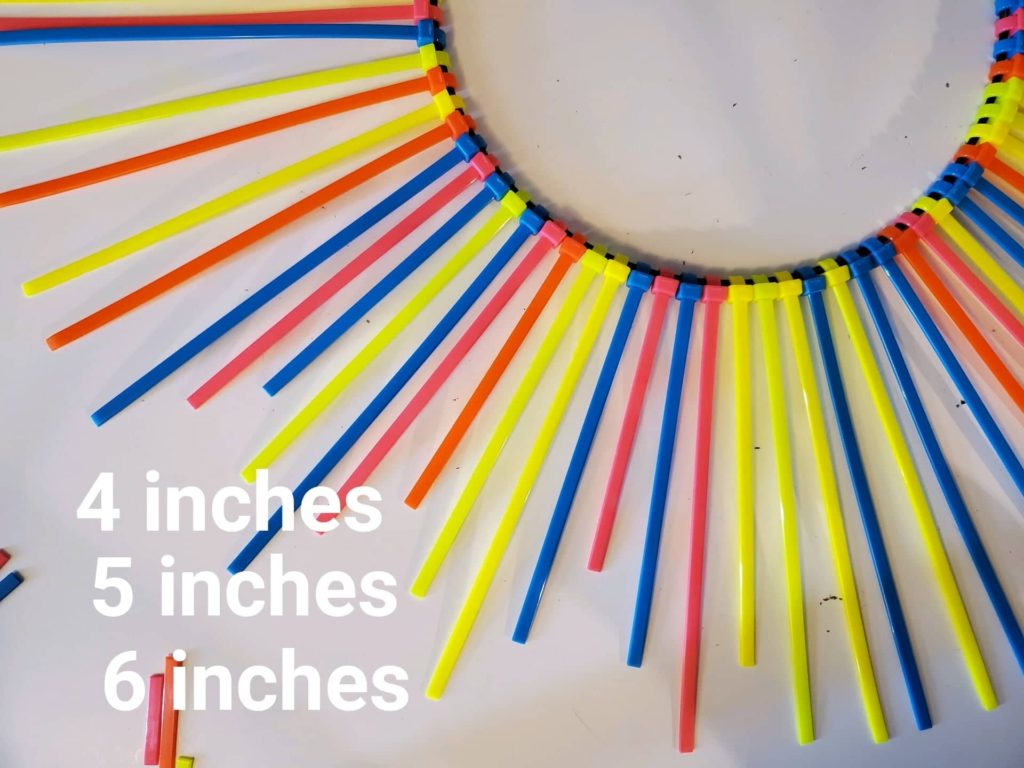
Cut the zip ties in an alternating pattern until you have created your starburst effect all the way around your wall art. It is okay if you have two zip ties together that are the same length. I bet you no one is going to notice.
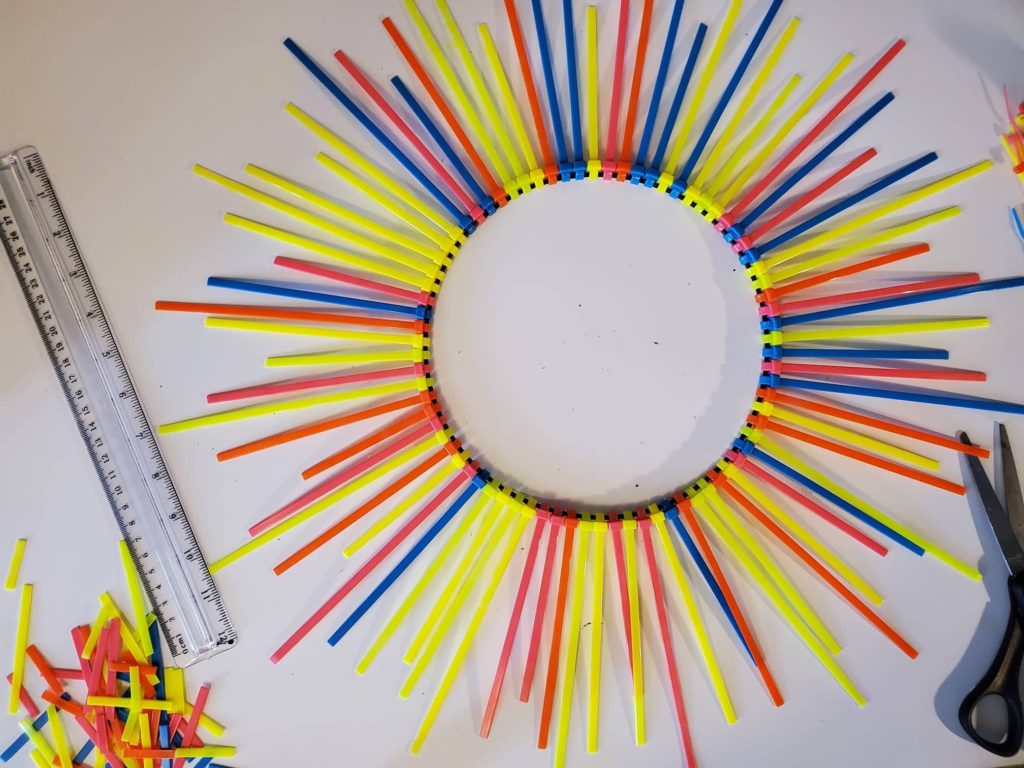
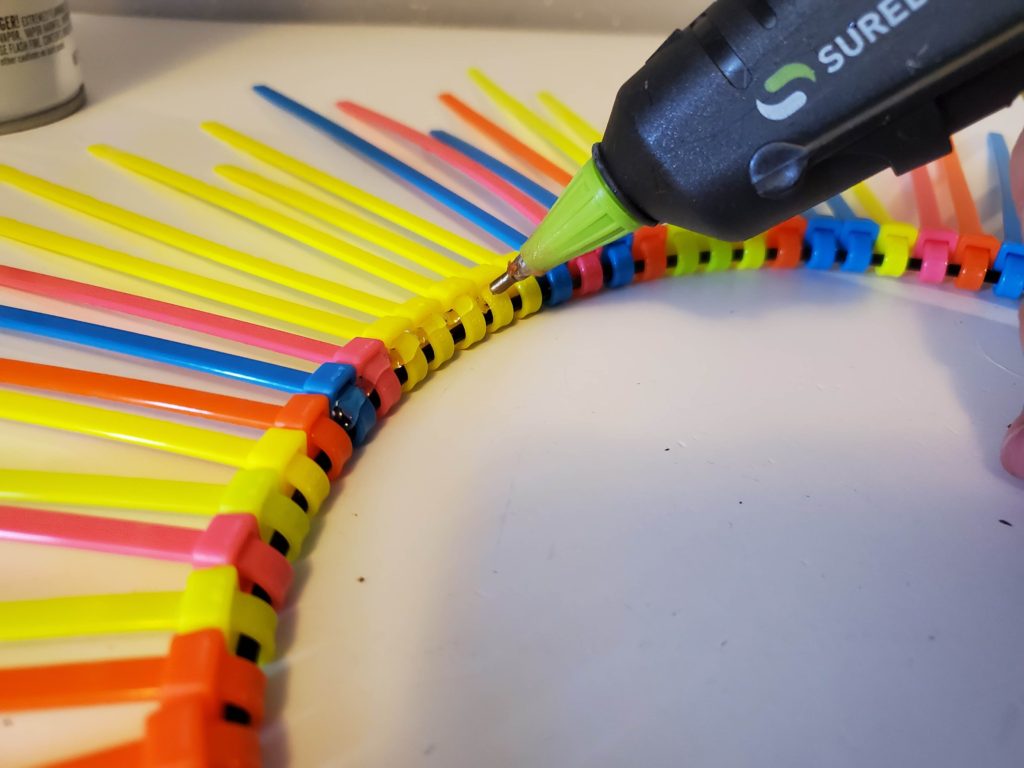
Step three: Securing your DIY Retro Starburst Wall Art
When working with glue, or anything messy really, it is always a good idea to set newspaper or something down to protect your work surface.
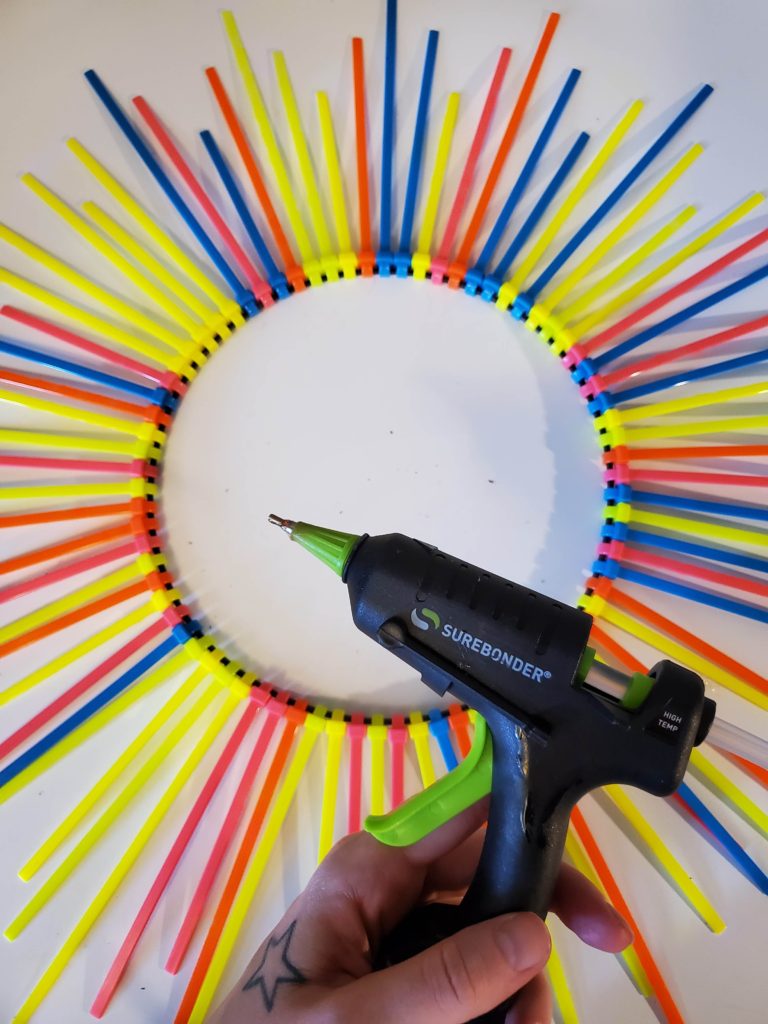
With your zip tie covered wire wreath laying on your work surface and ready for the next step, let your glue gun warm up. This is the part where we secure all of the zip ties so we don’t have to worry about them moving all over the place. You will need extra hot glue sticks for this step. I love my super extra long sticks so I’m not constantly replacing little glue sticks.
Start with one layer of glue all the way around the center of your wall art. Give that a moment to dry.
Add a second layer of glue around the center of your wall art, making sure to cover all of the zip ties. Give that a moment to dry as well.
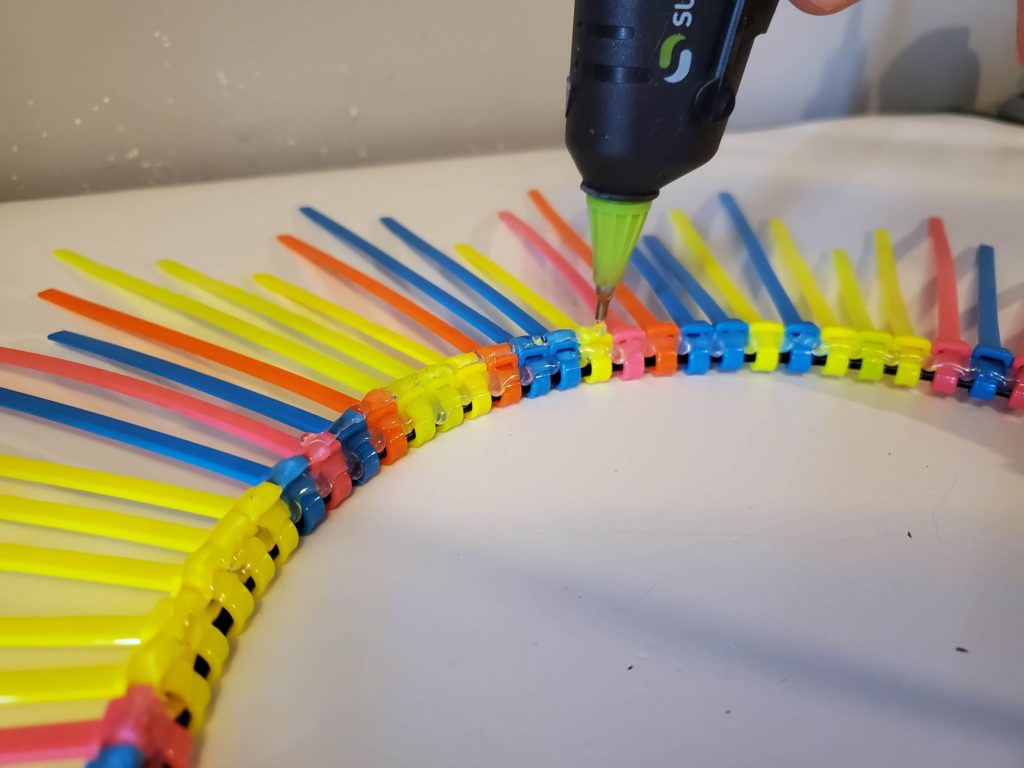
Add one third and final round of hot glue. Make sure every zip tie is covered and secured. Allow your glue to dry for severeal moments. Ideally, you want to give the glue enough time to firm up well so you can transport your retro wall art outside without the glue falling apart.
Step four: Set up your outside work area
For this step, we’ll have to work outside. It’s never a good idea to spray paint indoors. Lay down a spare poster board or newspaper outside. Bring your dried wall art outside as well and lay it on top of your newspaper.
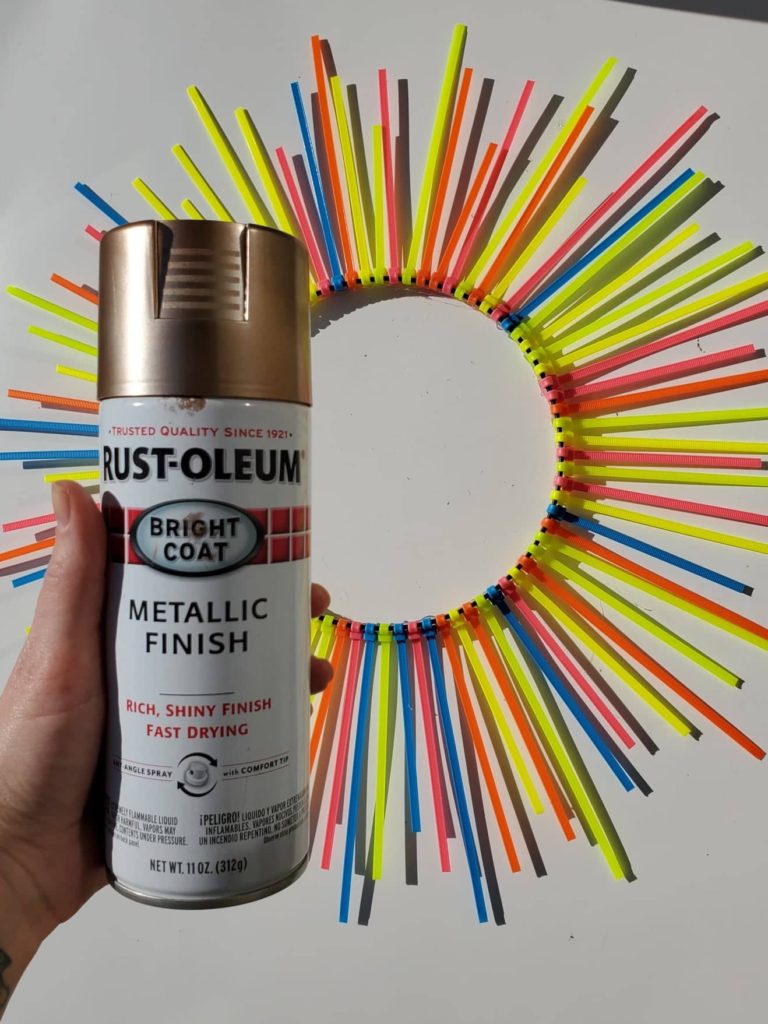
Get your rose gold spray paint ready. This color is amazing because it is a pretty vintage color and isn’t too bright and metallic and in your face about it. Find it here >> https://amzn.to/3yNvOOL
Step five: Make it vintage and beautiful
Give your bare zip tied wall art an even coat of spray paint. Get all of the sides and in the grooves of the zip ties. Let your first coat dry. Come back for a second coat and let that dry as well.
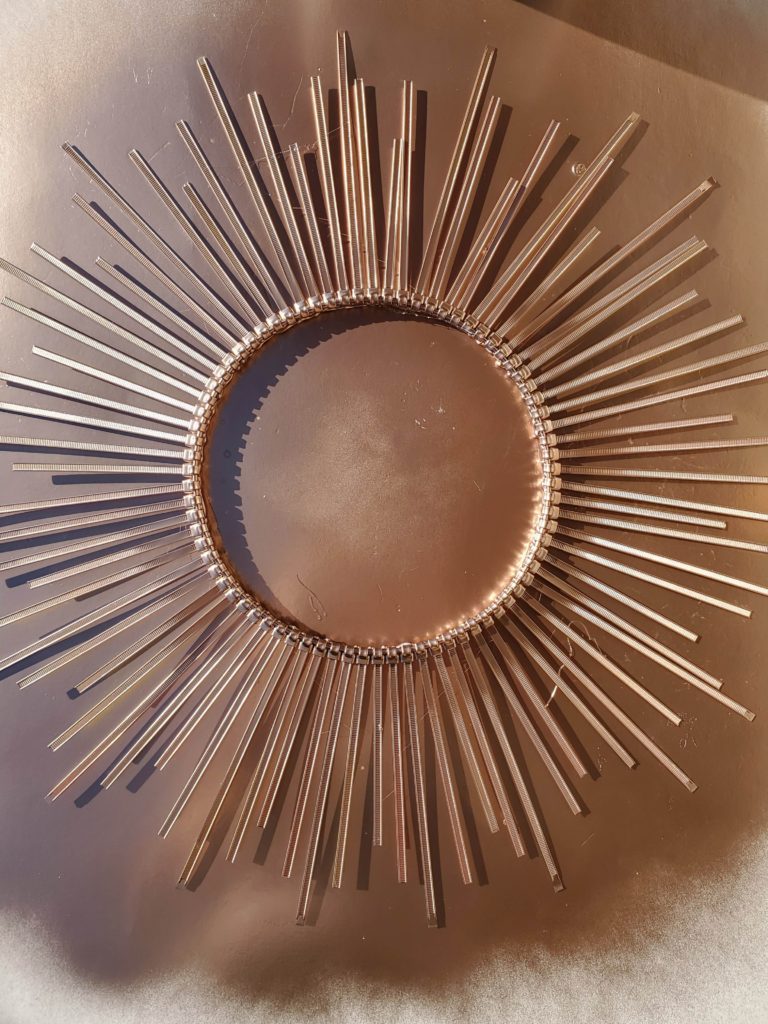
After that side has finished drying, flip your DIY Retro Starburst Wall Art over and repeat the spray paint process on the other side. One nice, even coat of the rose gold spray paint, let it dry. Second coat, let it dry.
Step six: Your DIY Retro Starburst Wall Art is complete!
What a beautiful project! Hang that thing up for everyone to see, because it’s amazing!
We are a participant in the Amazon Services LLC Associates Program, and affiliate advertising program designed to provide a means for us to earn fees by linking to Amazon.com and affiliated sites.