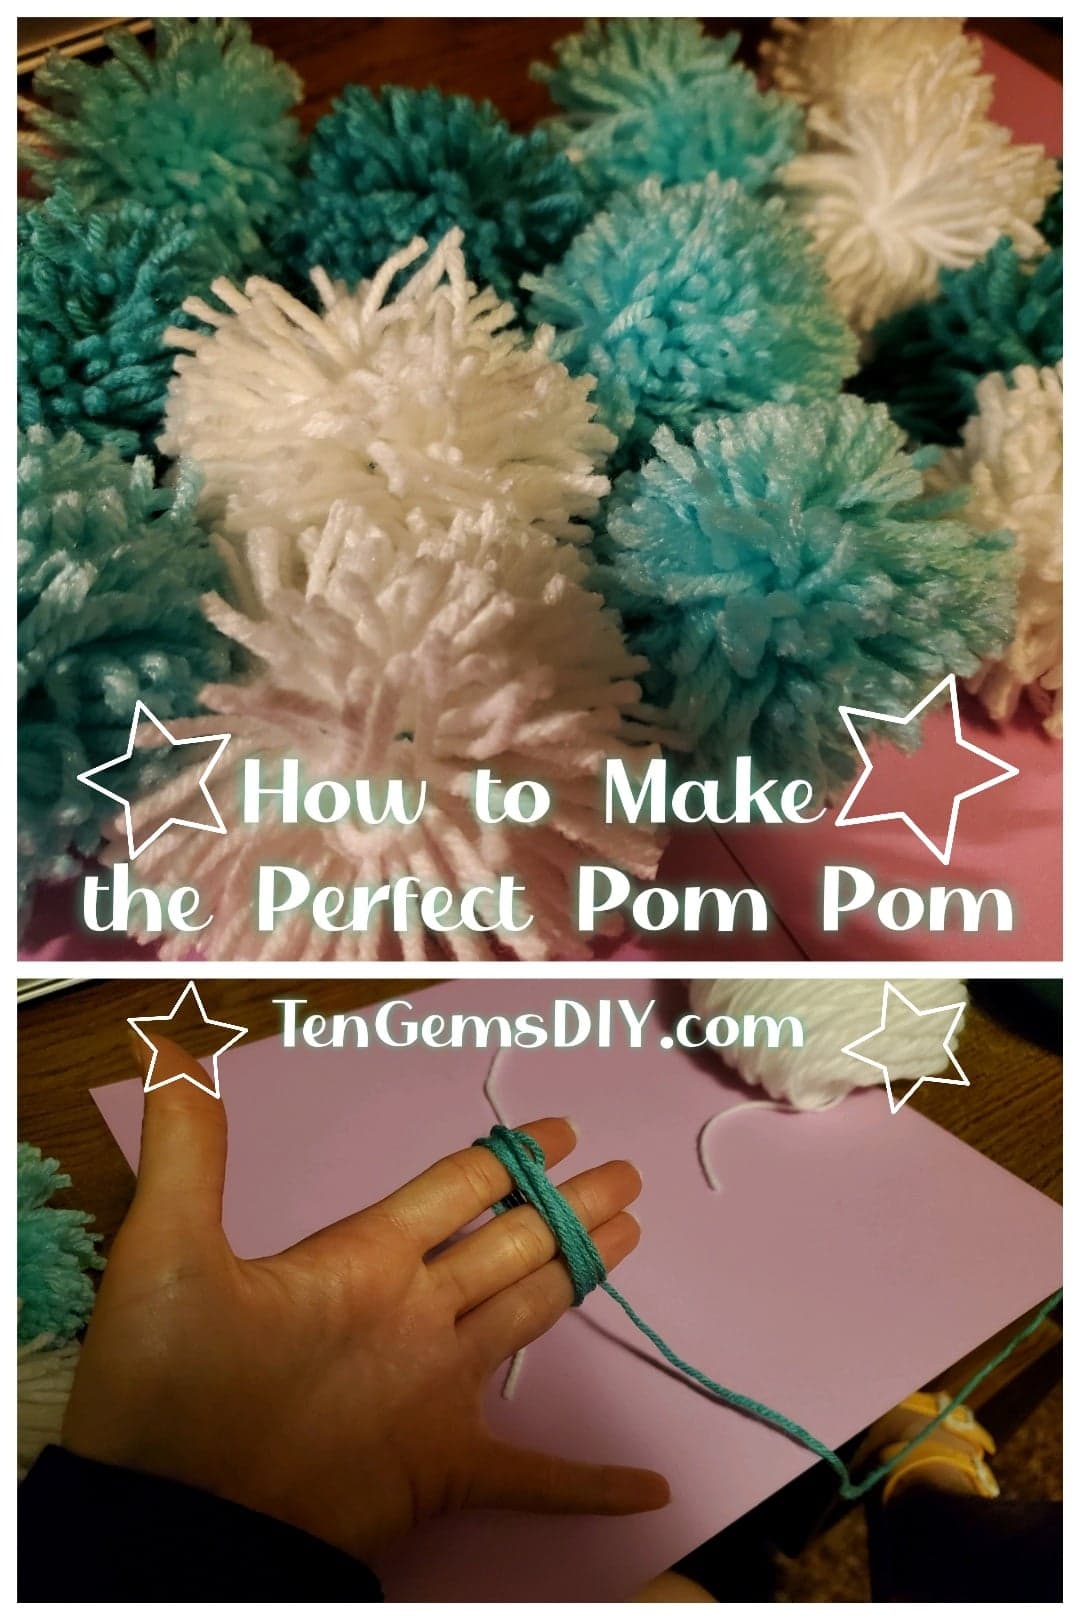
So here’s a super easy tutorial on how to make a pom pom! Pom pom balls are super cute and can be used for a ton of different projects. They can be made big and they can be made small, and colors can be changed any way you like. If you have a project where you want to make pom poms and make them quickly and easily, this is the guide for you.
If you’re looking for inspiration for what to do with all the pom poms you’ve made, check out this DIY Pom Pom Wreath – https://tengemsdiy.com/how-to-make-a-pom-pom-wreath/
Or another yarn inspired craft; How To Make An Easy Yarn Wrapped Star – https://tengemsdiy.com/how-to-make-easy-yarn-wrapped-stars/
Disclosure: TenGemsDIY is a DIY and craft blog. Some of our posts contain affiliate links for products we have tried and recommend. While clicking the links will not cost any money, we may receive a commission for items purchased, which helps keep our website ad free. Here is the privacy policy for more information: https://tengemsdiy.com/?page_id=3
What you’ll need for the pom poms, and where to easily find them:
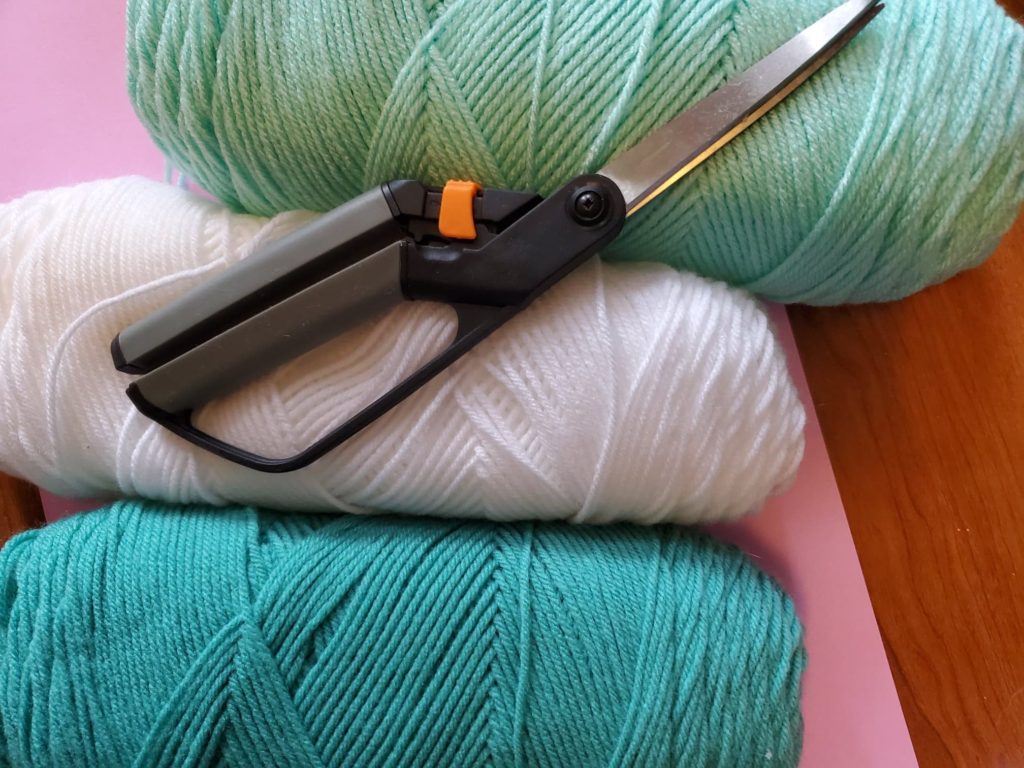
- Yarn in your favorite colors – I used white, light turquoise and dark turquoise for this tutorial
- White – https://amzn.to/3ue1lp3
- Light turquoise – https://amzn.to/3vedkV1
- Dark turquoise – https://amzn.to/3yyMx7K
- Sharp scissors – https://amzn.to/3oJ6kNw – Fiskars will forever be the favorite brand around here!
Step one: Gather the supplies
You can make a boat load of pom pom balls with one colored bundle of yarn, but who doesn’t like a variety? For your pom poms, try to find yarn with at least 5mm. 5mm is equal to your normal crochet yarn. You can always use thicker yarn too! Anything thinner wouldn’t work.
Step two: Cutting the first string
You’ll only need to cut one extra string. this will be the sting that holds the pom pom together. Cut a piece of your yarn about 6 inches long. You can totally eyeball it, it doesn’t have to be exactly six inches. Lay this piece to the side and move on to the next step.
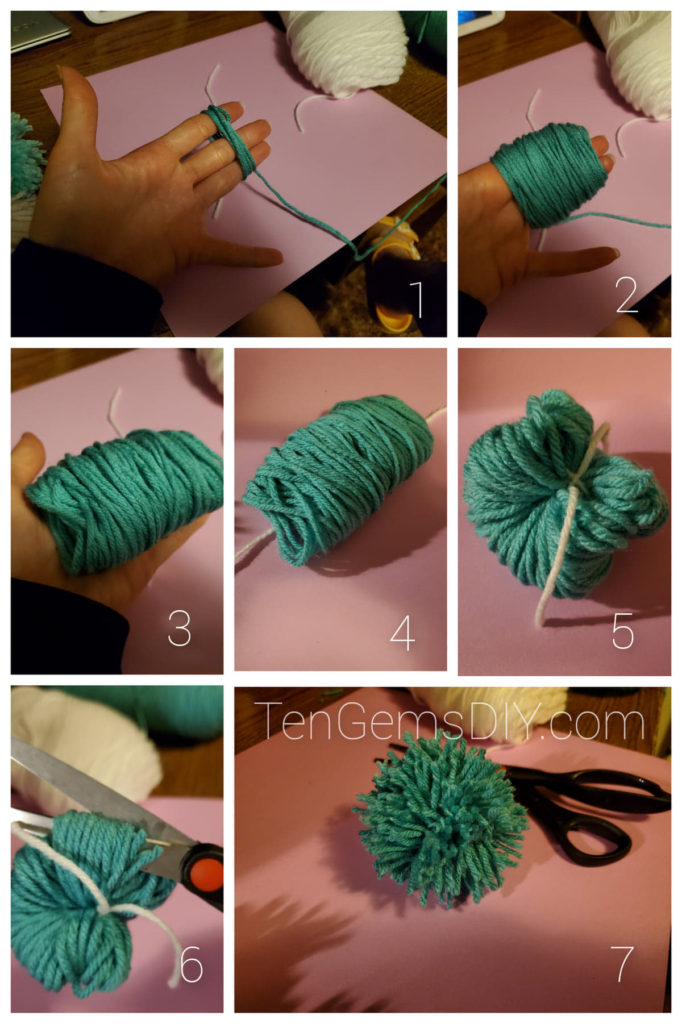
Step three: Wrapping the pom pom!
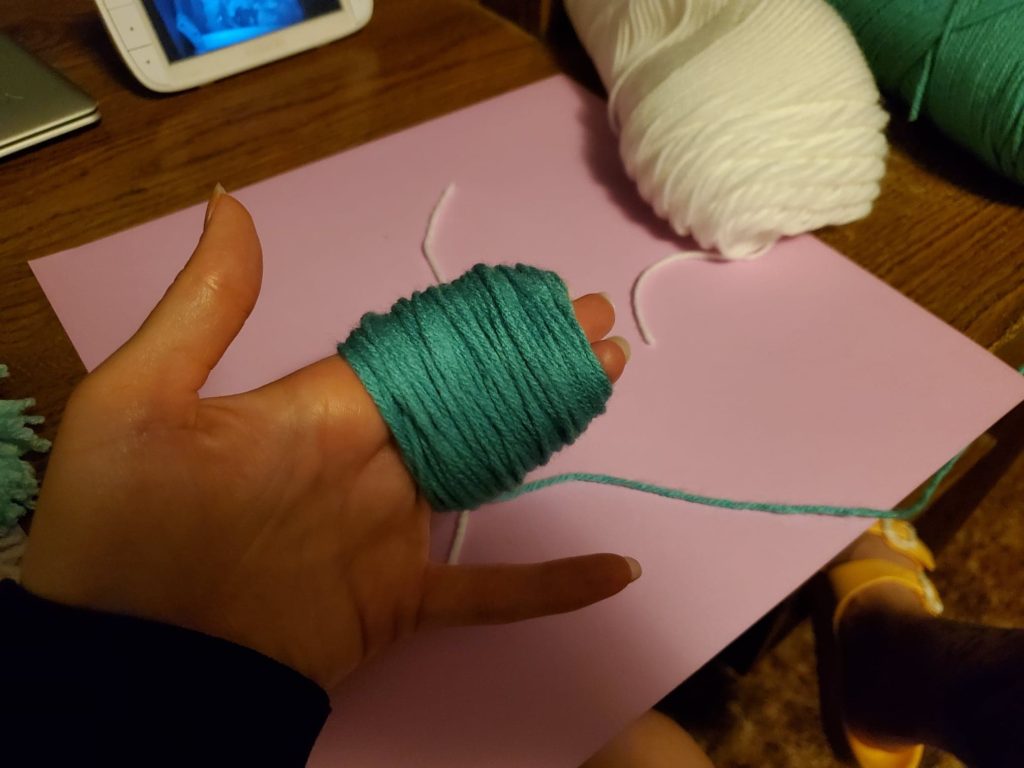
Here you’ll start to wrap your yarn. Start with a new piece of yarn, and around three relaxed fingers, start loosely wrapping the yarn. Try not to smoosh your fingers or overlap them. Keep them next to each other. Three fingers width results in a pom pom ball that is about three inches wide.
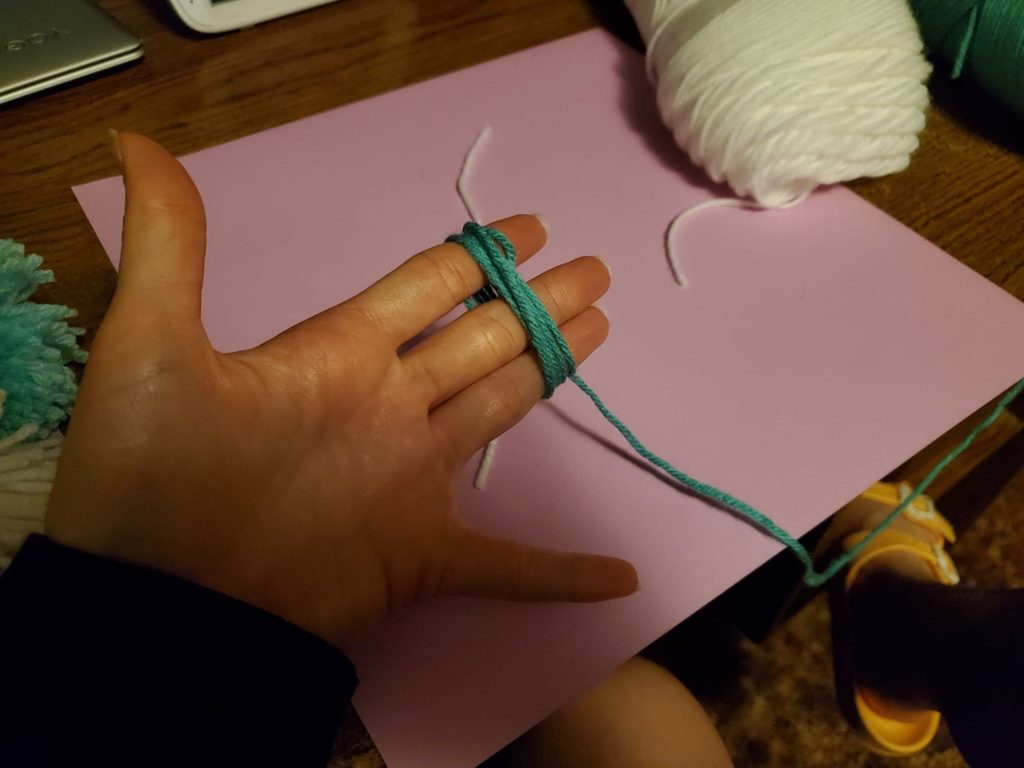
Keep wrapping – not too tight – until you have a good amount of yarn around your fingers. The more times you wrap, the poofier your ball will be. Cut your yarn when you’re done wrapping and gently work the wrapped yarn off of your hand, keeping the yarn neatly in its spiral.

Step four: Tying it up
Gently lay the wound yarn on top of the first six inch string you cut. Flatten out your yarn spiral. Take both ends of your six inch string and gather your yarn spiral, tying it tight.


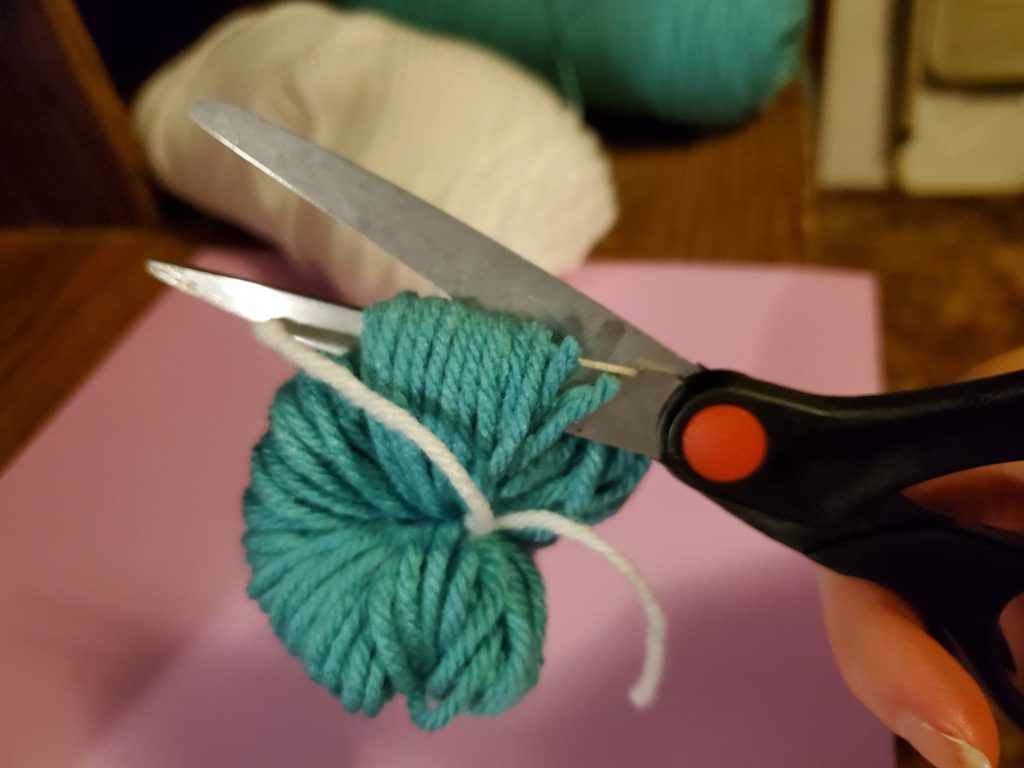
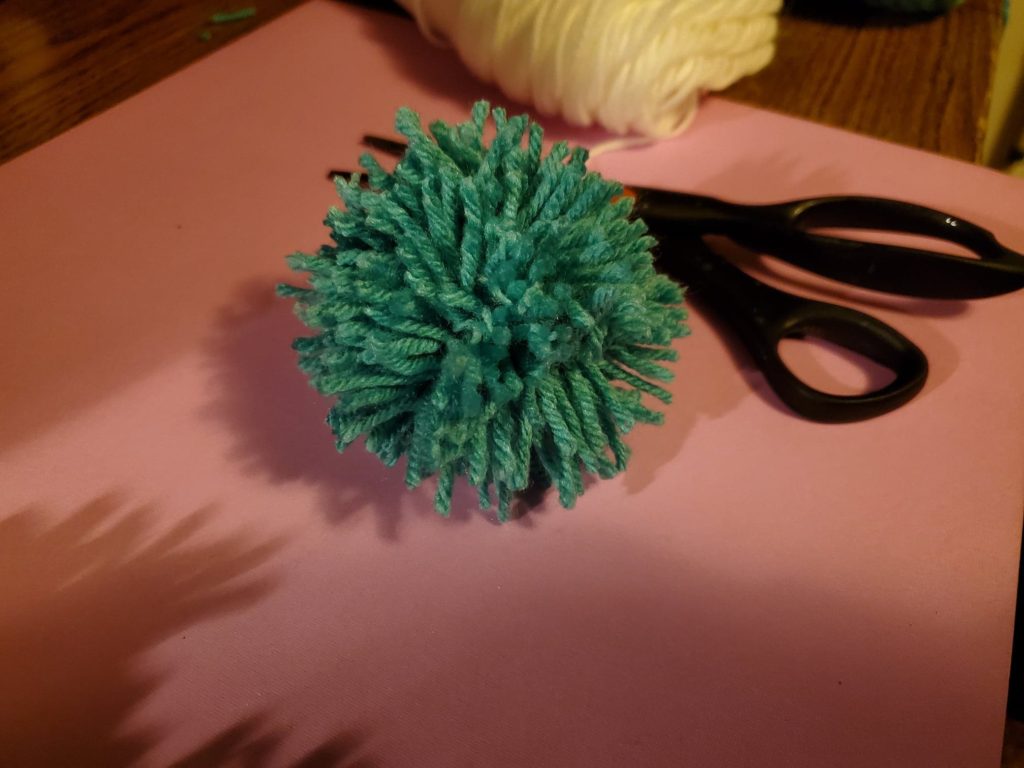
Step five: Cutting it up and making it perfect
Cut all the loops you have created on both sides of your tied six inch string. This will create your pom pom! Cut all the uneven ends off and you have your perfect little pom pom ball.
We are a participant in the Amazon Services LLC Associates Program, and affiliate advertising program designed to provide a means for us to earn fees by linking to Amazon.com and affiliated sites.