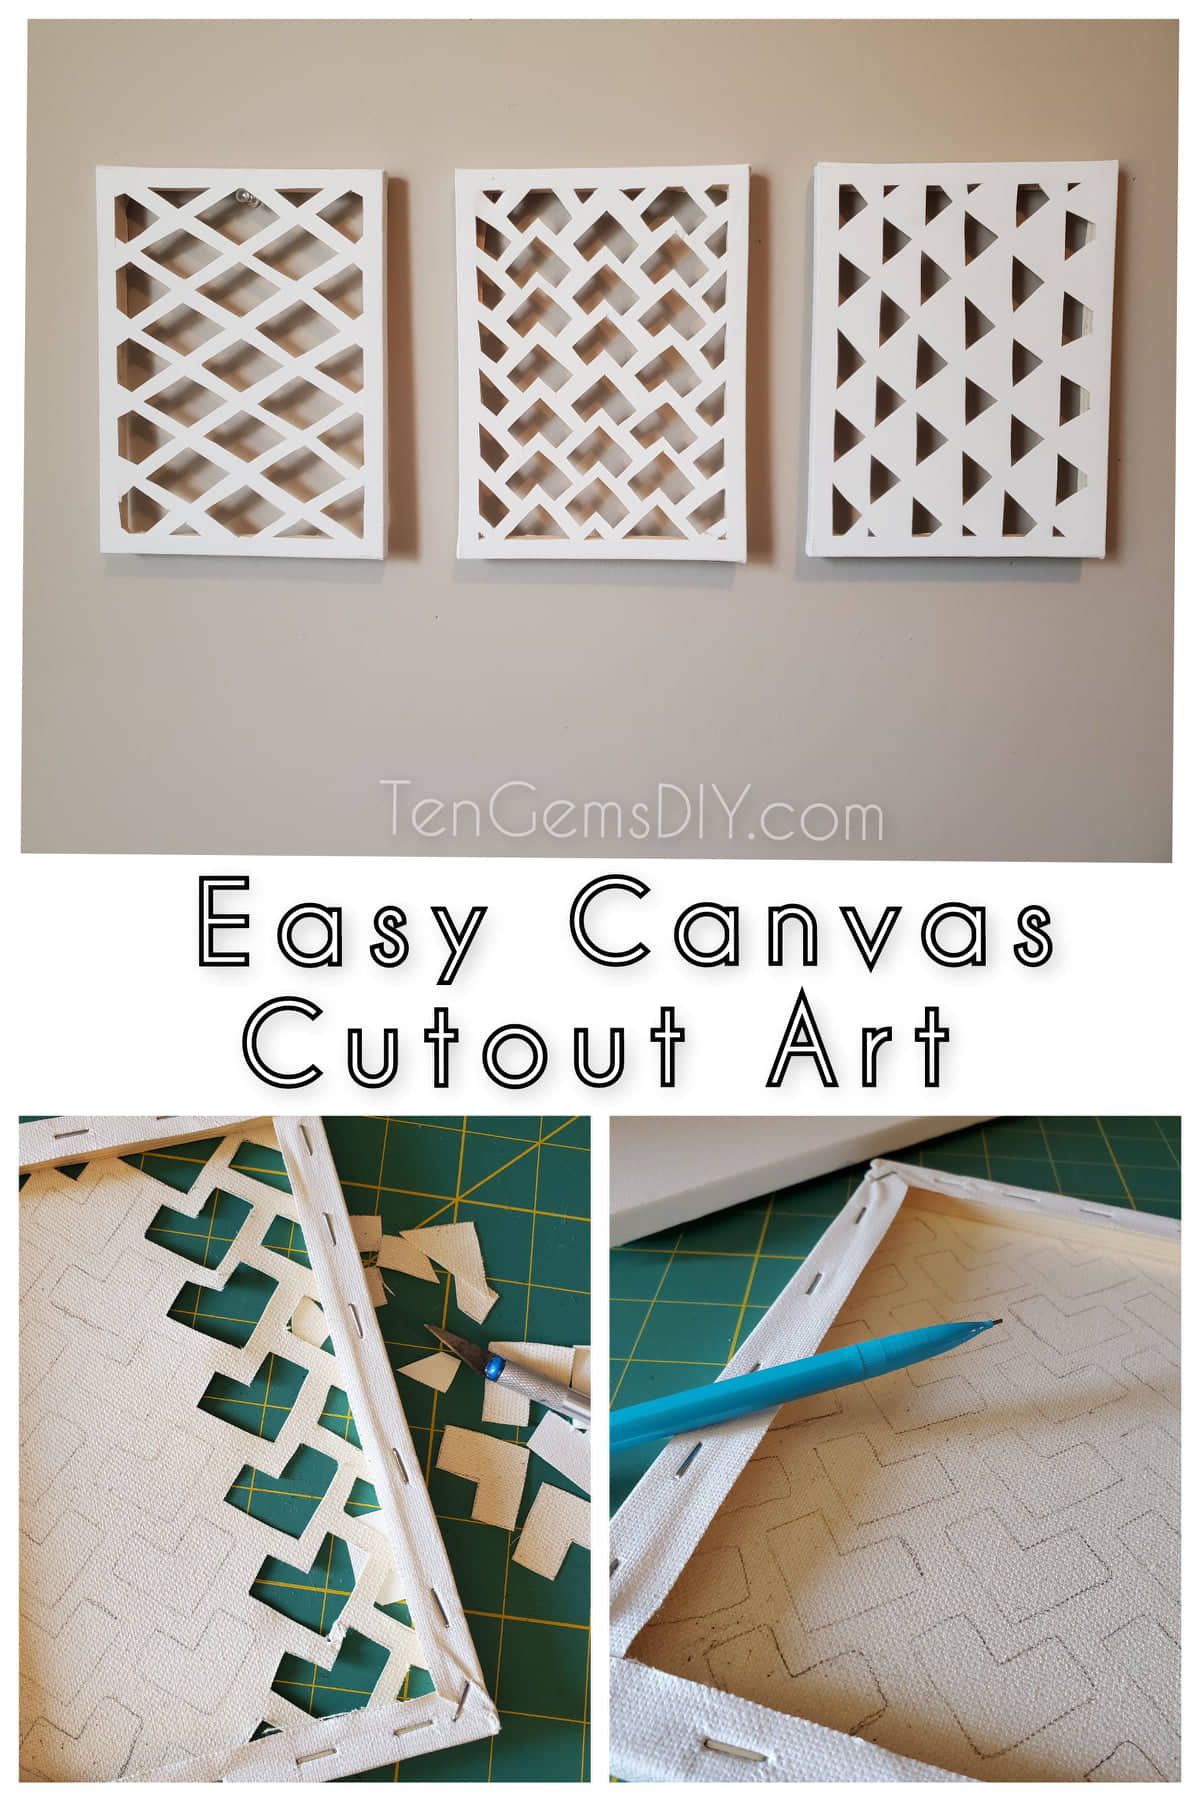
Make your empty walls fun and creative with this Easy Canvas Cutout Art! This creative canvas craft requires minimal supplies, but adds a ton charm to any wall. Why buy expensive wall art, when you can make your own! I love this project because it’s simple, it’s easy and you don’t need to commit a ton of time to get something great out of it!
If you’re looking for other really great wall art ideas, check out these other amazing tutorials!
How To Make Geometric Wall Art – >https://tengemsdiy.com/how-to-make-geometric-wall-art/
How To Make Hexagon Shelves – https://tengemsdiy.com/how-to-make-hexagon-shelves/
And How To Make DIY Retro Starbust Wall Art – https://tengemsdiy.com/how-to-make-diy-retro-starburst-wall-art/
TenGemsDIY is a DIY and craft blog. Some of our posts contain affiliate links for products we have tried and recommend. While clicking the links will not cost any money, we may receive a commission for items purchased, which helps keep our website up and running. Here is the privacy policy for more information: https://tengemsdiy.com/?page_id=3
Supplies you’ll need for your Easy Canvas Cutout Art:
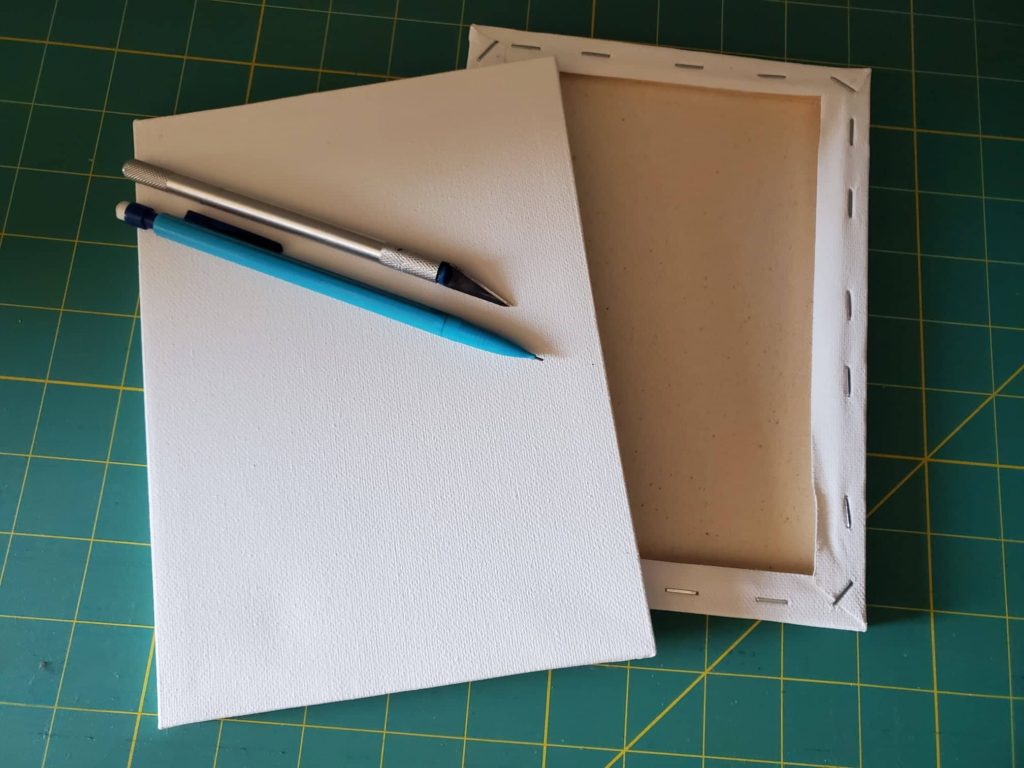
- Stretched canvas – You will need a stretched canvas with a frame. I used 5×7 – https://amzn.to/3Fjt1ip
- Art knife – Xacto knives are a great brand – https://amzn.to/320yJHt
- Pencil
- Cutting mat – Cutting mats are essential for any project using blades so you don’t cut up your table top – https://amzn.to/3FhJpjp
Step one: Choosing your canvas
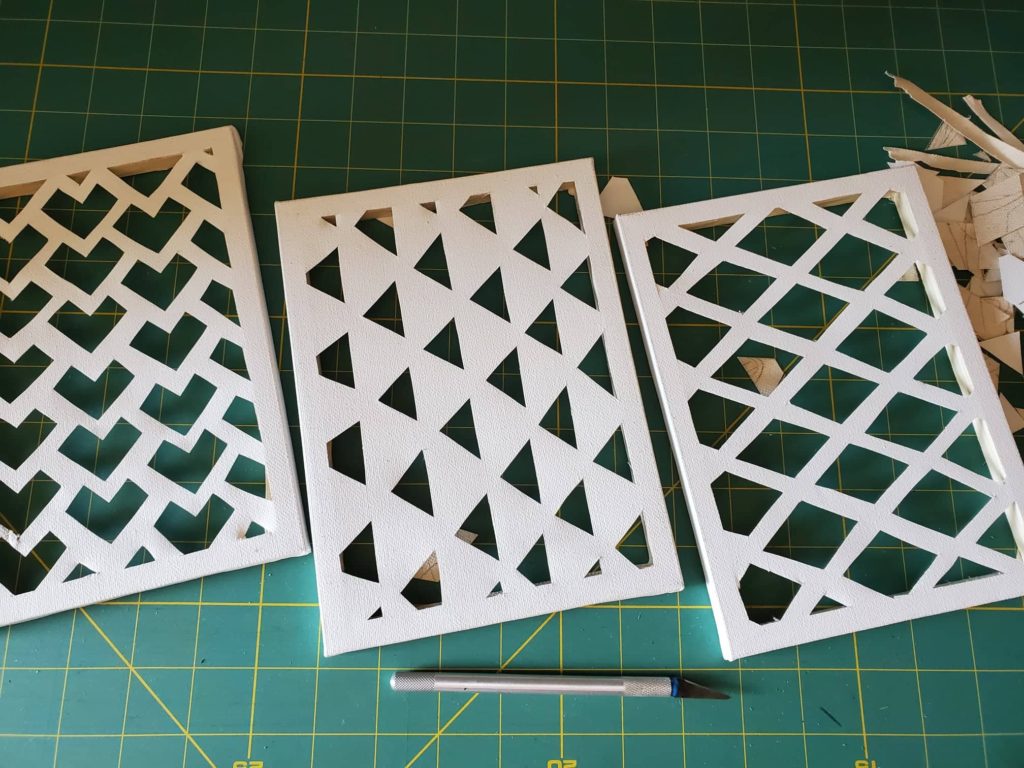
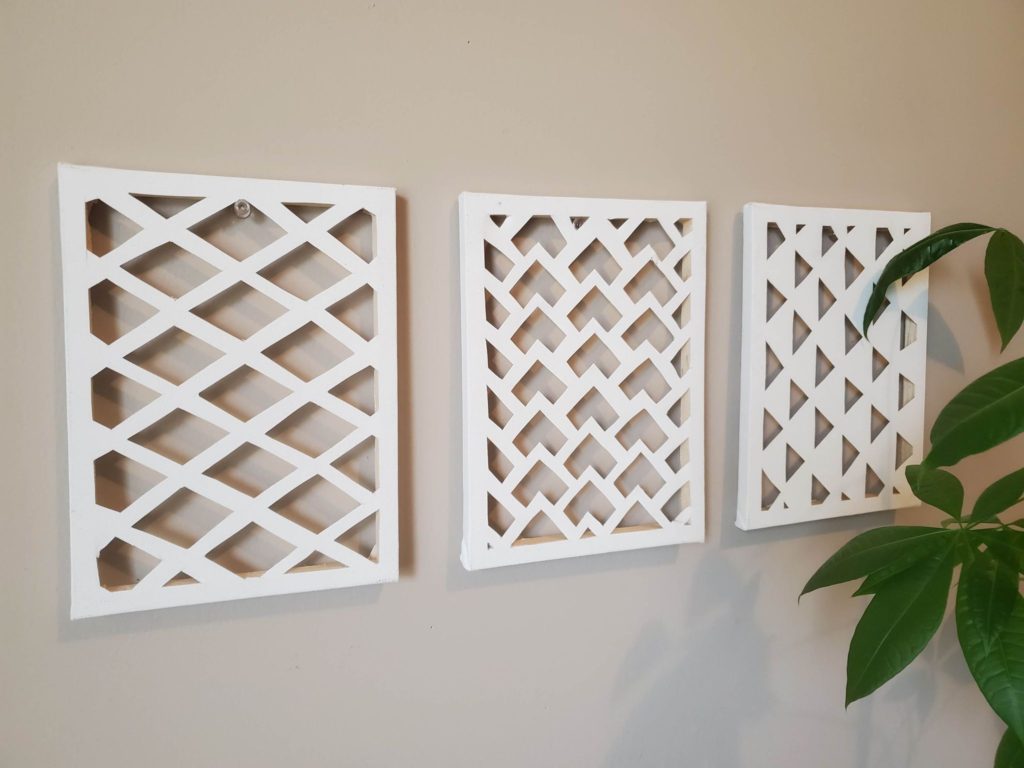
The first step is deciding how big you’d like your Easy Canvas Cutout Art to be. Keep in mind, the bigger your canvas is, the more time it will take to finish. Here I used three 5×7 canvases. Having three different patterns to look at makes it fun and interesting. It is essential that you use stretched canvas with a frame on the back. You cannot use canvas boards for this project as they would be impossible to cut. The link for 5×7 canvases is in the supply list above.
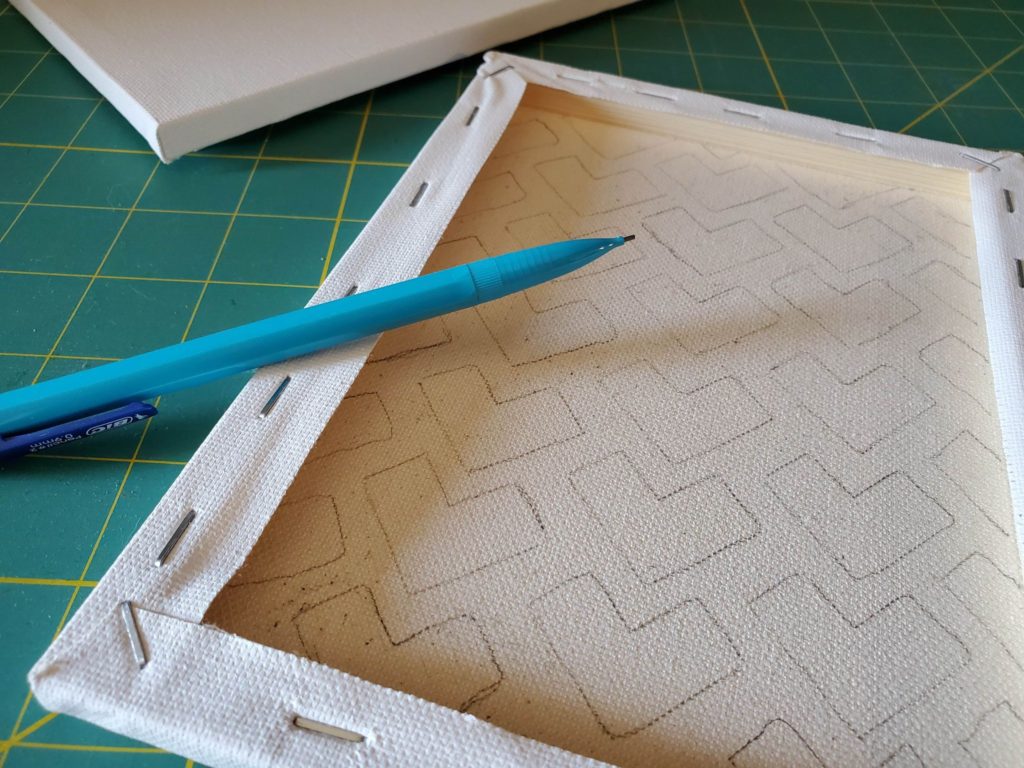
Step two: Think about your design and draw it out
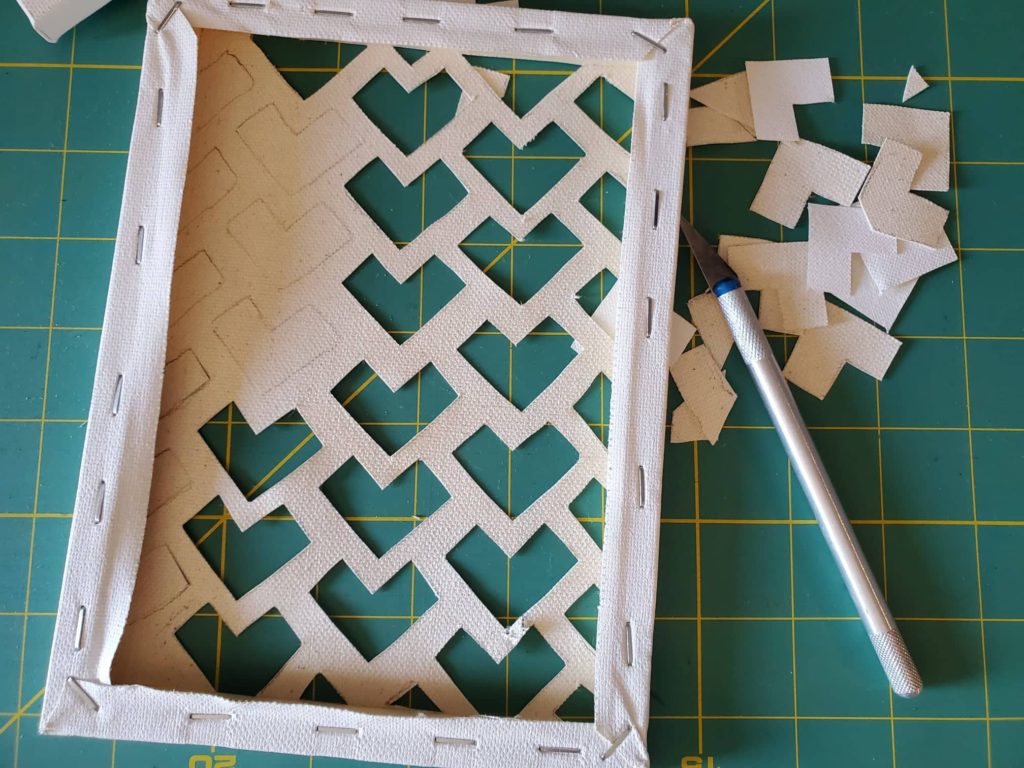
It’s best to choose a simple design that can be easily drawn on to the back of the canvas and later cut out. You can see in the photo here that I’ve allowed an outline in between all of my spaces to cut out so the canvas stays attached to the frame. Use your pencil to draw your design on the back of the canvas.
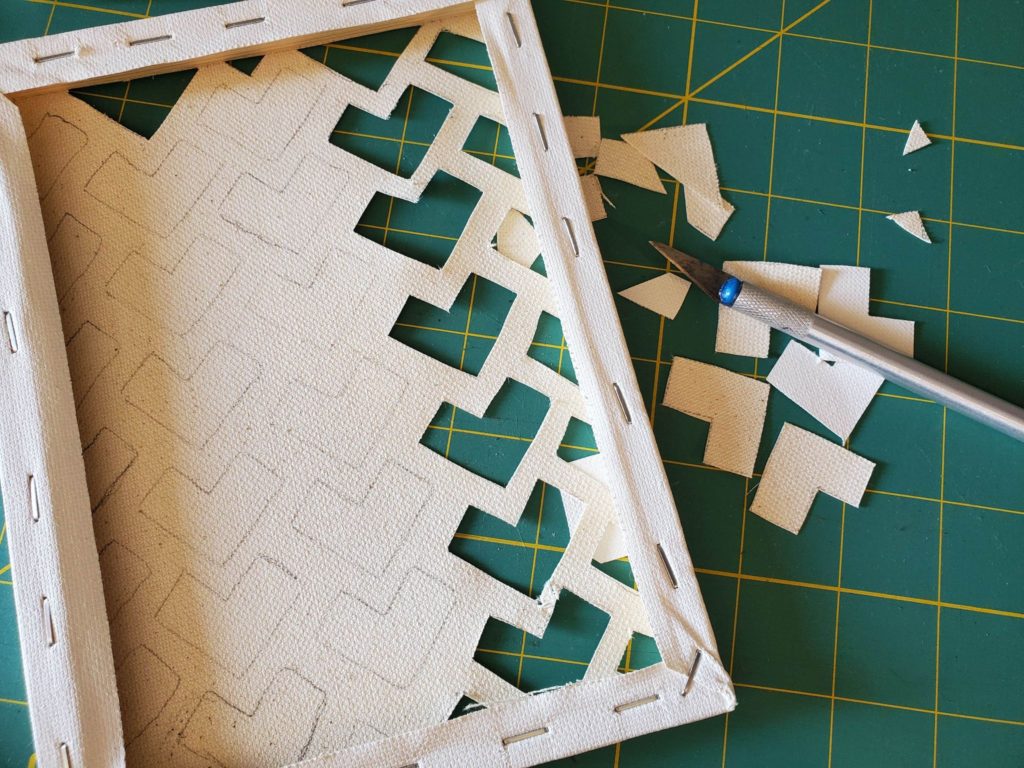
Step three: Cutting out your design
This part can be really fun! After you’ve drawn out your design on the back of the canvas, grab your crafting knife (this is the one I use for everything – https://amzn.to/320yJHt), and your cutting mat. The cutting mat is super important because you will cut up your work surface with this project.
When you are cutting, you want to cut from the back your canvas as well. Lay your canvas face flat on top of your cutting mat. Carefully begin to cut out your design. Please, please, please watch those fingers!
It takes a little bit of time, but so worth it in the end!
Step four: Finding the perfect place for your Easy Canvas Cutout Art!
The last step can be the most difficult. Where do you want to put your latest art project? Somewhere where everyone can see it and love it, of course!
We are a participant in the Amazon Services LLC Associates Program, and affiliate advertising program designed to provide a means for us to earn fees by linking to Amazon.com and affiliated sites.