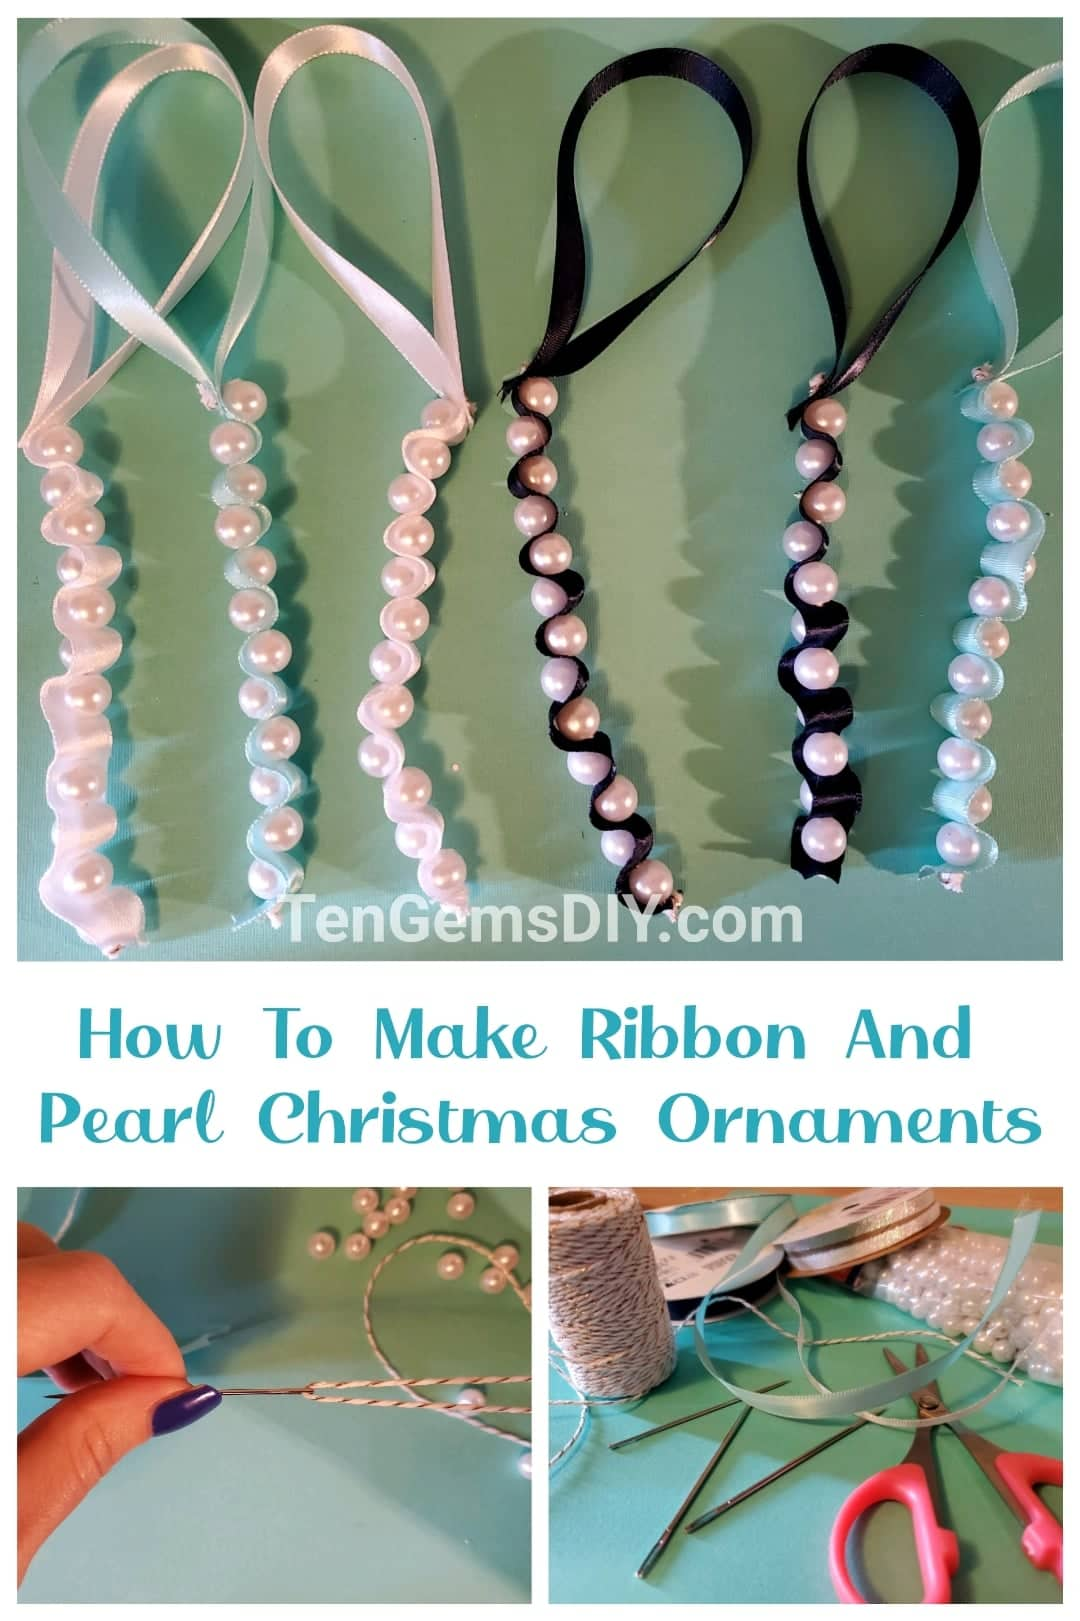
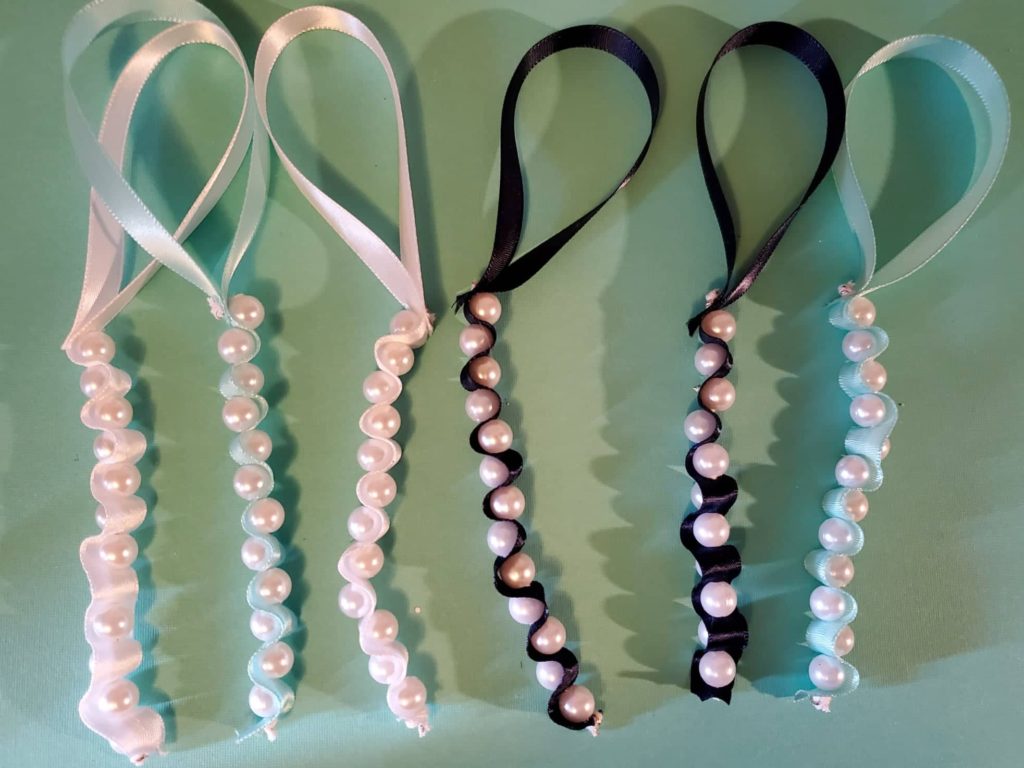
Ribbon and pearl Christmas ornaments are a unique and gorgeous way to do something new with your Christmas tree this year. It feels so much more satisfying to make some of your holiday decorations. This project is easy and uses only a few supplies, but is huge in visual appeal. The pearl beads and shimmering ribbon bring the holiday spirit so easily. Another great thing about these handmade ornaments is that you can change the colors to any that suit your desire. I have a pink Christmas tree I adore, so I thought some blues and white might look amazing with the pink, and I love them!
If you’re looking for another really great idea for some unique handmade ornaments, look over at this tutorial for How To Make Easy DIY Paper Christmas Ornaments!>> https://tengemsdiy.com/how-to-make-easy-diy-paper-christmas-ornaments/
Or How To Make Easy 3D Paper Christmas Ornaments! >> https://tengemsdiy.com/how-to-make-easy-3d-paper-christmas-ornaments/
And another super great tutorial for DIY Beaded Star Ornaments>> https://tengemsdiy.com/how-to-make-diy-beaded-star-ornaments/
TenGemsDIY is a DIY and craft blog. Some of our posts contain affiliate links for products we have tried and recommend. While clicking the links will not cost any money, we may receive a commission for items purchased, which helps keep our website up and running. Here is the privacy policy for more information: https://tengemsdiy.com/?page_id=3
Supplies you’ll need for your ribbon and pearl Christmas ornaments and where to find them easily:
- Ribbon – https://amzn.to/3Fbx0gD – A great pack of rainbow ribbon
- Ruler – https://amzn.to/3b04CBi – I like clear rulers so I can see underneath
- Scissors – https://amzn.to/2Z3UdBL – Fiskars will forever be my favorite brand of scissors
- Pearl beads – https://amzn.to/3CbDQku – These 6mm beads are the best size for the job!
- Yarn needle – https://amzn.to/3kwtOV0 – The yarn needles are necessary for this project to thread the beads and ribbon
- Thick string – https://amzn.to/3C6vpHT – Here is the gold and white string I used. It’s beautiful!

Step one: Threading your needle
The string used here is great because it’s thick and sturdy. There is a super pretty gold embellishment and it makes for a great holiday craft item, so it’s fitting for this project. For thicker strings you will need thicker needles, so I’ve given a link up top in the supply list for yarn needles, which come in handy often anyway.
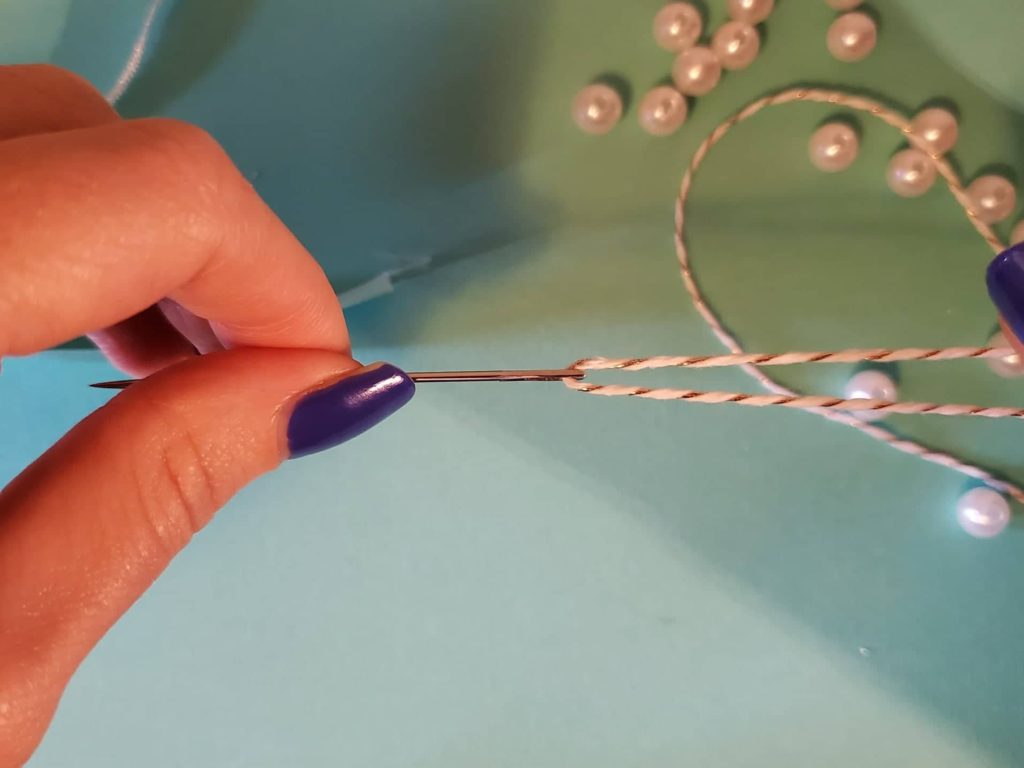
Thread your yarn needle. You won’t need a ton of string. 6 or 7 inches for one ornament, and that is with a little bit of excess.
Tie a knot at the end of your string to assure it doesn’t run through your ribbon and beads and everything falls apart everywhere. Cut off any extra tail at the end of the knot.
Step two: How much ribbon will I need?
For one ornament, you will need 12 inches of ribbon. If you want longer ornaments, you are absolutely welcome to make it however long you want. This is your project!

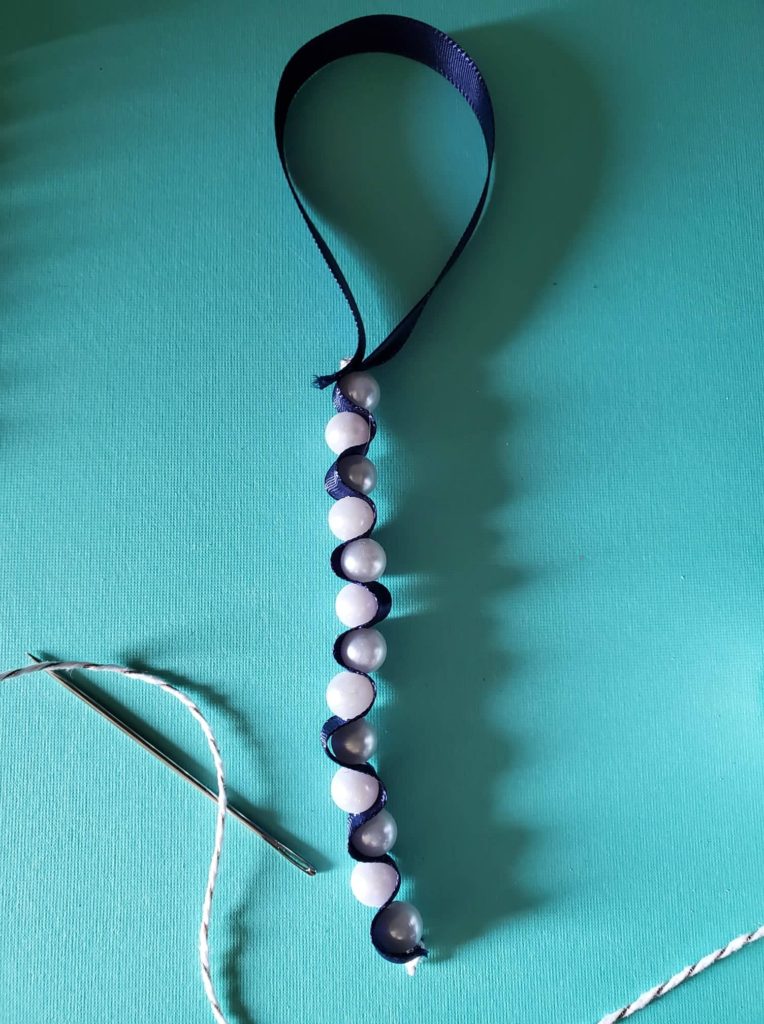
Step three: Beginning your ribbon and pearl Christmas ornaments
To begin, you’ll start by making the loop to hang your ornaments. Measure 7 inches from the end and fold that seven inch strip in half to match the end of the ribbon up to the 7 inch mark. This will give you a loop that is 3 1/2 inches long, and 5 inches leftover to use for your ornament.
Take your threaded needle and run it through the end of your ribbon and 7 inch mark to join the two together. Pull your string through to secure it.

Attach a bead by running your needle through the hole and bringing it all the way down to meet your ribbon.
Find the point where your ribbon meets the top hole in the bead and sew your string through the ribbon to make the ribbon wrap partially around the bead.
Thread another bead on to the string and bring it snugly close to the ribbon. Sew your needle through the ribbon, right where the ribbon would meet the top hole in the bead and pull the string through the ribbon.

Add another bead and keep the pattern going until you have reached close to the end.

To finish, thread the needle through the ribbon one last time and tie a knot as close as you can to the end to secure it.
Cut off any excess string or ribbon,
Look at that beautiful ornament! Your tree is going to look dazzling with the ribbon and pearl Christmas ornaments you just made!
We are a participant in the Amazon Services LLC Associates Program, and affiliate advertising program designed to provide a means for us to earn fees by linking to Amazon.com and affiliated sites.