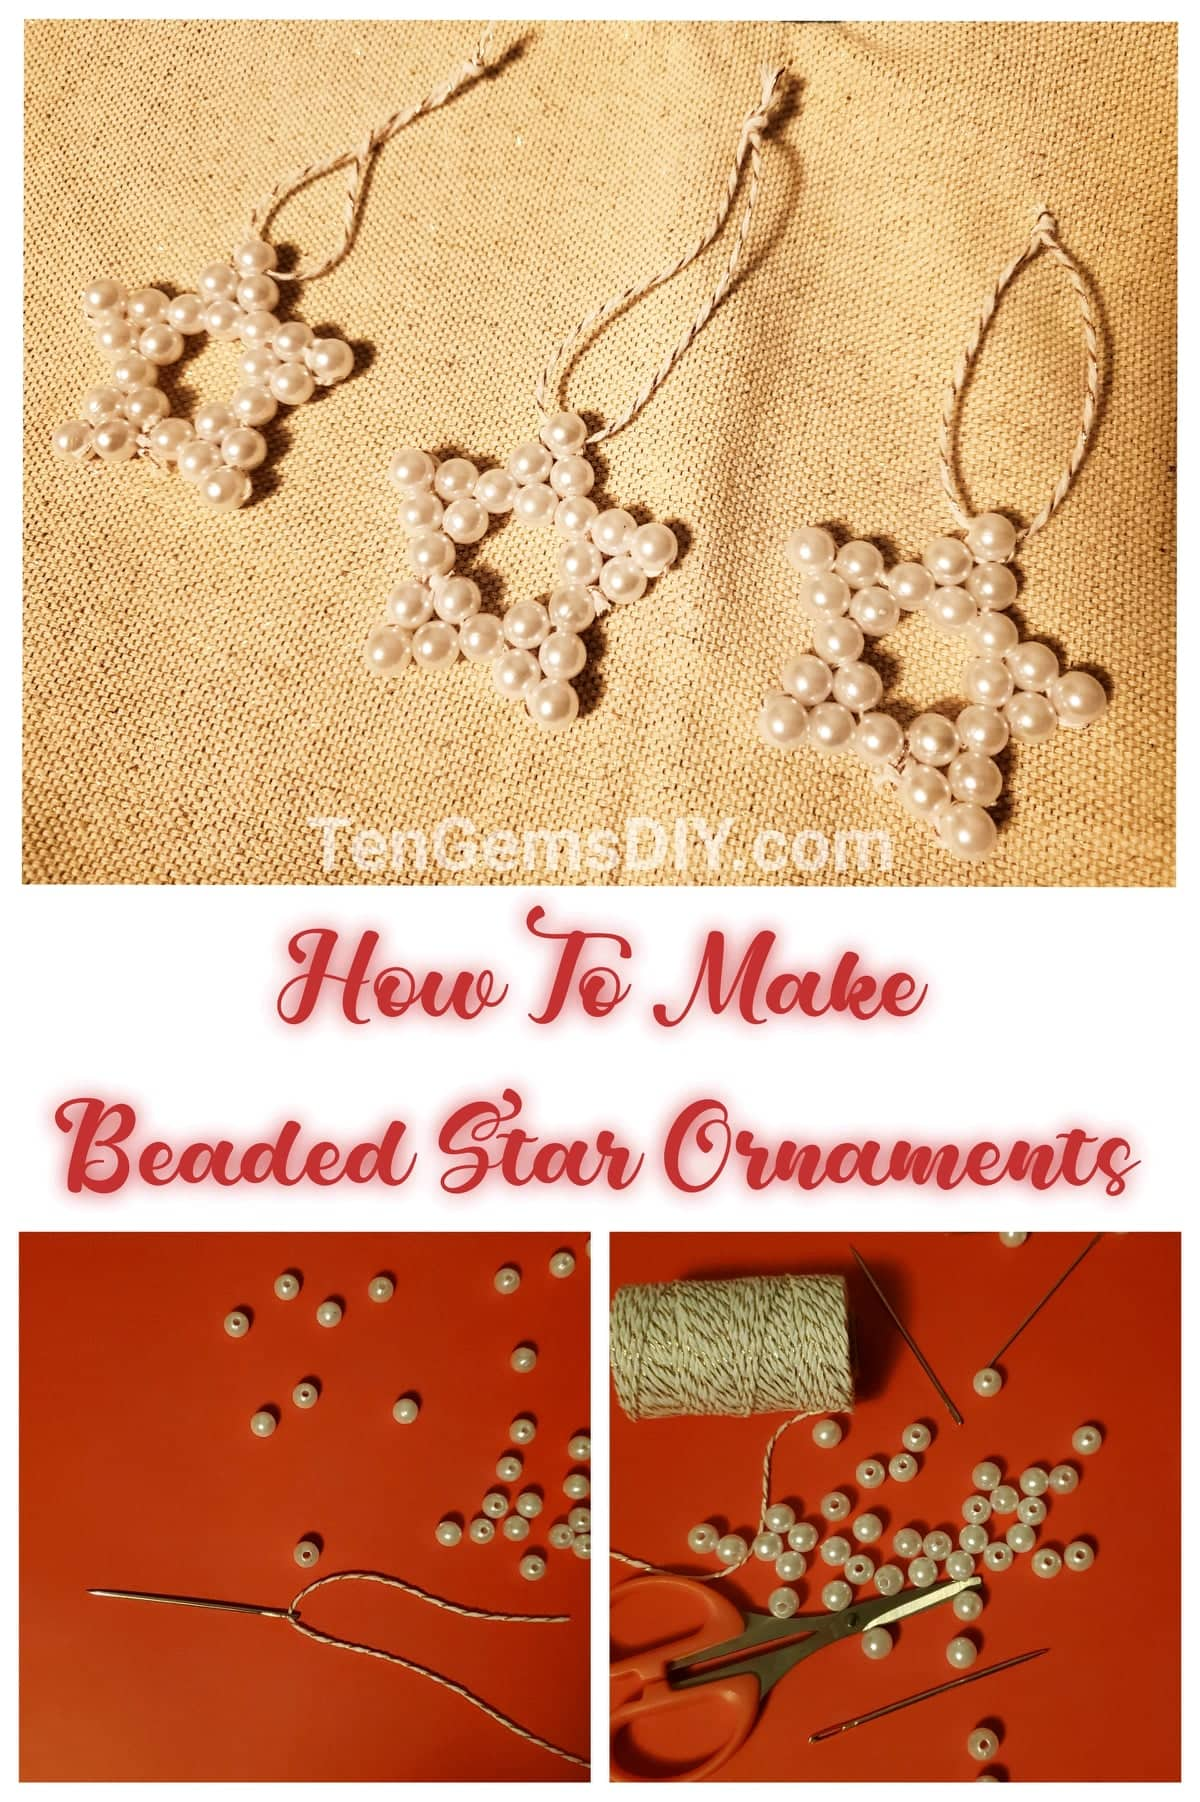
Learn how to make unique and cheerful DIY holiday decorations with this Beaded Star Ornaments Tutorial! Some of the most special ornaments are the ones that are handmade. Add them to your own Christmas Tree or give them as a gift to someone you care about this holiday season. Whatever you do, enjoy your time crafting and creating! When you are finished with your beautiful DIY star ornaments, teach someone you know how to make them too!
There are a ton of really great Christmas ornament tutorials here at TenGemsDIY.com. Check these step-by-step guides for other ideas this holiday season!
How To Make Easy DIY Paper Christmas Ornaments! >> https://tengemsdiy.com/how-to-make-easy-diy-paper-christmas-ornaments/
How To Make Easy 3D Paper Christmas Ornaments >> https://tengemsdiy.com/how-to-make-easy-3d-paper-christmas-ornaments/

TenGemsDIY is a DIY and craft blog. Some of our posts contain affiliate links for products we have tried and recommend. While clicking the links will not cost any money, we may receive a commission for items purchased, which helps keep our website up and running. Here is the privacy policy for more information: https://tengemsdiy.com/?page_id=3
Here is the supply list and where you can easily find everything for your DIY Beaded Star Ornaments:
- 1/4 inch pearl beads – https://amzn.to/3FRmzPB
- String – https://amzn.to/3C6vpHT
- Yarn needle – https://amzn.to/3p3SDZU
- Scissors – https://amzn.to/2Z3UdBL
- Ruler – https://amzn.to/3b04CBi

Step one: How much string will I need?
You’ll need to cut about 20 inches of string for one ornament. This is the easy step!
Step Two: Threading the yarn needle
It’s important you have a thick string like the one linked above in the supply list, and a needle large enough to hold the thick string. Metal yarn needles work very well for this project and a multitude of other projects. Thread your 20 inch string through the eye of the needle.

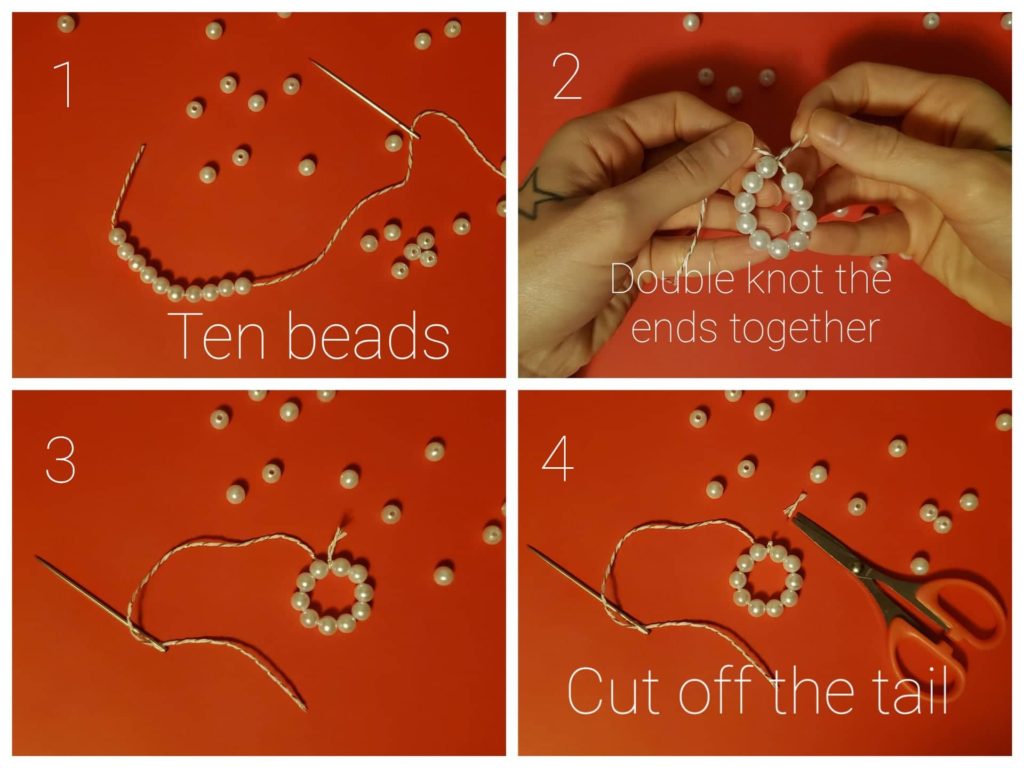
Step three: Start beading!
- Add ten beads to your string
- Double knot the ends together
- Snip off the extra tail with your scissors
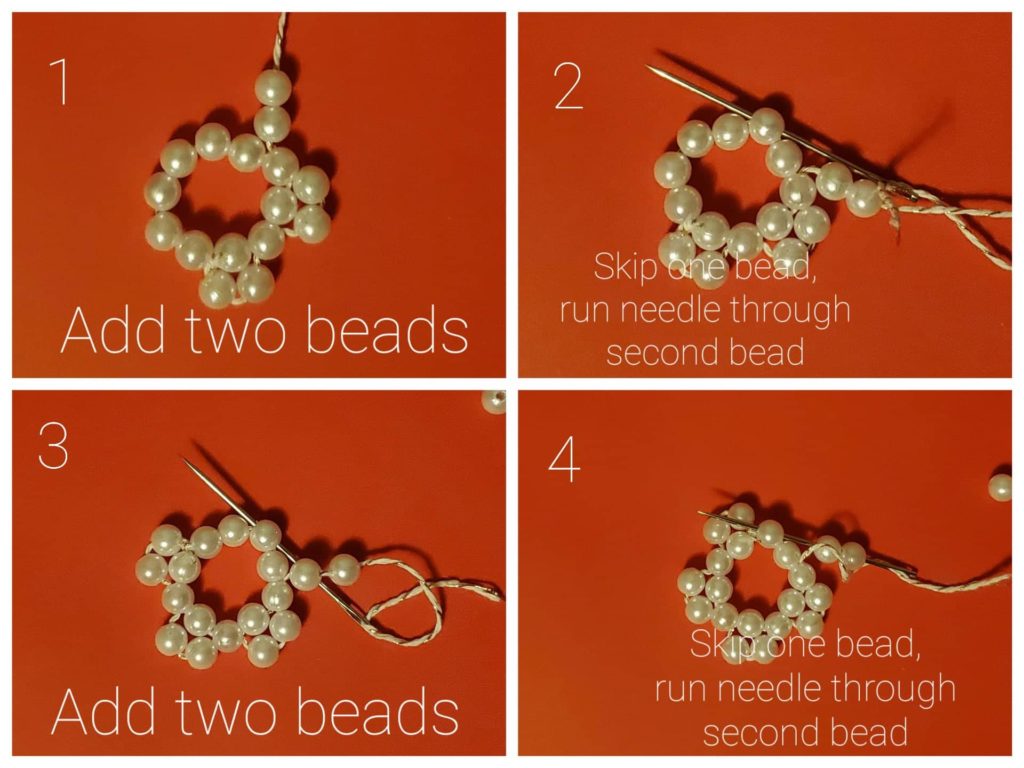
Step four: The second row of the DIY Beaded Star Ornaments
- Add two beads to your string
- Skip over one bead, and thread your needle through the next bead, pull string snug
- Add two beads
- Skip over one bead, and thread your needle through the next bead, pull string snug
- Do this five times until you have made it all the way around

Step five: Making the points of your DIY Beaded Star Ornaments!
- Thread your needle up through the first of the two beads, as shown in the picture
- Add one bead
- Thread needle down through the next two beads, as shown in the picture
- Thread needle up through next bead
- Add one bead
- Thread needle down through next two beads
- Thread needle up through next bead
- Add one bead
- Then thread needle down through next two beads
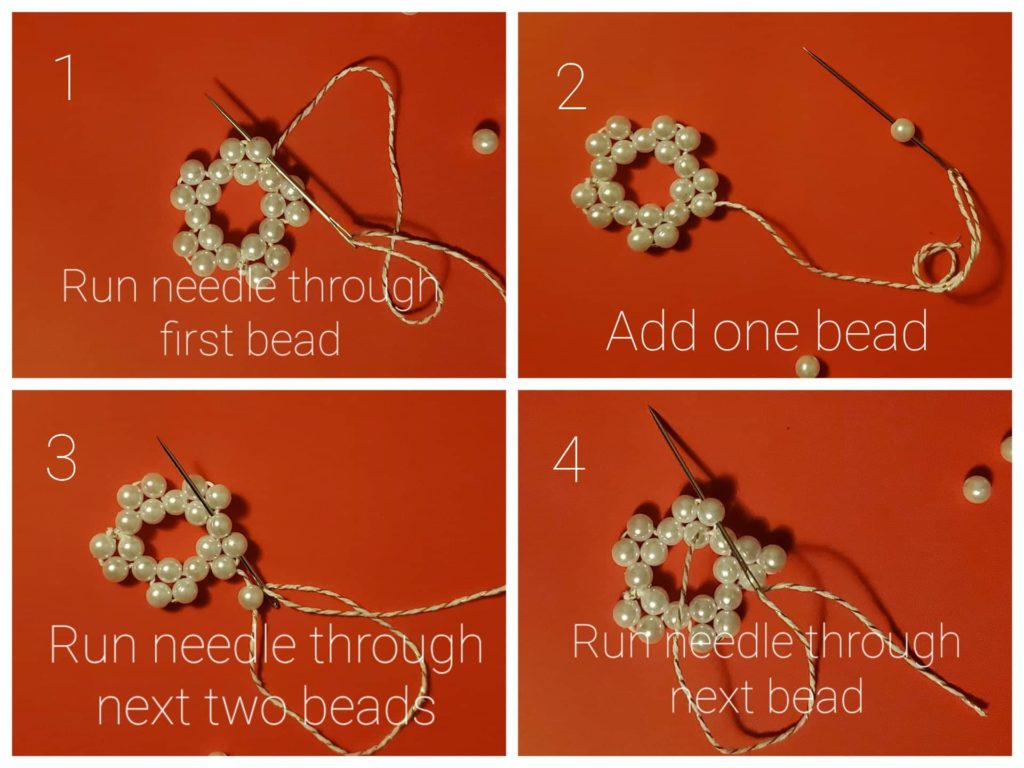
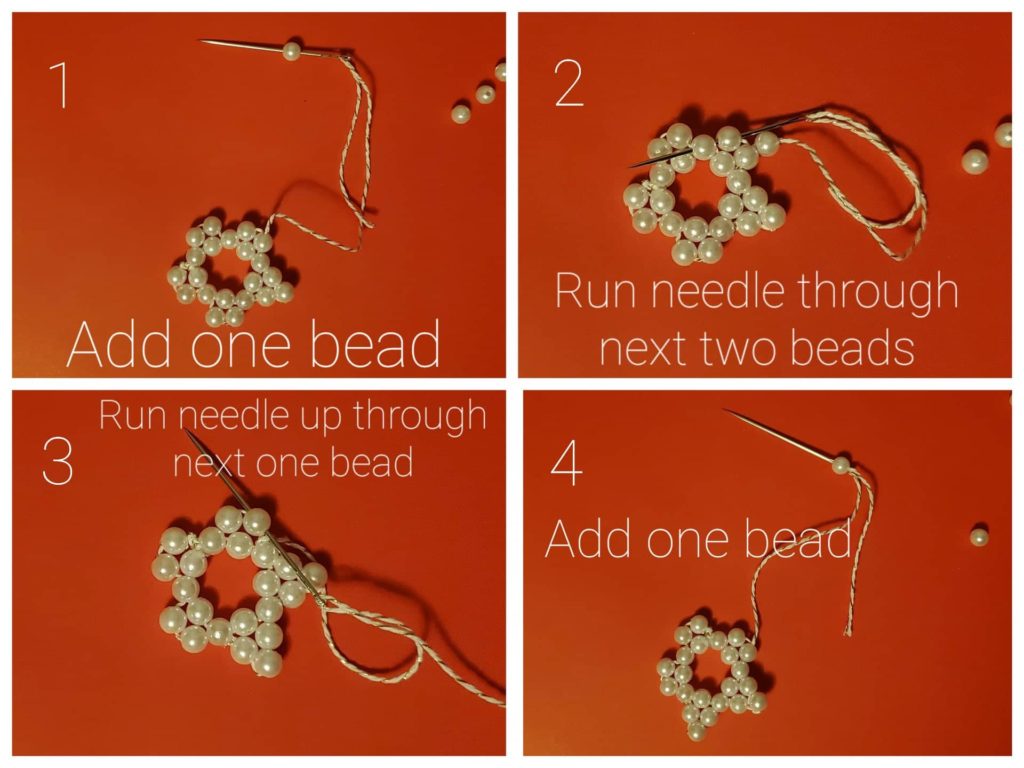

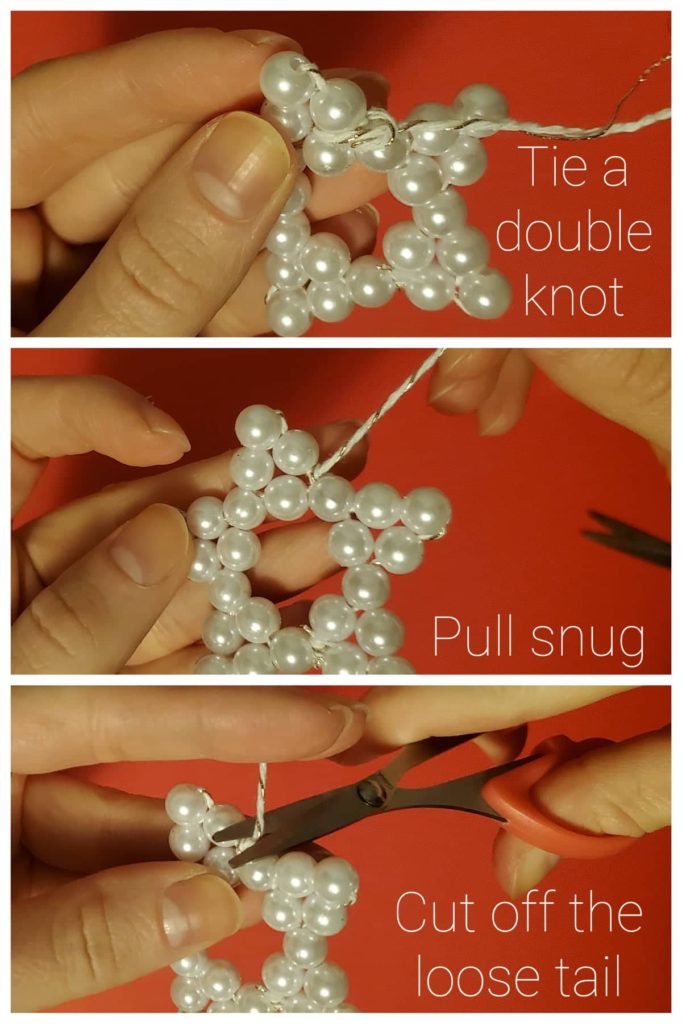
Do this five times to create five points for your star. When you are finished, Double knot your string around itself to secure it, and cut short.
Step six: Creating the loop
With your extra string, thread through one of the star’s top beads and double knot to form a loop to hang on the Beaded Star Ornaments.

How many are you going to make? Where are you going to put them? are you going to give any as gifts?? These are all the tough questions!
We are a participant in the Amazon Services LLC Associates Program, and affiliate advertising program designed to provide a means for us to earn fees by linking to Amazon.com and affiliated sites.