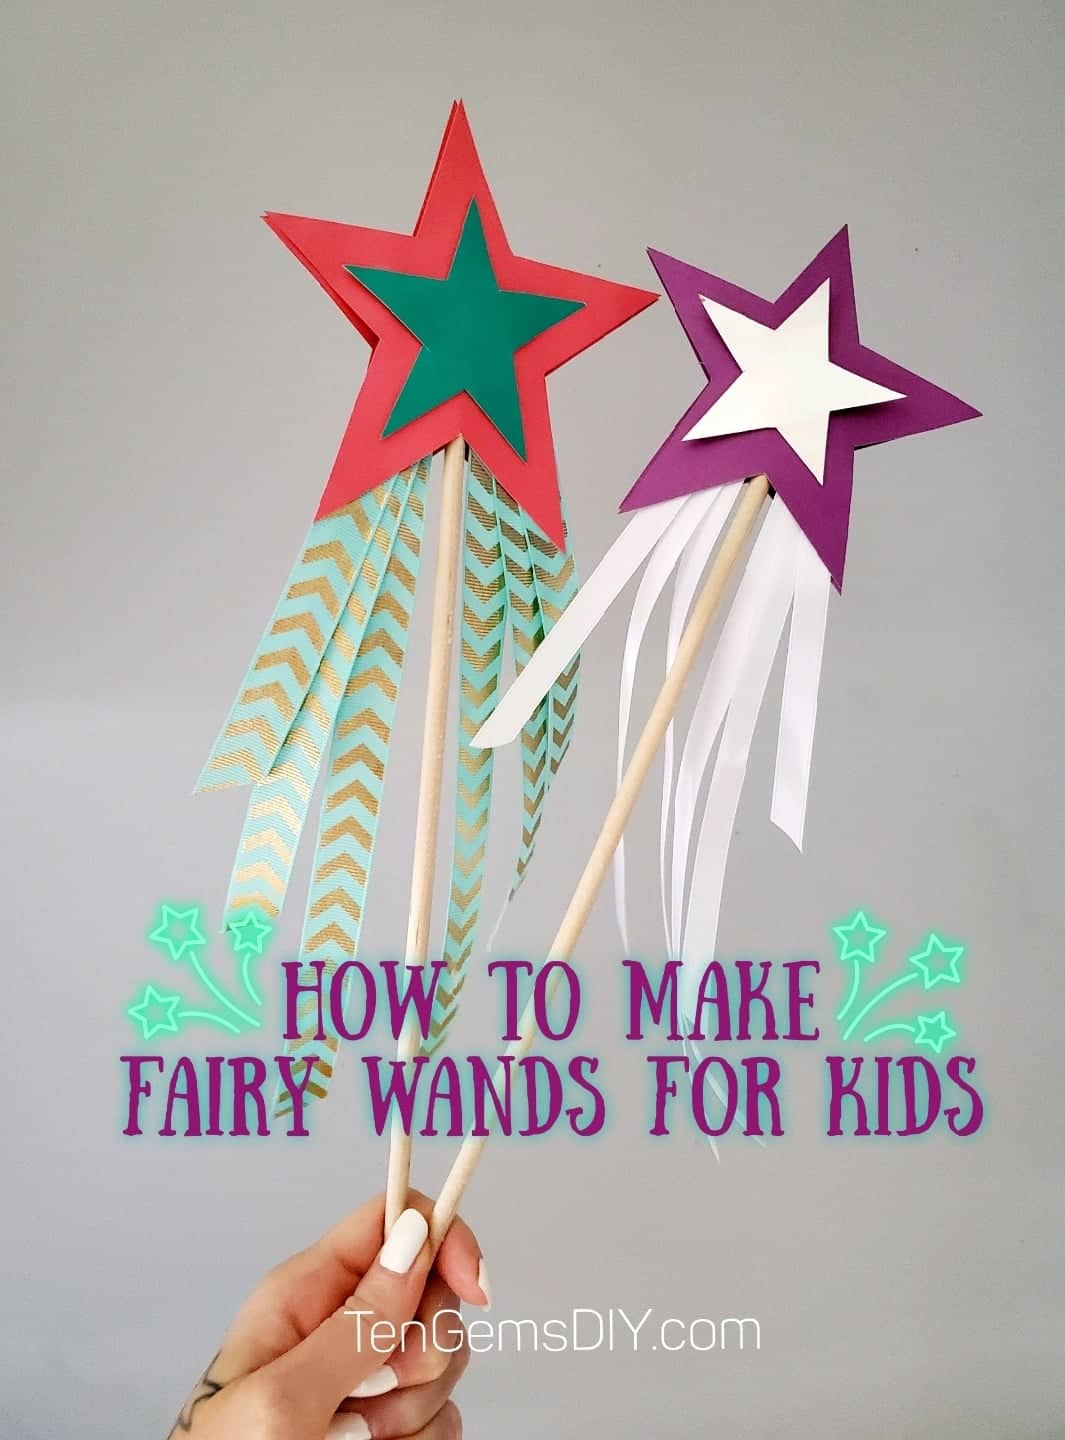
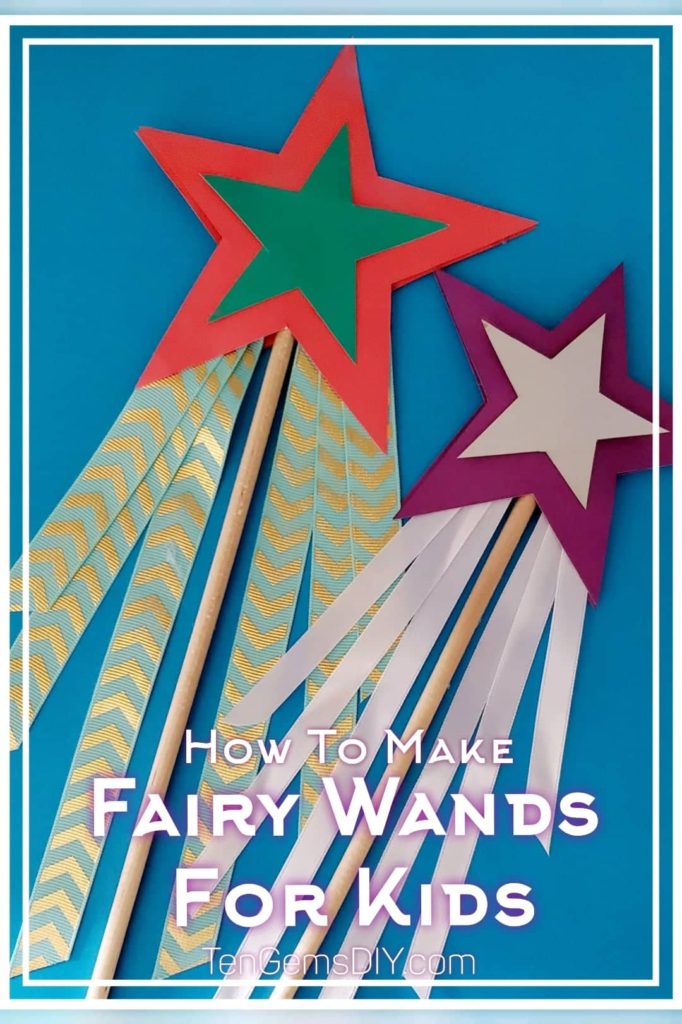
If you’re looking to learn how to make fairy wands for kids, this is the most magical tutorial! These fairy wands are a must have for every make-believe wardrobe. They can be created in your favorite color and they are adorned with beautiful and flowing ribbons! These wands take just a few steps and a few supplies. With a little help from a grown up, the wands will be ready to make magic in no time! After you’re finished with this tutorial, check out this other kid’s dress up must have! Fancy theater binoculars! https://tengemsdiy.com/?p=319
TenGemsDIY is a DIY and craft blog. Some of our posts contain affiliate links for products we have tried and recommend. While clicking the links will not cost any money, we may receive a commission for items purchased, which helps keep our website up and running. Here is the privacy policy for more information: https://tengemsdiy.com/?page_id=3
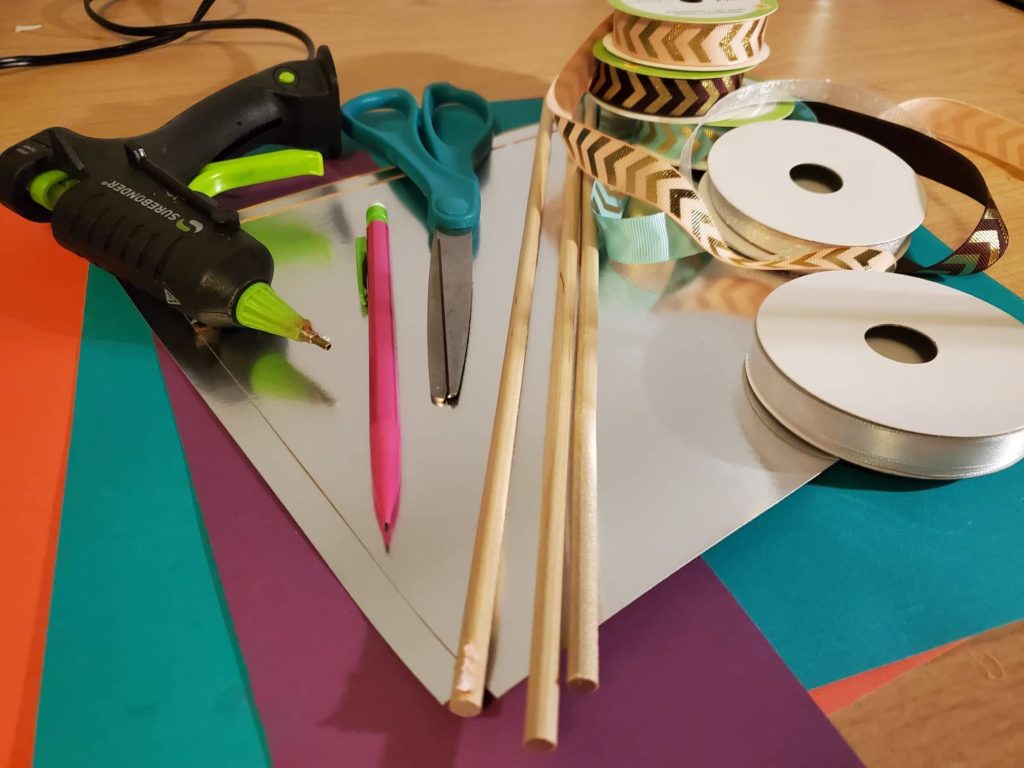
Supplies you’ll need for your fairy wands and where to find them:
- 12 inch dowel rods – https://amzn.to/2USF9F5
- Colored paper – https://amzn.to/3qyBojX – Cardstock will work best for this project
- Ribbon – https://amzn.to/2SAeqw3
- Scissors – https://amzn.to/364HFu2 – My grandma always used Fiskars scissors and I will be forever devoted to their quality products.
- Hot glue gun – https://amzn.to/3x85fCf – Not long ago I upgraded to my Surebonder mini glue gun and I must say am quite happy with it.
- Pencil
Step one: What amazing color are you going to choose?
Color always adds magic to any craft or project. This is where you’ll coose what color you want your star to be. Do you love purple? Is your favorite color yellow or blue? Choose your most favorite color. We’ll draw a star on the paper and cut it out. Then we’ll use the first star to trace a second and cut it out. Now we have two big beautiful stars for the fairy wands! My daughter has chosen purple for her star.
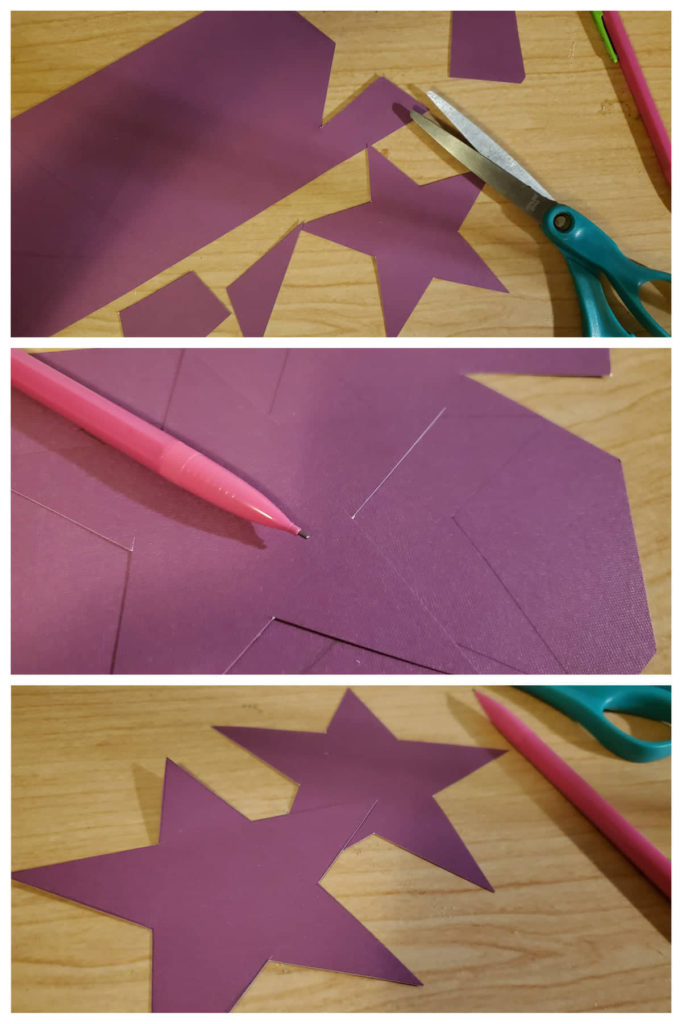
Step two: The second color!
If you had trouble choosing just one color before, there is good news! You can choose a second color for a second magical star! My daughter and I chose a shiny silver paper for our smaller accent star, but any color will look great! Use your pencil to draw a smaller star. It must be small enough to fit inside the big star. Trace a second small star and cut them both out.
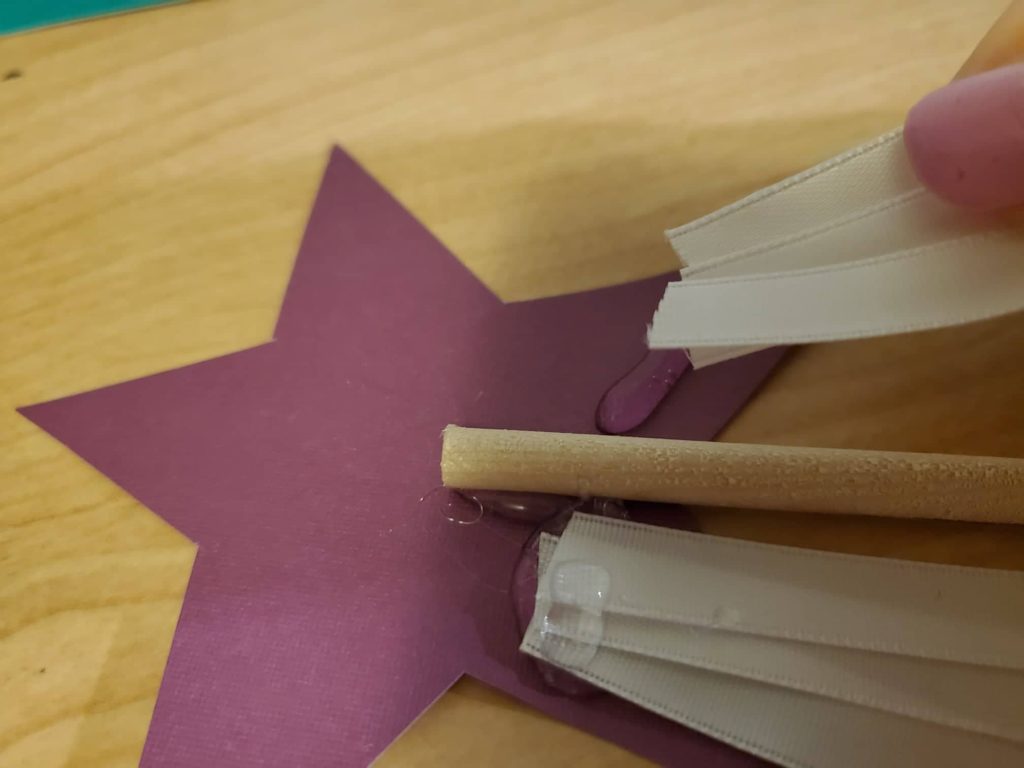
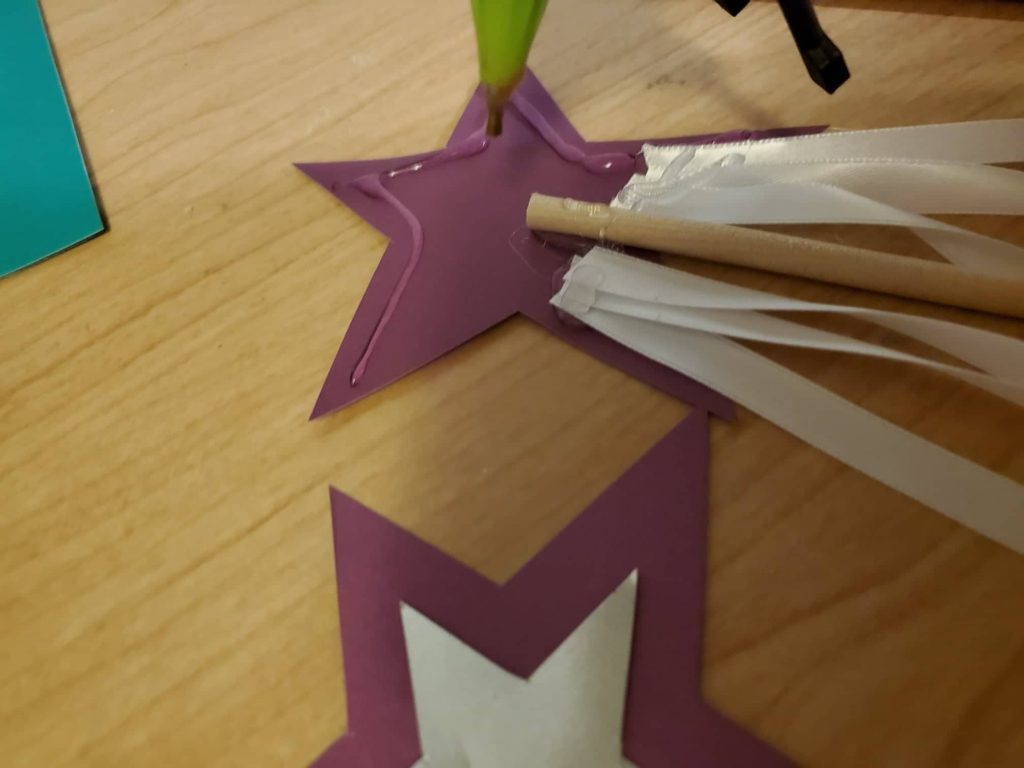
Step three: Grown up help
Step three requires the use of the hot glue gun and should be done by a trusted adult. Lay your two larger stars down and glue the smaller stars onto the big stars. Flip one of the stars face-down and glue your dowel rod to the star. They’re looking fabulous!

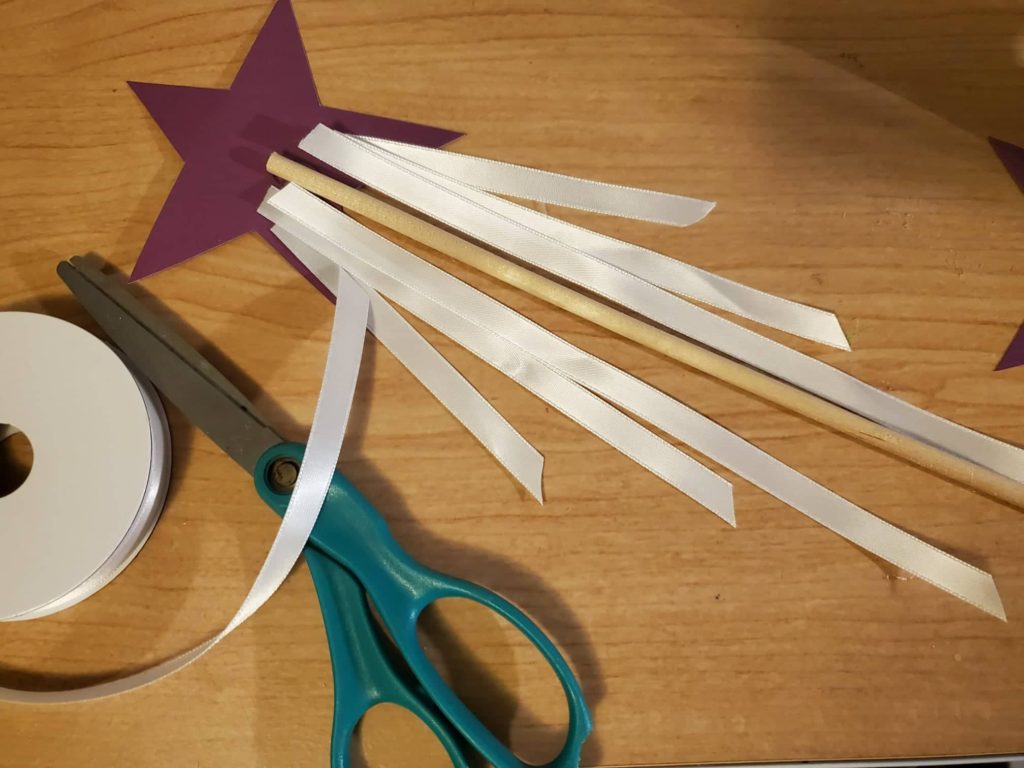
Step four: Getting the ribbon ready!
The ribbon might be the best part. We love ribbon <3 With your wand still face-down, cut your ribbon as long or as short as you’d like. Your can add more color here by choosing brightly colored fairy ribbons.
After you’ve cut them to the desired length, get that handy glue gun back out and carefully glue the ribbons down. It can be easy to burn yourself even if you think you’re being plenty careful.
Step five: Finishing your fairy wands for kids
This is the last step! Lay down plenty of glue around the edges of your star and place your second star on top to sandwich the dowel rod. You now have a completed fairy wand and it’s beautiful!

We are a participant in the Amazon Services LLC Associates Program, and affiliate advertising program designed to provide a means for us to earn fees by linking to Amazon.com and affiliated sites.