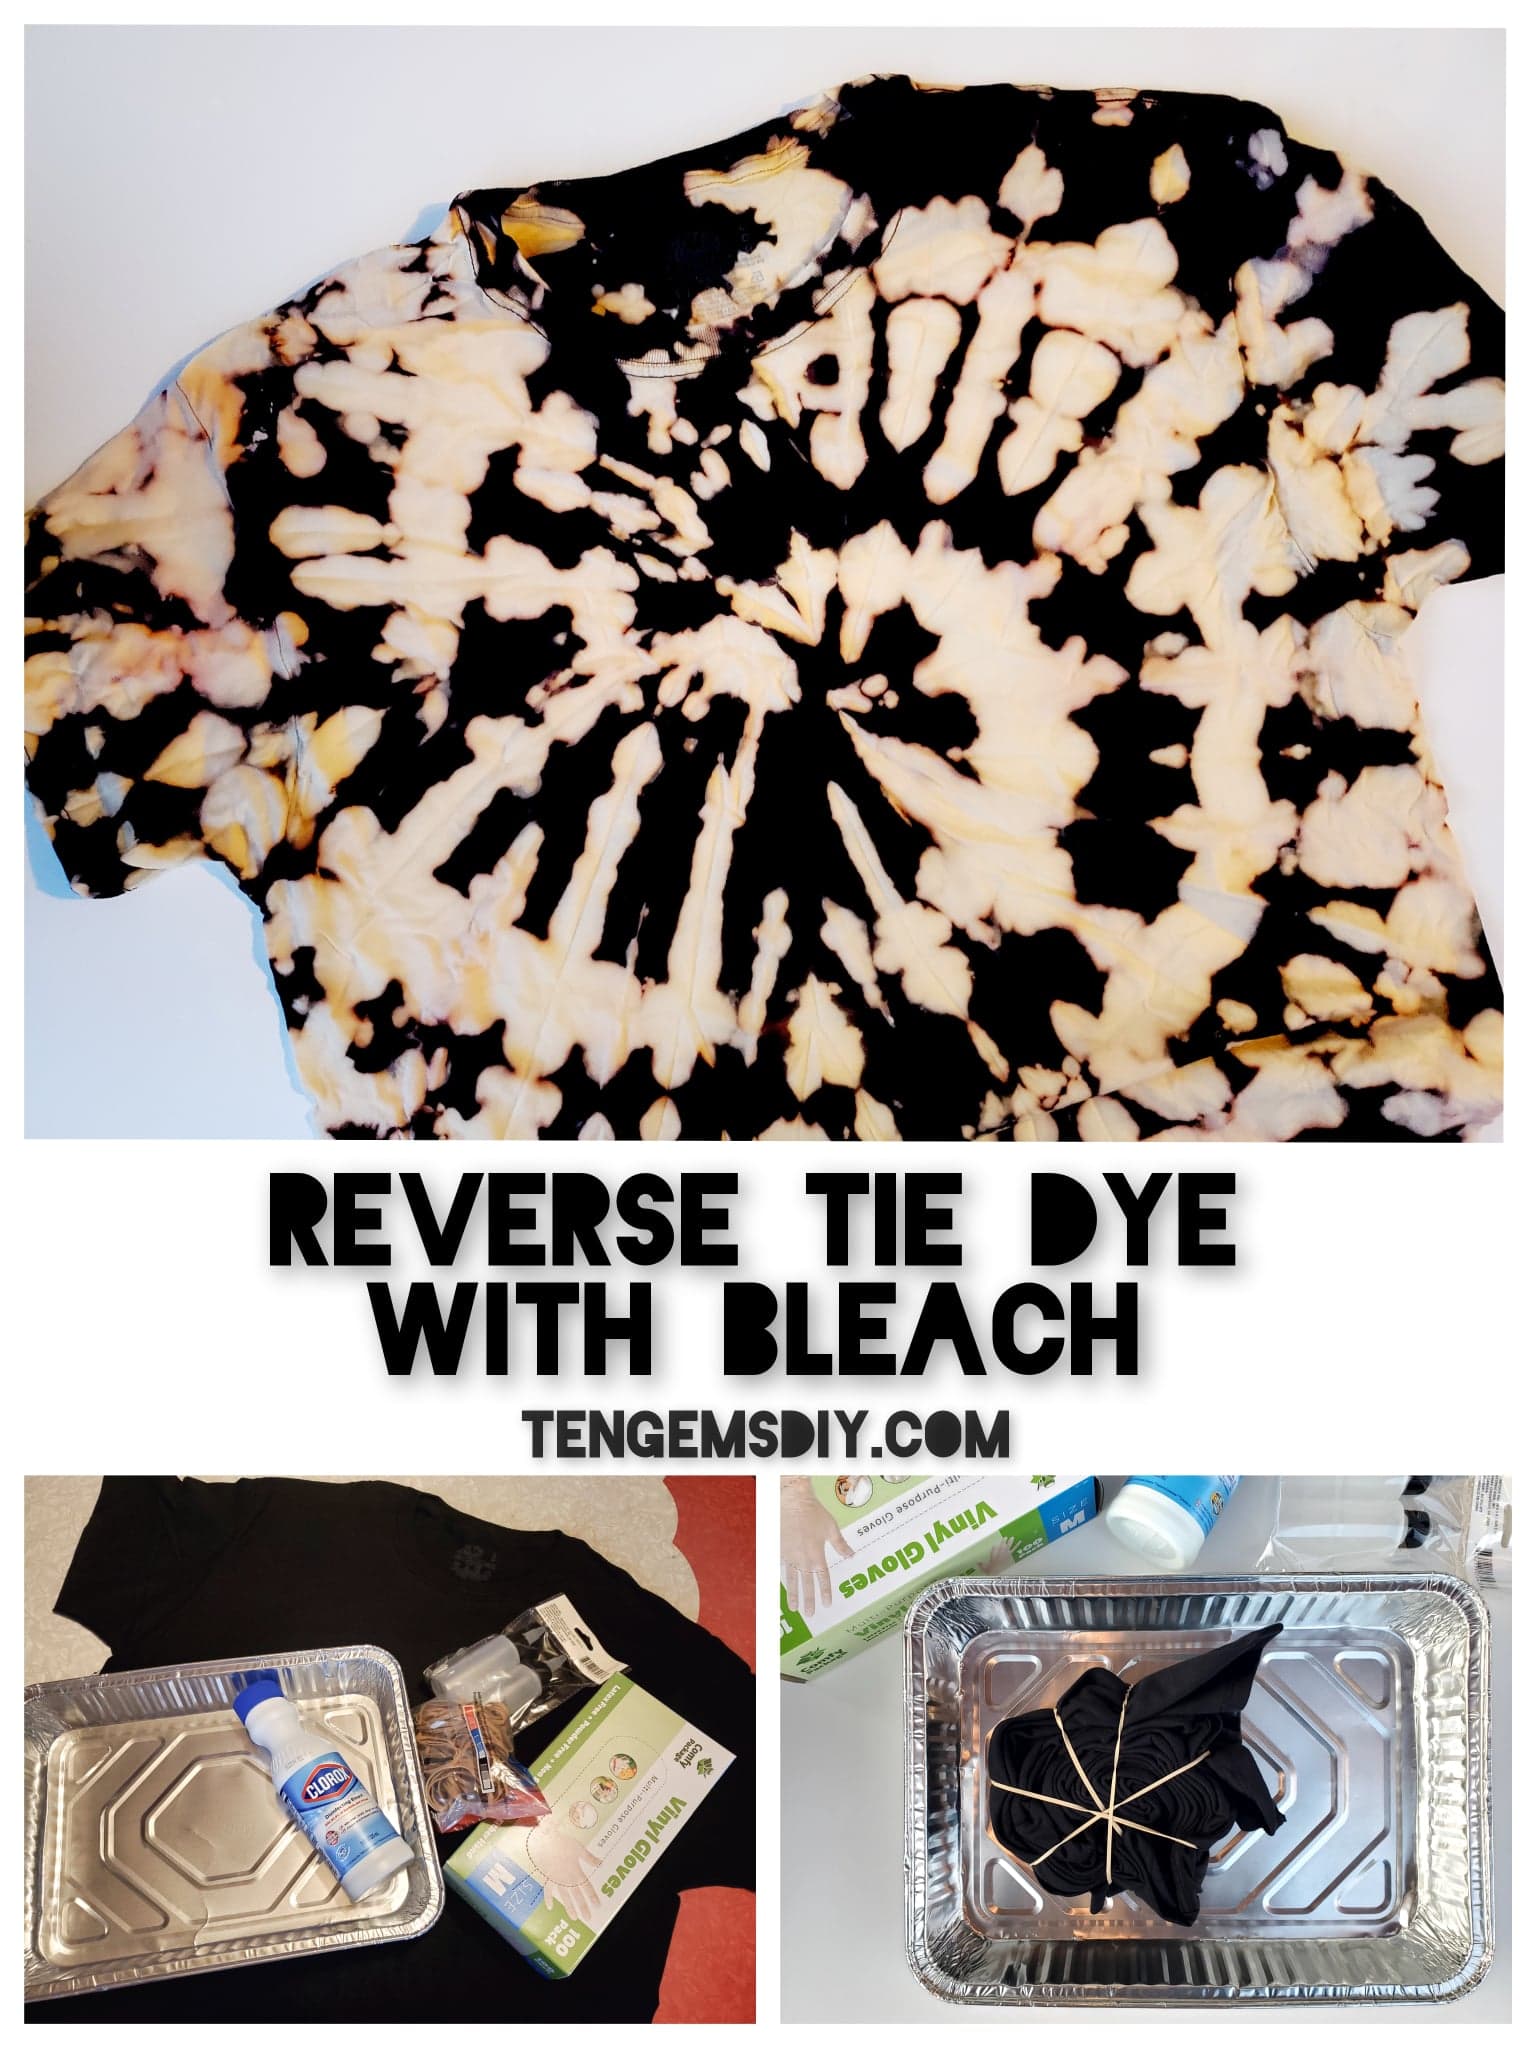
One of the most interesting forms of tie die has to be Reverse Tie Dye With Bleach! It’s easy to say why tie dye will always be trending; because it’s so stinkin’ cool! Each tie dye piece is unique. Not one comes out like another. Throw a whole tie dye party, or do a couple on your own at home on a quiet night for some crafty self care. I have like, six different tie dyed shirts in the drawer in my room and I don’t even feel bad about it. This DIY takes minimal supplies and it gets an A+ when it comes to how easy it is. Check out the supply list below for everything I used.
TenGemsDIY is a DIY and craft blog. Some of our posts contain affiliate links for products we have tried and recommend. While clicking the links will not cost any money, we may receive a commission for items purchased, which helps keep our website up and running. Here is the privacy policy for more information: https://tengemsdiy.com/?page_id=3
If you’re looking for some other fun and easy DIYs, look on over at these when you’re done with your reverse tie dye with bleach!
How to make rainbow pony bead keychains – https://tengemsdiy.com/how-to-make-rainbow-pony-bead-keychains/
How to make DIY glitter and canvas wall art – https://tengemsdiy.com/how-to-make-diy-canvas-and-glitter-wall-art/
Supplies you’ll need for your Reverse Tie Dye With Bleach and where to easily find them:
- Black shirts – I used Fruit of the Loom, love it. Pick your size from the link – https://amzn.to/3l5QStP
- Squirt bottles – https://amzn.to/3MaqjiS
- Aluminum pan – https://amzn.to/3PfNAlD
- Gloves – https://amzn.to/3LbsKjN
- Rubber bands – https://amzn.to/3yyeU8J
- Bleach – household bleach such as Clorox works just fine – https://amzn.to/3LcAZfF
Step one: Getting the shirt ready
I want to say here the shirts used in this tutorial are cotton shirts. So here we are going to get the shirt wound in to a spiral. To do this, lay the shirt on a flat surface such as a table. Pinch the shirt where you want the center of your spiral to be. It’s always best to show it off, so I put my spiral right smack in the front of my shirt.

Twist your shirt all the way until you have it completely in a round spiral, like shown in the picture.
Step two: Adding the rubber bands
The rubber bands help to secure the shirt and keep it from unraveling. They also help to section off the spiral and create an even more appealing visual effect.
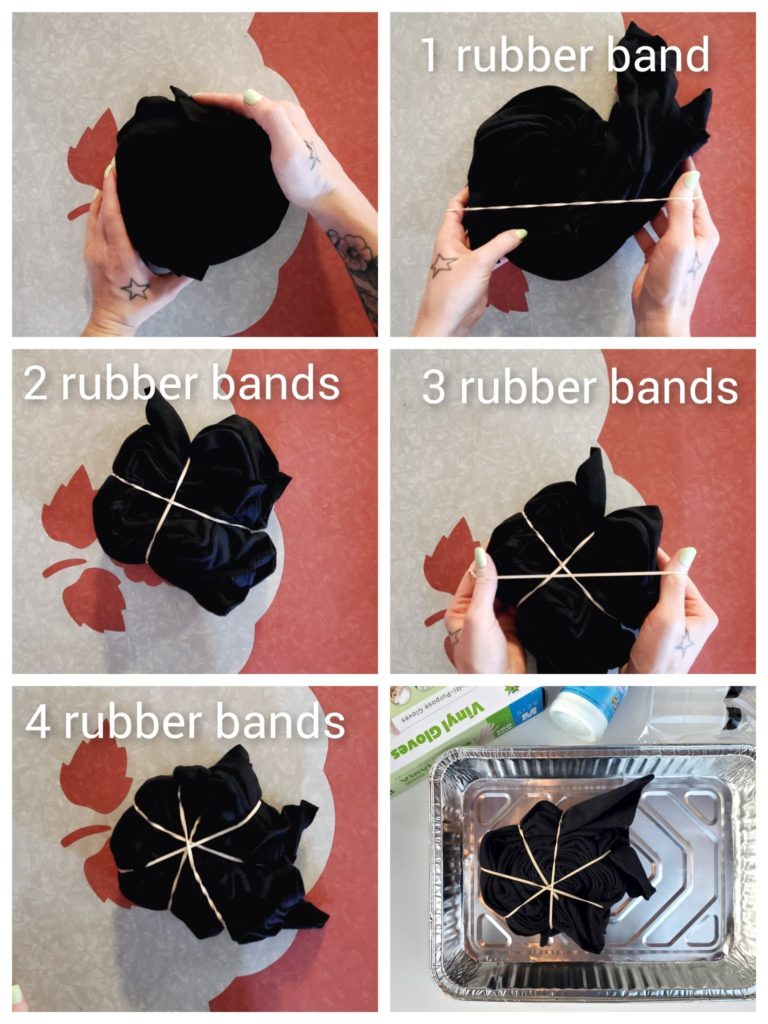
- Open one band with both hands big enough that you can secure it around the wrapped shirt.
- Add a second rubber band going to opposite direction, to make an X across the shirt.
- Add a third rubber band and a fourth rubber band like shown in the picture here.
You should have eight sections between the rubber bands. It is okay if they are not perfect!
Step three: Set up your work space outside
Since you are working with bleach, and bleach puts off large amounts of fumes, it is absolutely best to do this part outside.
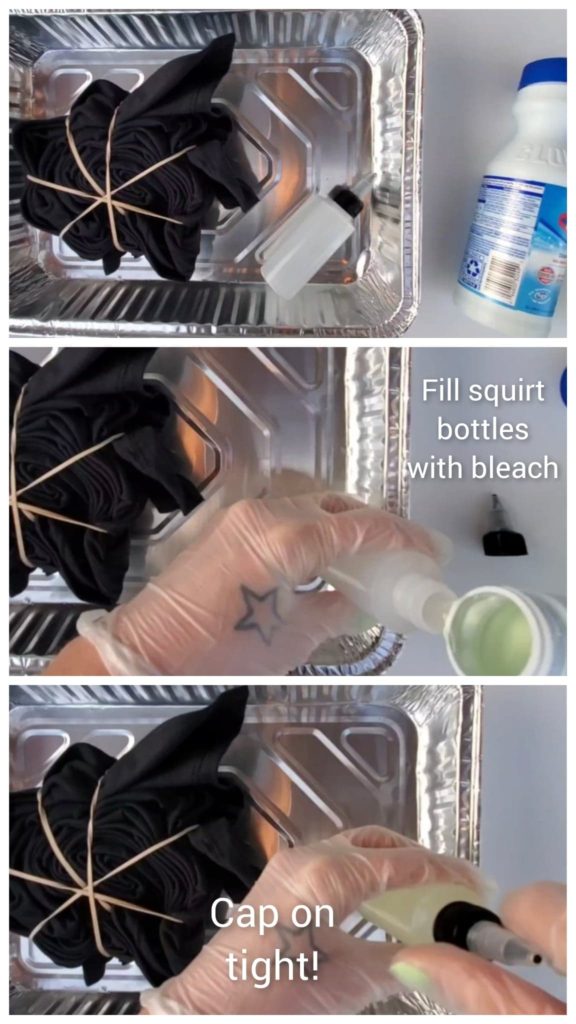
- Get your aluminum pan ready with your shirt inside the pan
- Put your gloves on
- Fill the squirt bottles with bleach
Step four: Creating your Reverse Tie Dye With Bleach!
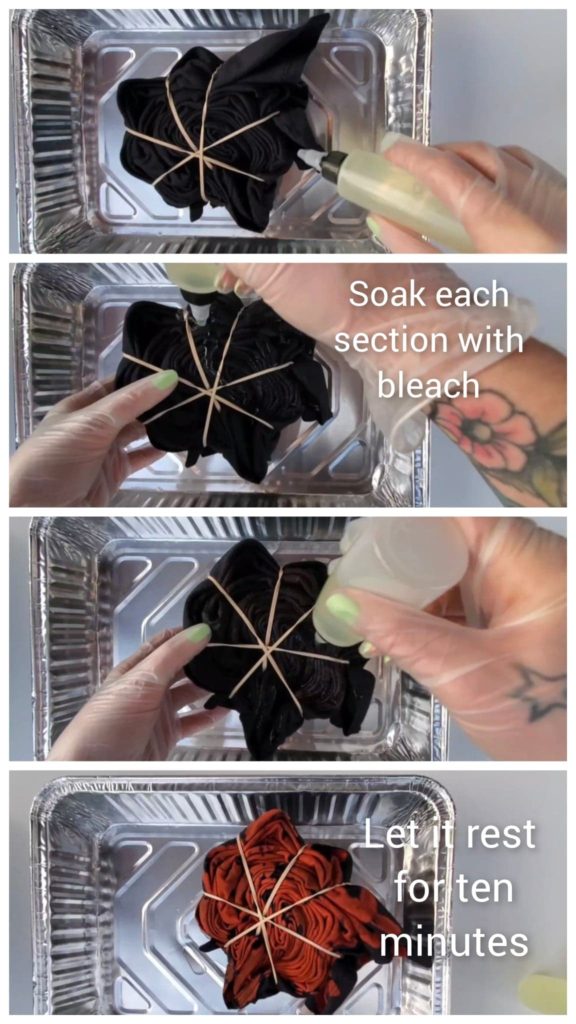
Start putting bleach from your squirt bottle in to the shirt. Do one section at a time and allow plenty of bleach to soak in to the shirt. You can go back around the sections a second time for a stronger bleached effect. Let the shirt rest for ten minutes or so. When you come back to check on it, it will be starting to fade!
Flip the shirt over and do the same thing on the other side. Plenty of bleach in each section; front and back. When you are finished, let the shirt rest again for a short while.
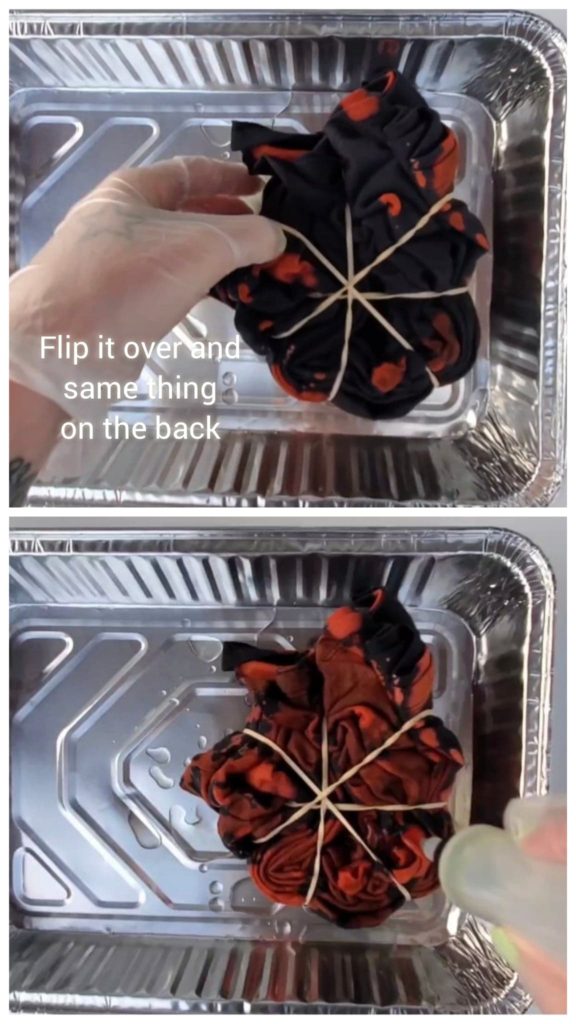
*You do need to gauge it a little bit. You don’t want your shirt to sit in a large puddle of bleach for a long time because it will start to eat away at the fabric.*
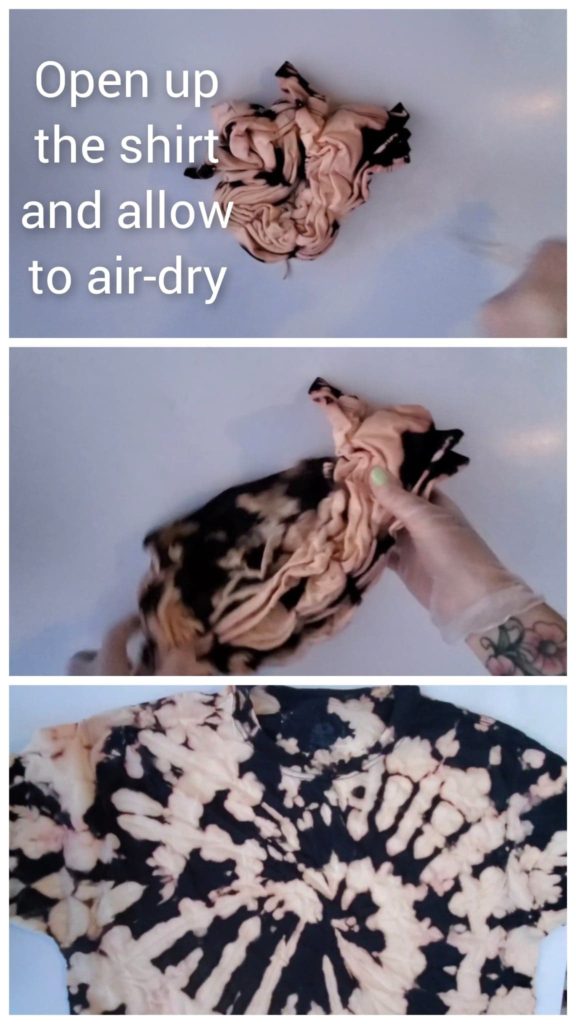
Step five: The big reveal!
After your reverse tie dye with bleach shirt has rested for a little while, take it out of the pan and cut the rubber bands off with a pair of scissors, or just take them off if it’s easier. Open up the shirt and look at how cool it is! The most fun part of this whole project is getting to see how it turned out, because you have no idea until you actually open it up! Let your shirt air dry for a while, preferably over night, outside. As an alternative, you can rinse the shirt out in the bathtub after it has rested for a bit and the bleach has set, before you throw it in the washer.
Your shirt is amazing and you should wear that baby so every one can see it!

We are a participant in the Amazon Services LLC Associates Program, and affiliate advertising program designed to provide a means for us to earn fees by linking to Amazon.com and affiliated sites.