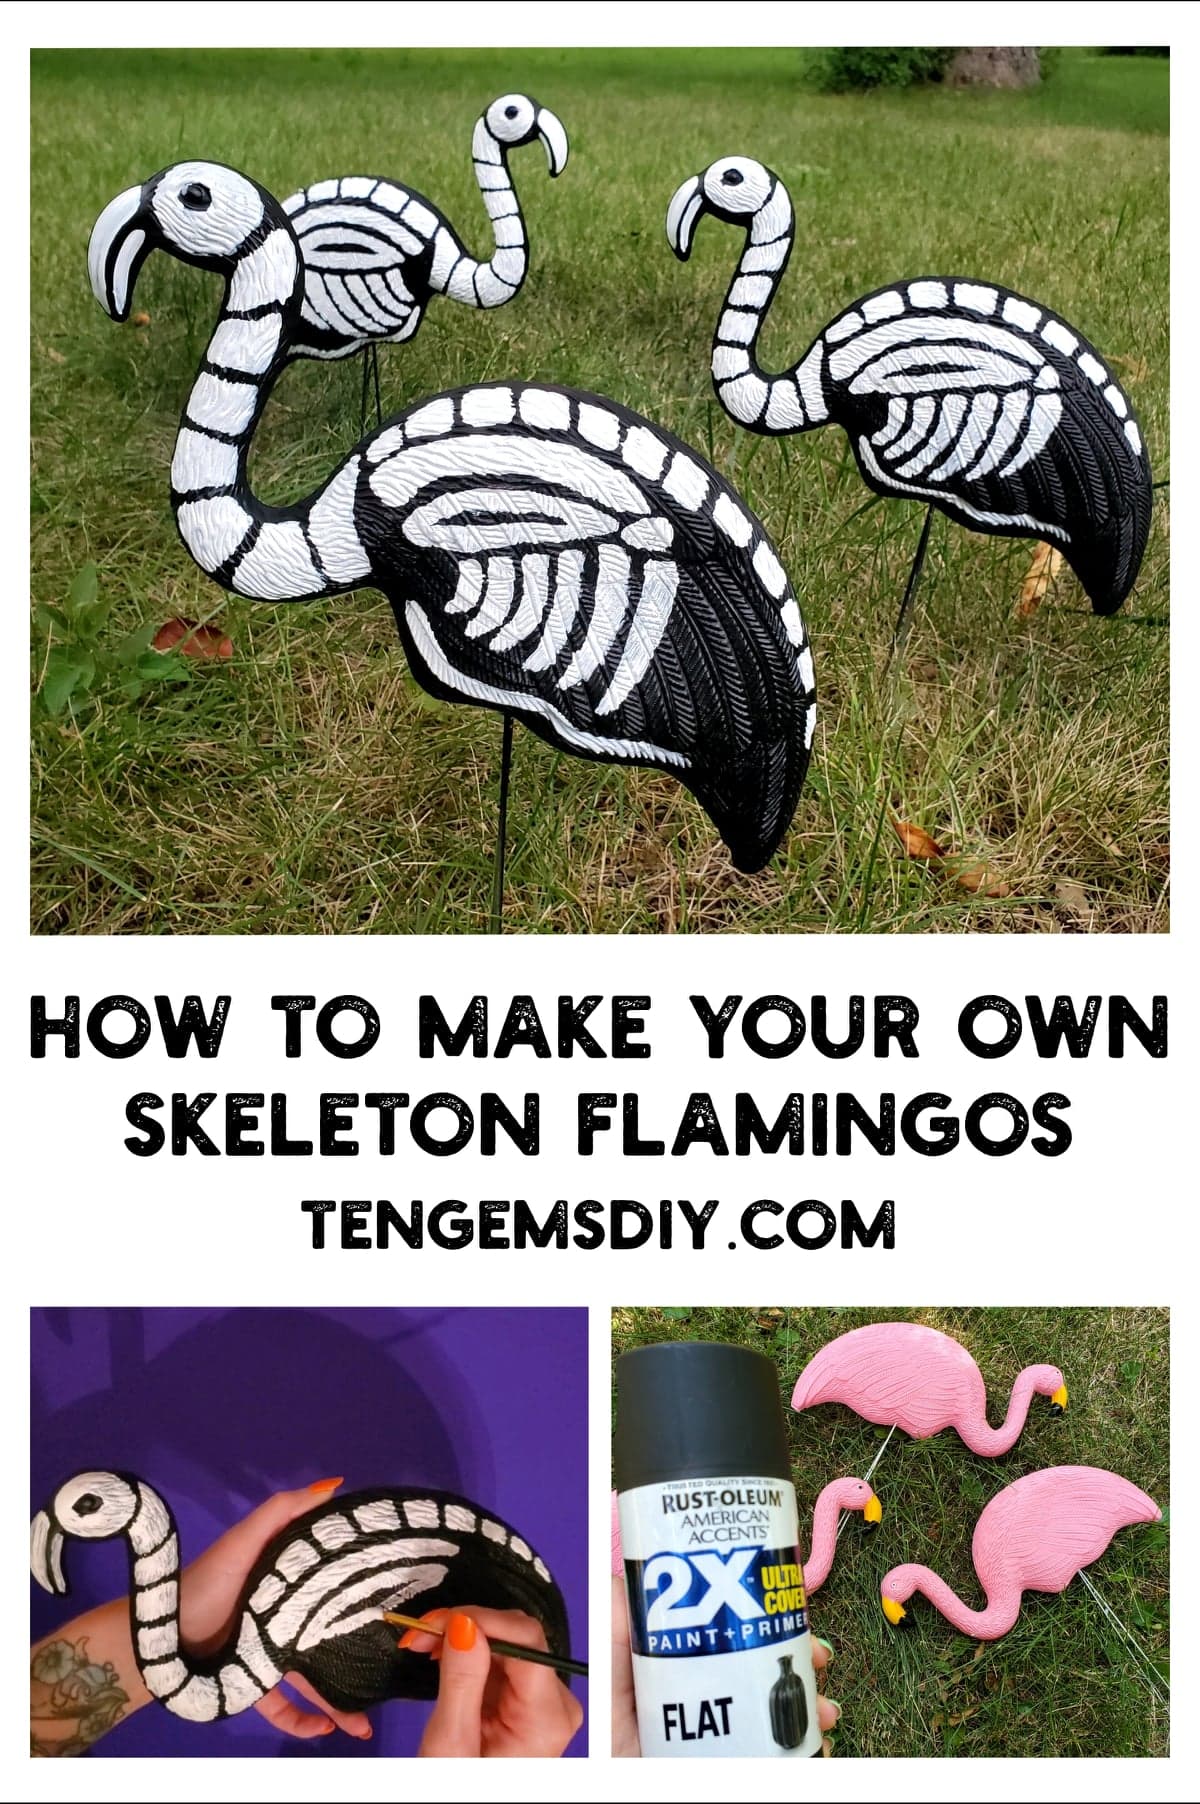
If you’ve started making this year’s DIY Halloween decorations, add this tutorial for How To Make Your Own Skeleton Flamingos to your list! The best Halloween decorations are a good mix of spooky, quirky and fun. These unique little flamingos will help make your yard fun and exciting this year! Check out the convenient supply list below to see all of the items used in this tutorial!
TenGemsDIY is a DIY and craft blog. Some of our posts contain affiliate links for products we have tried and recommend. While clicking the links will not cost any money, we may receive a commission for items purchased, which helps keep our website up and running. Here is the privacy policy for more information: https://tengemsdiy.com/?page_id=3
If you’re looking for other easy Halloween DIYs, take a peek at these!
- How to make pool noodle Halloween candles – https://tengemsdiy.com/how-to-make-pool-noodle-halloween-candles/
- How to make a black snake Halloween wreath – https://tengemsdiy.com/how-to-make-a-black-snake-halloween-wreath-diy/
- How to make foam bone letters – https://tengemsdiy.com/how-to-make-foam-bone-letters/
- How to make faux gilded insect taxidermy – https://tengemsdiy.com/how-to-make-faux-gilded-insect-taxidermy/
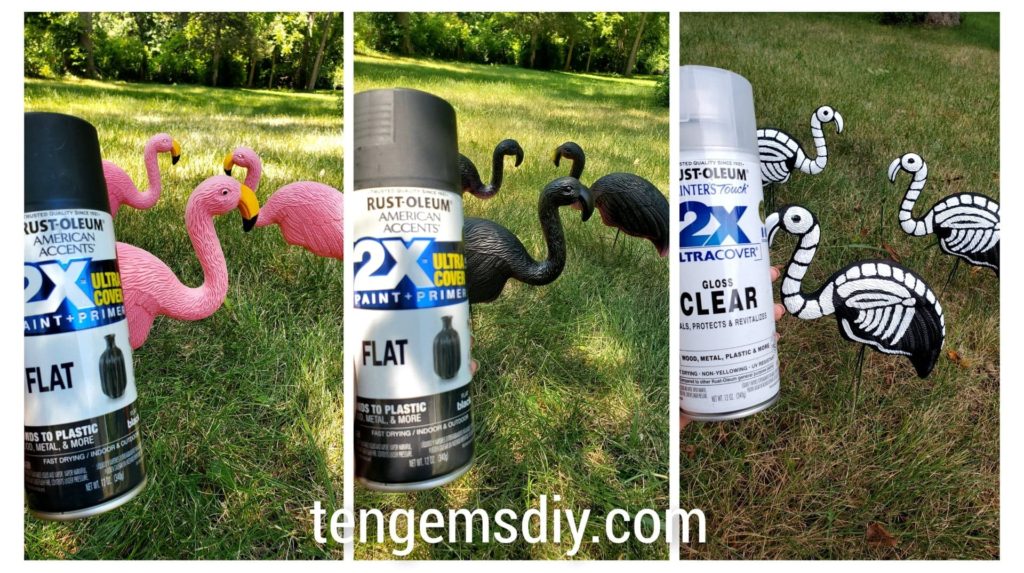
Here are the things you’ll need to make your own skeleton flamingos and where to easily find them:
- Plastic lawn flamingos – https://amzn.to/3vnKwLL
- Black spray paint – https://amzn.to/3oFTEra
- Clear coat spray paint – https://amzn.to/3OzOJCZ
- White acrylic paint – https://amzn.to/3bf6nht
- Paint brush – https://amzn.to/3cN7NjV
Step one: Set up your work space
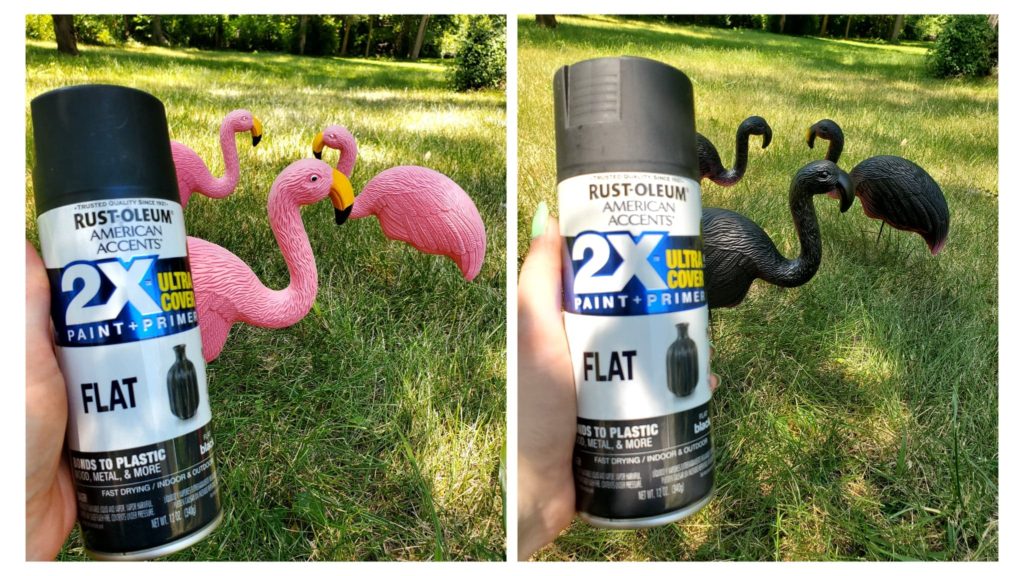
Make a space outside where you can spray your flamingos and give them their spooky black color. You can either poke them in the ground and paint them that way, or set down a barrier, like newspaper, in between your flamingos and your work area.
Give the flamingos an even first coat of black spray paint, and then give them a little while to dry. Come back to your flamingos and spray a second coat of black spray paint. Let them dry.
Step two: Creating the skeletons
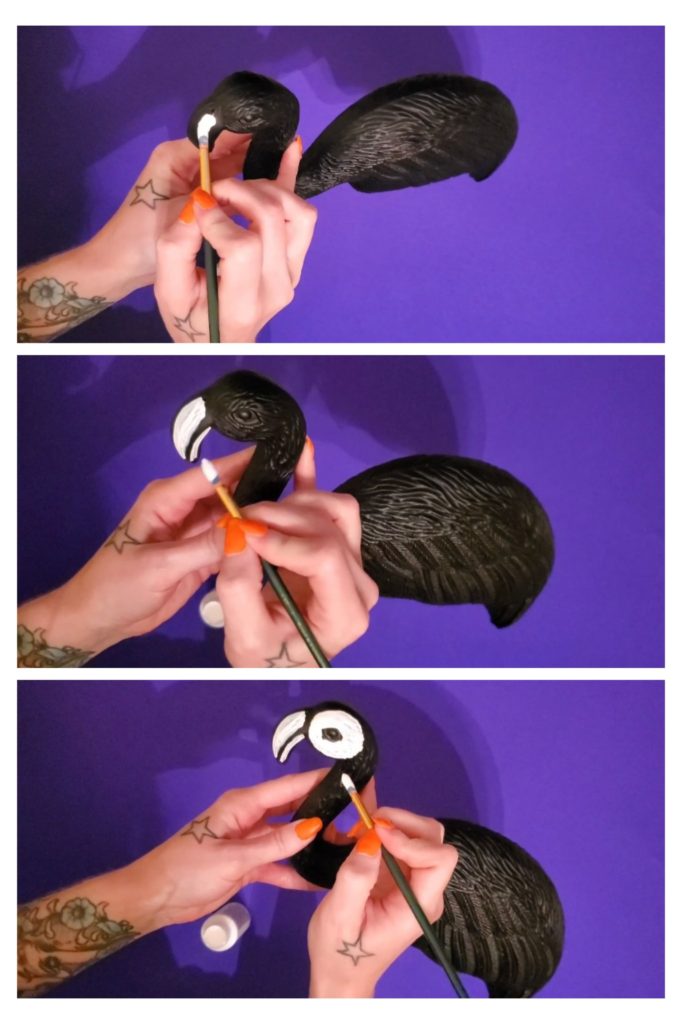
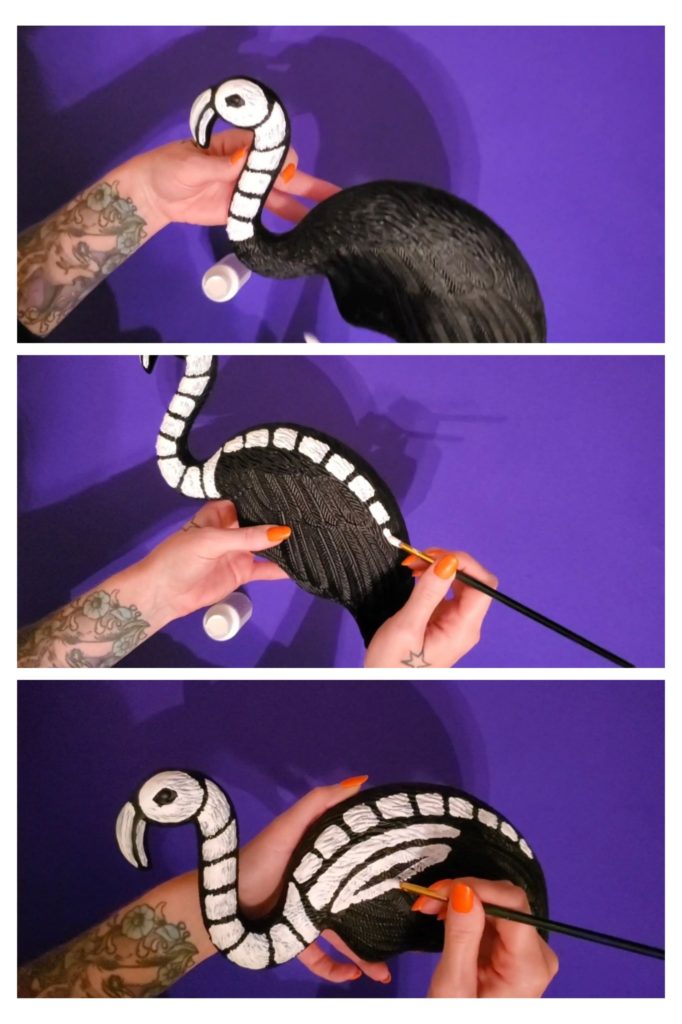
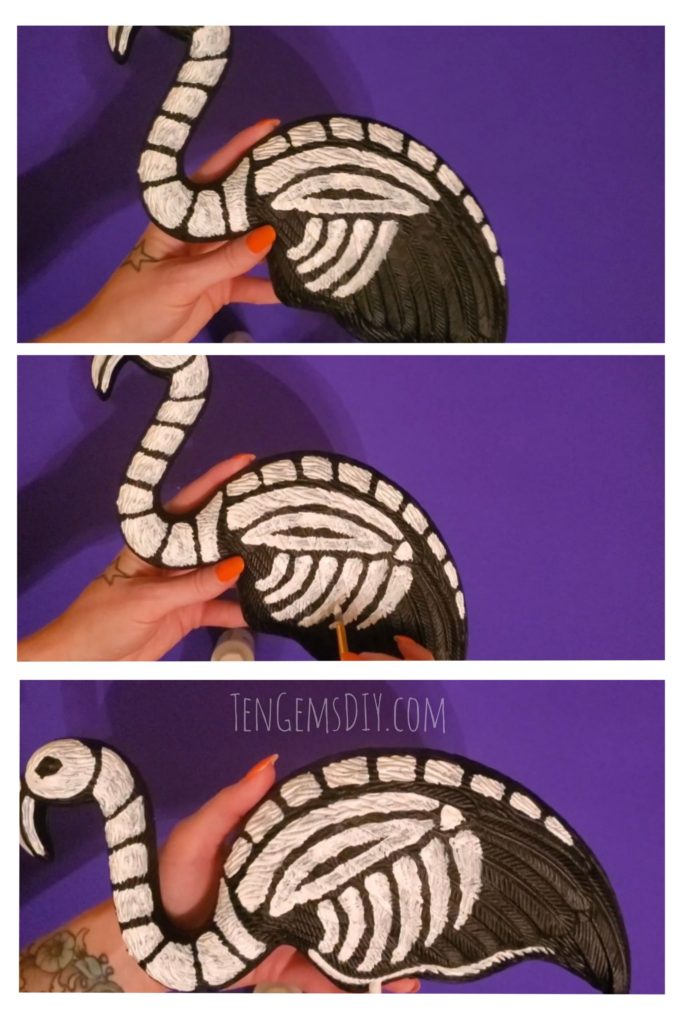
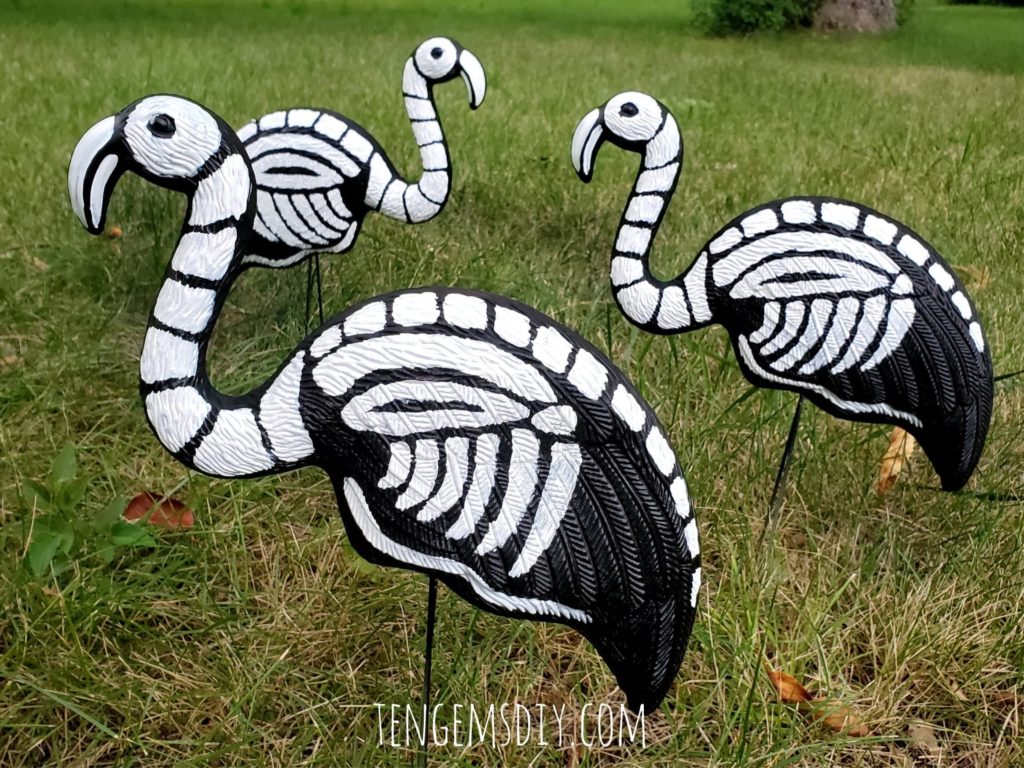
This is the most fun part! With your white acrylic paint, start painting your flamingo’s skeleton. It’s easiest to start at the beak and work your way back. You can see here how I’ve painted each piece of the spooky skeleton, little by little. I’m no expert on fowl skeletons, but these are lookin’ a little creepy and I love them.
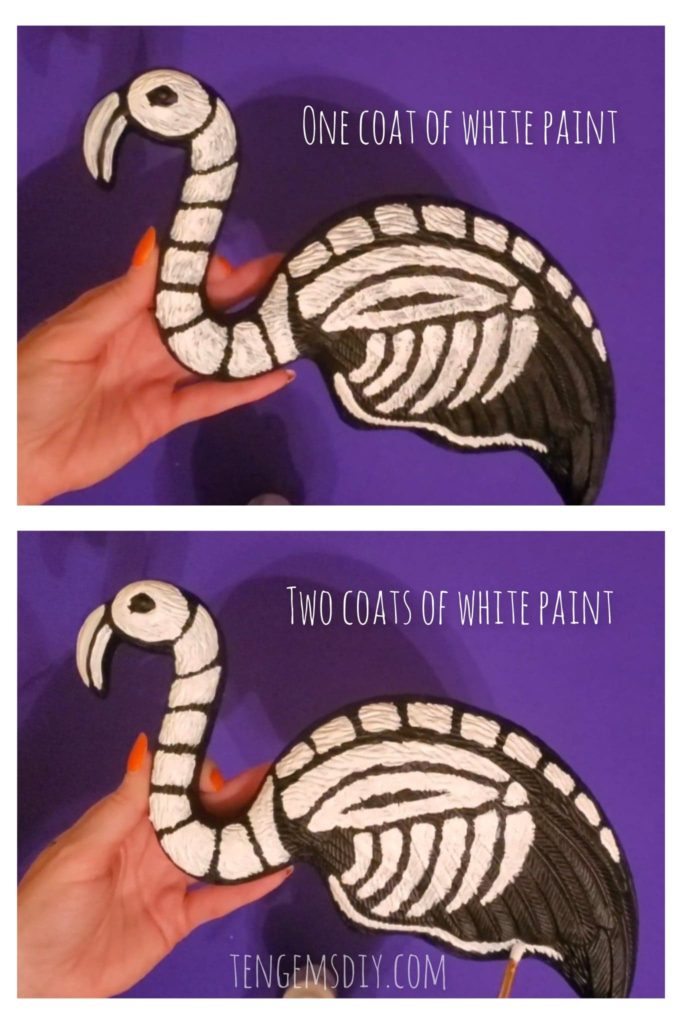
Add a second coat. You can see here how much of a difference an extra coat can make.
Step three: Clear coat those spooky little beauties!
After your skeleton flamingos have dried, it’s time to add the clear coat. This will help add a little bit of protection from the elements with the flamingos being outside. It will also help keep the acrylic paint vibrant and clean looking. Put your flamingos back outside, either standing up, or on a prepared work surface. Give the DIY skeleton flamingos an even coat of clear spray paint and allow it to dry before coming back to repeat this step for a second coat.
You’ve learned how to make your own skeleton flamingos!
I’m willing to bet your yard is going to be the most unique and spooky spot on the block this year! Happy Halloween!
If you have little artists at home, there are plenty of Halloween crafts for kids here:
- How to make pumpkin tissue paper crafts for kids – https://tengemsdiy.com/how-to-make-pumpkin-tissue-paper-crafts-for-kids/
- How to make yarn pumpkin crafts for kids – https://tengemsdiy.com/how-to-make-yarn-pumpkin-crafts-for-kids/
- Silhouette bat crafts for kids – https://tengemsdiy.com/how-to-make-silhouette-bat-crafts-for-kids/
- And how to make yarn spider web crafts for kids – https://tengemsdiy.com/how-to-make-yarn-spider-web-crafts-for-kids/
We are a participant in the Amazon Services LLC Associates Program, and affiliate advertising program designed to provide a means for us to earn fees by linking to Amazon.com and affiliated sites.
